
Basic Webpack interview questions
1. What is Webpack, in simple words?
2. Why do we need Webpack?
3. Can you explain the core concepts of Webpack: entry, output, loaders, and plugins?
4. What is an entry point in Webpack and how do you configure it?
5. Where does Webpack put the processed files? How is this configured?
6. What are loaders in Webpack? Give some examples.
7. What are plugins in Webpack? How do they differ from loaders?
8. How do you configure loaders in your `webpack.config.js` file?
9. How do you configure plugins in your `webpack.config.js` file?
10. What is the purpose of `webpack.config.js`?
11. Can you describe a basic Webpack configuration file?
12. What is the `mode` option in Webpack and what are its common values?
13. How does Webpack help with code splitting?
14. What are the benefits of code splitting?
15. What is a module bundler and how does Webpack fit into that category?
16. How do you use Webpack with different types of assets, like CSS or images?
17. What are some common Webpack plugins that you have used?
18. How can you optimize your Webpack build for production?
19. What are some ways to improve Webpack build performance?
20. Explain what Webpack Dev Server is.
21. How does Webpack Dev Server help during development?
22. How do you set up Webpack Dev Server?
Intermediate Webpack interview questions
1. How can you optimize Webpack's build speed for large projects?
2. Describe how code splitting works in Webpack and its benefits.
3. Explain the difference between various Webpack module bundler plugins and loaders.
4. How do you configure Webpack to handle different types of assets (e.g., images, fonts, CSS)?
5. What are Webpack's 'resolve' options and how do they affect module resolution?
6. How can you use Webpack to create different builds for development and production environments?
7. Describe how to use Webpack with TypeScript projects.
8. Explain how to set up Webpack with different module formats, such as ESM and CommonJS.
9. How can you implement lazy loading using Webpack?
10. What are Webpack's 'target' options and when would you use them?
11. How can you debug Webpack configurations and build issues?
12. Describe the process of creating a custom Webpack loader.
13. Explain how to use Webpack's Hot Module Replacement (HMR) feature.
14. How do you configure Webpack to work with CSS preprocessors like Sass or Less?
15. What is the purpose of Webpack's 'optimization' options and how do they impact the build?
16. Describe how to use Webpack to bundle multiple entry points.
17. Explain how to handle environment variables in Webpack configurations.
18. How can you configure Webpack to output multiple bundles?
19. Describe how you might analyze your webpack bundle to find out which modules are the largest?
20. Explain how you can improve your Webpack build times?
21. How can you manage different environments such as Staging and Production with Webpack?
22. How would you use Webpack in a monorepo?
23. How do you handle caching of assets in Webpack to improve performance?
24. Explain how to use Webpack's 'externals' configuration.
25. How would you configure webpack to handle static assets like images?
26. How do you integrate Webpack with a backend framework like Express.js?
27. Explain how to write a custom webpack plugin.
Advanced Webpack interview questions
1. Can you describe a scenario where you might need to write a custom webpack plugin and how you'd approach it?
2. Explain how you can optimize webpack build times in a large project.
3. How would you configure webpack to work with a monorepo setup, considering shared modules and dependencies?
4. What are some strategies for handling different environments (development, staging, production) with webpack?
5. Describe how you'd use webpack's code splitting features to improve the loading performance of a single-page application.
6. Explain how webpack handles circular dependencies and what strategies you can use to resolve them.
7. How can you integrate webpack with a backend framework like Node.js/Express for server-side rendering?
8. What are the benefits and drawbacks of using webpack's module federation, and in what scenarios would you use it?
9. How can you use webpack to analyze your bundle size and identify potential optimization opportunities?
10. Explain how to set up webpack to work with different types of assets, such as images, fonts, and CSS, and optimize them for production.
11. Describe how you can implement hot module replacement (HMR) with webpack and React.
12. How would you configure webpack to output multiple bundles for different parts of your application?
13. What are the different caching strategies available in webpack, and how do you choose the right one for your project?
14. Explain how to configure webpack to work with TypeScript, including type checking and code generation.
15. Describe how to use webpack to create a library or component that can be published to npm.
16. How can you integrate webpack with a CI/CD pipeline to automate the build and deployment process?
17. What are some common webpack performance bottlenecks and how can you address them?
18. Explain how to use webpack's 'externals' configuration option and when it would be beneficial.
19. Describe how to implement error logging and reporting in webpack to track build issues.
20. How can you configure webpack to use different loaders and plugins based on the target browser or environment?
21. Explain how you can use webpack to optimize images, including compression, resizing, and format conversion.
Expert Webpack interview questions
1. How does Webpack handle circular dependencies, and what strategies can prevent them from breaking your build?
2. Can you describe the process of creating a custom Webpack plugin from scratch?
3. Explain how to optimize Webpack's build performance in a large, multi-page application.
4. How can you use Webpack to create multiple bundles with shared dependencies, and why would you do that?
5. What are the trade-offs between using Webpack's 'mode' option versus manually configuring environment-specific settings?
6. Describe how you would implement code splitting based on user behavior or route changes in a single-page application using Webpack.
7. How do you configure Webpack to work with different versions of the same library in different parts of your application?
8. Explain the process of integrating Webpack with a backend framework like Django or Ruby on Rails.
9. How can you use Webpack to analyze your bundle size and identify opportunities for optimization?
10. Describe how you would set up Webpack to automatically generate and update service worker files for offline support.
11. How would you handle different image optimization strategies for various environments using Webpack?
12. Can you explain how to debug Webpack configuration issues effectively?
13. How do you integrate Webpack with a CI/CD pipeline for automated builds and deployments?
14. Explain how you can use Webpack's module federation to share code between completely separate applications.
15. How would you implement a custom file loader in Webpack to handle a unique file type?
16. Describe how to set up Webpack to watch for changes in multiple entry points and rebuild only the necessary bundles.
17. Explain how you can use Webpack to create a library or component that can be used in different JavaScript environments (e.g., browser, Node.js).
18. How can you leverage Webpack's caching mechanisms to improve build times and browser performance?
19. Describe a scenario where you would use Webpack's 'externals' option, and explain how it works.
20. How can you use Webpack to create different builds for different browsers or devices, taking advantage of modern features where available?
21. Explain how to configure Webpack to work with TypeScript and generate declaration files for your library.
22. How do you ensure that your Webpack configuration is maintainable and scalable as your project grows?
23. Describe the challenges of migrating from an older Webpack version to the latest one, and how you would approach it.
24. How can you use Webpack to implement hot module replacement (HMR) in a React application?
25. Explain how you would configure Webpack to handle environment variables securely and prevent them from being exposed in the client-side code.
26. Describe the process of using Webpack to pre-render a single-page application for improved SEO and initial load time.

When interviewing front-end or full-stack developers, understanding their Webpack proficiency is key to gauging their ability to handle modern JavaScript development. Asking the right questions helps you ensure they can bundle, optimize, and manage dependencies effectively.
This blog post provides a curated list of Webpack interview questions categorized by difficulty: basic, intermediate, advanced, and expert, complete with a set of multiple-choice questions (MCQs). This list is designed to equip you with the tools to assess candidates' knowledge comprehensively.
With this guide, you can effectively evaluate candidates and confidently hire developers who are ready to tackle complex bundling challenges; for a more data-driven approach, consider leveraging Adaface's JavaScript online test to benchmark candidates.
Table of contents
Basic Webpack interview questions
Intermediate Webpack interview questions
Advanced Webpack interview questions
Expert Webpack interview questions
Webpack MCQ
Which Webpack skills should you evaluate during the interview phase?
Tips for Using Webpack Interview Questions
Hire Top Webpack Talent with Skills Tests
Download Webpack interview questions template in multiple formats
Basic Webpack interview questions
1. What is Webpack, in simple words?
Webpack is a module bundler. Think of it as a tool that takes all your project's files (JavaScript, CSS, images, etc.) and packages them into a few optimized files (bundles) that can be easily loaded in a web browser.
Essentially, it solves the problem of managing dependencies and assets in complex web applications by:
- Bundling: Combining multiple files into fewer files to reduce HTTP requests.
- Optimizing: Minimizing and transforming code (e.g., using Babel to transpile modern JavaScript).
- Managing dependencies: Ensuring that modules are loaded in the correct order and that all required dependencies are included.
2. Why do we need Webpack?
Webpack is primarily needed to bundle JavaScript modules, along with other assets like CSS and images, for use in web browsers. Modern web development often involves breaking code into multiple files for better organization and maintainability. Webpack takes these disparate modules and their dependencies and packages them into optimized bundles suitable for deployment. This is crucial because browsers don't natively support module systems like CommonJS or ES Modules (natively, although newer browsers are starting to add support for ES Modules natively, webpack provides robust support and features).
Specifically, Webpack helps with:
- Module Bundling: Resolves dependencies and combines modules into bundles.
- Code Splitting: Divides the application into smaller chunks for faster initial load times.
- Asset Optimization: Minifies and optimizes assets like CSS and images.
- Development Workflow: Provides features like hot module replacement (HMR) for improved development experience.
- Transpilation: Transpiles newer versions of javascript (ES6, Typescript) to older browser compatible versions.
babel-loaderis a key example here.
3. Can you explain the core concepts of Webpack: entry, output, loaders, and plugins?
Webpack is a module bundler; it takes various assets (JavaScript, CSS, images) and transforms them into optimized bundles for deployment. Its core concepts are:
- Entry: Specifies the entry point(s) Webpack uses to start building the dependency graph. This is where Webpack begins traversing your project.
- Output: Configures where Webpack should emit the bundles it creates and how they should be named.
- Loaders: Transform modules. They allow Webpack to process different types of files (e.g.,
.scss,.jsx) and convert them into valid modules that JavaScript can use. For example,babel-loadertransforms ES6+ code into browser-compatible JavaScript. - Plugins: Extend Webpack's capabilities. They perform various tasks beyond what loaders can do, like optimizing bundles, generating HTML files, or defining environment variables. Examples are
HTMLWebpackPluginandMiniCssExtractPlugin.
Loaders are applied on a per-module basis during the build process, while plugins can tap into various stages of the entire compilation lifecycle to perform broader tasks.
4. What is an entry point in Webpack and how do you configure it?
In Webpack, an entry point is the module Webpack uses to start building the dependency graph. Webpack starts bundling from this point, tracing all dependencies to create the final bundle(s). Think of it as the root of your application's dependency tree.
To configure the entry point, you typically modify the webpack.config.js file. You can specify a single entry point (a string) or multiple entry points (an object). Here's how:
- Single entry point:
module.exports = { entry: './src/index.js', //... }; - Multiple entry points:
module.exports = {
  entry: {
    main: './src/index.js',
    another: './src/another.js'
  },
  //...
};
5. Where does Webpack put the processed files? How is this configured?
Webpack outputs the processed (bundled) files to a directory specified in the output.path configuration option. By default, if no configuration is provided, webpack will output the bundle to the ./dist folder. The output.filename option determines the name of the generated bundle.
This is configured in the webpack.config.js (or similar named configuration file) using the output property. Here is a simple example:
module.exports = {
  //...
  output: {
    path: path.resolve(__dirname, 'build'),
    filename: 'bundle.js'
  }
};
In this example, processed files are emitted to build/bundle.js.
6. What are loaders in Webpack? Give some examples.
Loaders in Webpack are transformations that are applied to individual files in your project before they are included in a bundle. They allow you to preprocess files, transforming them from one format to another. Think of them as modules that transform sources.
Examples include:
babel-loader: Transpiles JavaScript (ES6+) to older versions for browser compatibility.css-loader: Interprets@importandurl()likeimport/require()and will resolve them. Used in conjunction withstyle-loader.style-loader: Injects CSS into the DOM using<style>tags.file-loader: Emits files as separate files and replaces theurlwith the public URL.url-loader: Similar tofile-loader, but can embed files as data URLs if they are below a specified size limit.
7. What are plugins in Webpack? How do they differ from loaders?
Webpack plugins are JavaScript objects that have an apply method. This apply method is invoked by the Webpack compiler, giving the plugin access to the entire compilation lifecycle. Plugins can hook into various points in this lifecycle to perform custom actions like bundling optimization, asset management, or even defining environment variables. They enhance Webpack's capabilities beyond just transforming modules.
Loaders, on the other hand, operate at the individual file level. They transform modules from one format to another (e.g., converting Sass to CSS, or TypeScript to JavaScript) before they are bundled. Loaders are configured to process specific file types using test and use configurations in webpack.config.js. Plugins work on the entire bundle or compilation process, while loaders work on individual modules during the module transformation phase.
8. How do you configure loaders in your `webpack.config.js` file?
Loaders are configured within the module.rules array in your webpack.config.js file. Each rule defines how webpack should handle specific types of modules based on file extensions or other conditions.
Here's a simple example:
module.exports = {
  //...
  module: {
    rules: [
      {
        test: /\.js$/,
        exclude: /node_modules/,
        use: {
          loader: 'babel-loader',
          options: {
            presets: ['@babel/preset-env']
          }
        }
      }
    ]
  }
};
test: A regular expression that matches the file types to apply the loader to (e.g.,/.js$/for JavaScript files).exclude: Specifies directories or files to exclude from the loader.use: Specifies the loader or loaders to use for the matched files. Can be a string for a single loader or an object withloaderandoptionsfor configuration.
9. How do you configure plugins in your `webpack.config.js` file?
Plugins are configured within the plugins array in your webpack.config.js file. Each entry in the array typically represents an instance of a webpack plugin. You instantiate the plugin with any required options as arguments to its constructor.
For example:
const HtmlWebpackPlugin = require('html-webpack-plugin');
const webpack = require('webpack');

module.exports = {
  //...
  plugins: [
    new HtmlWebpackPlugin({
      template: './src/index.html',
      filename: 'index.html'
    }),
    new webpack.DefinePlugin({
       'process.env.NODE_ENV': JSON.stringify('production')
    })
  ]
};
10. What is the purpose of `webpack.config.js`?
webpack.config.js is the core configuration file for Webpack, a popular JavaScript bundler. Its purpose is to define how Webpack should process and bundle your project's assets (JavaScript, CSS, images, etc.) into optimized bundles for deployment. It acts as a set of instructions guiding Webpack through the bundling process.
Specifically, it allows you to specify:
- Entry points: Which files Webpack should start bundling from.
- Output: Where and how to save the bundled files.
- Loaders: How to transform different types of modules (e.g., using
babel-loaderto transpile ES6+ JavaScript). - Plugins: To perform additional tasks during bundling (e.g., minifying code, generating HTML files). In essence, it defines the entire bundling pipeline.
11. Can you describe a basic Webpack configuration file?
A basic Webpack configuration file (usually named webpack.config.js) is a JavaScript file that defines how Webpack should bundle your project's assets. It typically exports a JavaScript object with key properties.
Key parts include:
entry: Specifies the entry point(s) of your application (e.g.,src/index.js).output: Defines where Webpack should output the bundled files, including thepath(directory) andfilename(name of the bundle).module: Configures loaders. Loaders transform different types of modules (e.g., CSS, images) into JavaScript modules.- Example: Using
babel-loaderto transpile JavaScript.
- Example: Using
plugins: An array of plugins. Plugins can perform various tasks like optimizing bundles, defining environment variables, or generating HTML files.HtmlWebpackPluginis commonly used.mode: Specifies the build mode ('development','production', or'none'). Influences default optimizations.
12. What is the `mode` option in Webpack and what are its common values?
The mode option in Webpack specifies the environment in which your application will run. It essentially tells Webpack how to optimize your code for either development or production.
Common values for the mode option are:
development: Optimizes for ease of debugging and development speed. It enables features like hot module replacement (HMR) and provides more detailed error messages. It generally turns off minification and some optimizations to speed up the build process.production: Optimizes for performance and smaller bundle sizes. This mode enables features like minification, tree shaking (dead code elimination), and other optimizations to reduce the final bundle size and improve performance. This is the recommended mode for deploying your application to a live environment.none: Disables all default optimizations. This is useful if you want to manually configure all aspects of the build process.
13. How does Webpack help with code splitting?
Webpack facilitates code splitting by allowing you to divide your application's code into smaller, more manageable chunks. These chunks can then be loaded on demand, improving initial load times and overall application performance. This is achieved through techniques like:
Entry Points: Defining multiple entry points in your webpack configuration creates separate bundles. Each entry point represents a distinct part of your application.
Dynamic Imports: Using
import()syntax allows you to asynchronously load modules when needed. Webpack automatically creates separate chunks for these dynamically imported modules.SplitChunks Plugin: This plugin (part of Webpack) can automatically extract common dependencies into separate chunks, preventing duplication across different parts of your application. For example:
// webpack.config.js
optimization: {
    splitChunks: {
        chunks: 'all',
    },
},
14. What are the benefits of code splitting?
Code splitting offers several key benefits, primarily centered around improving application performance and user experience. By breaking down a large codebase into smaller, more manageable chunks, you can achieve:
- Improved Initial Load Time: Users only download the code they need initially, leading to faster page loads. This is especially critical for mobile users and those with slower internet connections.
- Reduced Parse/Compile Time: Smaller bundles mean less JavaScript for the browser to parse and compile, further contributing to faster startup times.
- Better Caching: Changes to one part of the application don't necessarily invalidate the entire cache. Users can benefit from cached code more effectively, leading to faster subsequent loads.
- On-Demand Loading: Features or components that are not immediately required can be loaded lazily, only when the user interacts with them. Examples include rarely used settings panels or complex visualisations. This optimizes resource utilization. For example, using dynamic
import()syntax in JavaScript allows you to load modules on demand.
15. What is a module bundler and how does Webpack fit into that category?
A module bundler is a tool that takes multiple JavaScript modules and their dependencies and packages them into a single file or a set of files (bundles) that can be used in a browser or other JavaScript execution environment. This process optimizes the application for performance by reducing the number of HTTP requests and managing dependencies efficiently.
Webpack is a popular and powerful module bundler. It treats every file (JavaScript, CSS, images, etc.) as a module and generates dependency graphs to bundle them correctly. Webpack offers many features like code splitting, loaders (to transform different types of files), plugins (to extend functionality), and optimization tools, making it highly configurable and suitable for complex web applications. Other module bundlers include Parcel and Rollup, but Webpack is more versatile due to its rich ecosystem.
16. How do you use Webpack with different types of assets, like CSS or images?
Webpack uses loaders to handle different types of assets. Loaders transform these assets into modules that can be included in your JavaScript bundles. For CSS, you'd typically use css-loader (to interpret CSS) and style-loader (to inject CSS into the DOM). For images, you might use file-loader or url-loader to handle file paths and embedding.
Here's a simplified example from a webpack.config.js file:
module.exports = {
  module: {
    rules: [
      {
        test: /\.css$/,
        use: ['style-loader', 'css-loader']
      },
      {
        test: /\.(png|jpg|gif)$/,
        use: ['file-loader']
      }
    ]
  }
};
In this example, any .css files are processed by style-loader and css-loader. Image files (png, jpg, gif) are handled using file-loader.
17. What are some common Webpack plugins that you have used?
I have used several Webpack plugins to optimize and enhance the build process. Some common ones include:
HtmlWebpackPlugin: This simplifies the creation of HTML files to serve your Webpack bundles.MiniCssExtractPlugin: Extracts CSS into separate files, creating CSS files per JS file which contain CSS. This is beneficial for performance.CleanWebpackPlugin: Removes/cleans build folders before each build, ensuring only the latest files are present.DefinePlugin: Allows you to create global constants which can be configured at compile time. It's helpful for managing environment variables.CopyWebpackPlugin: Copies files or directories to the build directory.TerserPluginorUglifyJsPlugin(for older versions): Used for minimizing JavaScript files to reduce their size.webpack-bundle-analyzer: Analyzes bundle content to identify optimization opportunities, visualizing the size of output files.
For example, to define a global constant API_URL using DefinePlugin, you could configure Webpack like this:
new webpack.DefinePlugin({
  'API_URL': JSON.stringify('https://api.example.com')
})
18. How can you optimize your Webpack build for production?
To optimize a Webpack build for production, several strategies can be employed. First, minification is crucial. Use plugins like TerserPlugin (for JavaScript) and CssMinimizerPlugin (for CSS) to reduce file sizes. Also, enable tree shaking to eliminate unused code by setting mode: 'production' in your Webpack configuration or using a plugin such as webpack.optimize.ModuleConcatenationPlugin.
Furthermore, code splitting divides your application into smaller chunks, enabling parallel downloading and caching. Use dynamic imports (import()) or configure SplitChunksPlugin to achieve this. Consider using lazy loading to only load modules when they are needed, further reducing the initial load time. Utilize asset optimization techniques such as image compression, using appropriate image formats (e.g., WebP), and using a CDN for static assets.
19. What are some ways to improve Webpack build performance?
Several strategies can improve Webpack build performance. One common approach is to minimize the work Webpack has to do. For example, using mode: 'production' enables optimizations like tree shaking and minification by default.
Other improvements include:
- Use
cache-loaderorhard-source-webpack-plugin: These tools cache the results of expensive operations, significantly speeding up subsequent builds. - Optimize loaders: Use the
includeorexcludeoptions to limit loaders to only the necessary files. Specify thetestregex as efficiently as possible. Consider using faster alternatives where available (e.g.,esbuild-loaderorswc-loaderinstead ofbabel-loader). - Code splitting: Split your code into smaller chunks to allow for parallel loading, especially with large applications. Webpack can perform code splitting using dynamic imports
import(). - Minimize bundle size: Remove unused dependencies and optimize images to reduce the overall bundle size. Tools like
webpack-bundle-analyzercan help visualize the bundle contents. - Use a faster machine: The more CPU cores and memory you have, the faster Webpack will be able to perform builds.
20. Explain what Webpack Dev Server is.
Webpack Dev Server is a development server that provides live reloading and hot module replacement (HMR) functionality for web applications. It serves your application from memory, which significantly speeds up the development process because files are not written to disk unless explicitly specified.
Key features include:
- Fast Refresh: Automatically updates the browser when changes are made to your code.
- Hot Module Replacement (HMR): Updates modules without requiring a full page reload, preserving application state.
- In-Memory Serving: Improves performance by serving files directly from memory.
- Proxying: Allows you to proxy API requests to a separate backend server.
- Supports HTTPS/HTTP2: Can serve content over secure protocols.
21. How does Webpack Dev Server help during development?
Webpack Dev Server provides several key benefits during development. First, it offers hot module replacement (HMR), which automatically updates the browser when code changes are saved, without requiring a full page reload. This significantly speeds up development by preserving the application's state and only updating the necessary modules. Also, it serves the bundled files from memory, which makes rebuilds and updates much faster as it avoids writing to disk on every change.
Second, it acts as a simple web server, allowing you to serve your application's files during development without needing a separate server setup. It also supports features like proxying API requests to a backend server, which is very useful when developing frontends that need to communicate with a separate API. It can be configured using webpack.config.js. For example:
devServer: {
  static: './dist',
  hot: true,
  proxy: {
    '/api': 'http://localhost:3000'
  }
}
22. How do you set up Webpack Dev Server?
To set up Webpack Dev Server, you'll typically start by installing it as a development dependency using npm or yarn: npm install --save-dev webpack webpack-cli webpack-dev-server or yarn add -D webpack webpack-cli webpack-dev-server. Then, you need to configure webpack.config.js. Add an entry point and output. In the devServer configuration, you can specify options like port, hot (for hot module replacement), and static (to serve static files). Finally, add a script to your package.json like "start": "webpack serve --mode development". Running npm start will then start the dev server.
Intermediate Webpack interview questions
1. How can you optimize Webpack's build speed for large projects?
To optimize Webpack build speed for large projects, several strategies can be employed. Firstly, code splitting divides the application into smaller chunks, allowing Webpack to build only the necessary parts during initial load and subsequent updates. Utilizing webpack-bundle-analyzer helps identify large bundles and potential optimization areas. Also, using cache-loader and hard-source-webpack-plugin can significantly reduce rebuild times.
Secondly, consider optimizing your loaders. For example, use babel-loader with caching (cacheDirectory: true) and explicitly specify include/exclude directories to limit its scope. Minimizing the use of expensive loaders like source maps in development environments can help. Furthermore, upgrading to the latest versions of Node.js, npm/yarn, and Webpack itself can often provide performance improvements. Consider using tools like esbuild-loader or swc-loader for faster transpilation compared to Babel. Finally, consider parallelizing tasks using thread-loader for CPU-intensive operations.
2. Describe how code splitting works in Webpack and its benefits.
Code splitting in Webpack divides your application's code into smaller bundles, which can be loaded on demand. Instead of loading one large bundle initially, users only download the code they need for the current page or feature. Webpack achieves this through:
- Entry Points: Defining multiple entry points in your Webpack configuration.
- Dynamic Imports: Using
import()syntax within your code. - SplitChunksPlugin: Optimizing bundle splitting based on shared dependencies.
The benefits include: faster initial load times, improved user experience, and more efficient resource utilization. Smaller bundles translate to reduced network bandwidth usage and faster parsing/execution by the browser, leading to a noticeable performance improvement.
3. Explain the difference between various Webpack module bundler plugins and loaders.
Webpack loaders and plugins serve different purposes in the module bundling process. Loaders transform individual modules during the build process. They operate on a per-file basis, allowing you to preprocess files as they are imported (e.g., transforming Sass to CSS, or transpiling ES6 to ES5). For example:
module: {
  rules: [
    { test: /\.scss$/, use: ['style-loader', 'css-loader', 'sass-loader'] }
  ]
}
In contrast, plugins operate on the entire bundle or chunks of bundles. They can perform a wide range of tasks, such as optimizing output, defining environment variables, or generating HTML files. Plugins hook into various stages of the Webpack compilation lifecycle to provide more global or comprehensive modifications or functionalities. For example, HtmlWebpackPlugin generates HTML files, while DefinePlugin defines global constants.
4. How do you configure Webpack to handle different types of assets (e.g., images, fonts, CSS)?
Webpack uses loaders to handle different types of assets. Loaders transform these assets into modules that can be included in your JavaScript bundles. To configure Webpack for different assets, you'll typically use the module.rules array in your Webpack configuration file (webpack.config.js).
For example:
module.exports = {
  module: {
    rules: [
      { test: /\.(png|jpg|gif)$/, use: [ 'file-loader' ] },
      { test: /\.(woff|woff2|eot|ttf|otf)$/, use: [ 'file-loader' ] },
      { test: /\.css$/, use: [ 'style-loader', 'css-loader' ] }
    ]
  }
};
test: A regular expression that matches the file types you want to handle.use: An array of loaders to apply to the matched files. Loaders are applied from right to left (or bottom to top in the config).
Common loaders include file-loader (for images and fonts), url-loader (for conditionally embedding assets as base64 URLs), style-loader and css-loader (for CSS), and sass-loader (for SCSS).
5. What are Webpack's 'resolve' options and how do they affect module resolution?
Webpack's resolve options configure how Webpack searches for modules to resolve when you use import or require. They affect module resolution by customizing the paths and file extensions Webpack looks at. Some common options include:
resolve.alias: Creates aliases to remap module requests. For example, aliasing'@components'to'./src/components'.resolve.extensions: Specifies which file extensions to try when resolving modules without extensions (e.g.,['.js', '.jsx', '.ts', '.tsx']).resolve.modules: Specifies directories where to look for modules, enabling importing modules from anywhere using relative paths (e.g.,[ 'node_modules', 'src' ]).resolve.mainFiles: When resolving a directory, specifies which filenames to look for (e.g.,['index', 'main']).resolve.fallback: Specifies fallback module paths. Useful when a requested module is not found in 'resolve.modules'.
6. How can you use Webpack to create different builds for development and production environments?
Webpack can create different builds using NODE_ENV environment variable and webpack configuration files tailored for each environment (e.g., webpack.config.js for development and webpack.config.prod.js for production).
Typically, you'll have:
A base configuration with shared settings.
Environment-specific configurations that extend or override the base. The production config usually includes minification, optimization, and setting
NODE_ENVtoproduction. Dev config includes source maps, and a development server.webpack.config.jsexample snippet:const mode = process.env.NODE_ENV || 'development'; module.exports = { mode: mode, // other configurations };In
package.json, you can define scripts:"scripts": { "build:dev": "webpack --config webpack.config.js", "build:prod": "NODE_ENV=production webpack --config webpack.config.prod.js" }
7. Describe how to use Webpack with TypeScript projects.
To use Webpack with TypeScript, you'll need to configure Webpack to compile your TypeScript code into JavaScript. First, install the necessary dependencies: npm install --save-dev webpack webpack-cli typescript ts-loader. Then, create a webpack.config.js file to define your Webpack configuration. Key configurations include setting the entry point to your main TypeScript file, defining the output for the bundled JavaScript, and most importantly, adding a rule to use ts-loader for .ts files. The ts-loader uses your tsconfig.json to handle the TypeScript compilation.
Example configuration snippet:
module.exports = {
  entry: './src/index.ts',
  module: {
    rules: [
      {
        test: /\.ts$/,
        use: 'ts-loader',
        exclude: /node_modules/,
      },
    ],
  },
  resolve: {
    extensions: ['.ts', '.js'],
  },
  output: {
    filename: 'bundle.js',
    path: path.resolve(__dirname, 'dist'),
  },
};
8. Explain how to set up Webpack with different module formats, such as ESM and CommonJS.
Webpack handles different module formats using loaders and the output.module configuration. For ESM (ECMAScript Modules), Webpack can natively process them. For CommonJS, you typically use require() syntax. Webpack's default configuration usually handles CommonJS modules without extra setup. However, to explicitly manage different module formats, you can configure the output.module property like so:
module.exports = {
  // ... other configurations
  output: {
    path: path.resolve(__dirname, 'dist'),
    filename: 'bundle.js',
    module: true,
    library: { type: 'module' },
  },
  experiments: {
    outputModule: true,
  },
  // ... other configurations
};
With output.module set to true and experiments.outputModule also set to true, Webpack will output an ES module. Loaders like babel-loader can transform code into a specific format if needed before Webpack processes it. Webpack automatically detects and handles CommonJS modules through its dependency graph analysis without explicit configuration in most cases.
9. How can you implement lazy loading using Webpack?
Webpack facilitates lazy loading (or code splitting) primarily through dynamic import() statements. When Webpack encounters import() in your code, it treats the imported module as a separate chunk. This chunk is then loaded only when the import() statement is executed, improving initial load time. To use, you can use async/await or .then to handle promise as shown:
async function getComponent() {
  const { default: component } = await import('./my-component');
  return component;
}

//OR

import('./my-component').then(module => {
  const component = module.default;
  // Use the component
});
Webpack also provides configuration options for controlling chunk naming and preloading/prefetching behavior, allowing for fine-grained control over lazy loading strategies. Ensure your webpack.config.js is setup correctly to handle these dynamic imports.
10. What are Webpack's 'target' options and when would you use them?
Webpack's target option specifies the environment for which the bundle is built. It instructs webpack how to compile the code based on where it will run. Some common target options include:
web: For browsers (default).node: For Node.js.electron-main: For Electron's main process.electron-renderer: For Electron's renderer process.async-node: For Node.js, but compiles to async modules.webworker: For Web Workers.
You'd use these when building for different environments. For example, if you're building a server-side application, you would set the target to node. If your application is running inside an Electron app, you'd use electron-renderer or electron-main accordingly. Using the correct target ensures that your code leverages the appropriate environment features and avoids errors related to missing APIs.
11. How can you debug Webpack configurations and build issues?
Debugging Webpack configurations and build issues involves several strategies. First, carefully examine the Webpack configuration file (webpack.config.js) for syntax errors or incorrect settings. Use console.log statements or a debugger to inspect variables and module resolutions within the configuration. Utilize the --verbose flag with Webpack commands (e.g., webpack --verbose) to get more detailed output about the build process. Also inspect the terminal output for specific error messages and stack traces, these often pinpoint the source of the problem.
For build issues, leverage Webpack's profiling and analysis tools. The webpack-bundle-analyzer provides a visual representation of the bundle size and module dependencies, helping identify large or redundant modules. You can also use environment variables (NODE_ENV=development) to conditionally enable debugging features or disable optimizations that might be masking errors. Browser developer tools are crucial for debugging client-side code generated by Webpack, including inspecting the source code, setting breakpoints, and analyzing network requests.
12. Describe the process of creating a custom Webpack loader.
Creating a custom Webpack loader involves a few key steps. First, you define a JavaScript function that will transform the source code of a module. This function takes the source code as input and returns the transformed code. You can use libraries like babel or regular expressions to perform the transformation. Second, you export this function as the default export of a Node.js module. Third, you configure Webpack to use your loader for specific file types using the module.rules configuration in your webpack.config.js file. This configuration specifies a test condition (e.g., a regular expression for file extensions) and the use array which includes the path to your custom loader.
Here's a simple example:
// my-custom-loader.js
module.exports = function(source) {
  // Perform transformations on the source
  const transformedSource = source.replace('hello', 'goodbye');
  return transformedSource;
};
Then, in webpack.config.js:
module.exports = {
  // ... other configurations
  module: {
    rules: [
      {
        test: /\.txt$/, // Example file extension
        use: ['./my-custom-loader.js']
      }
    ]
  }
};
13. Explain how to use Webpack's Hot Module Replacement (HMR) feature.
Webpack's Hot Module Replacement (HMR) allows modules to be updated at runtime without requiring a full page refresh. This significantly speeds up development by preserving the application's state. To use HMR, you'll typically need to:
- Enable HMR in Webpack configuration: Set
HotModuleReplacementPluginand potentially configuredevServerto enable hot reloading using--hotorhot:truein yourwebpack.config.jsfile. Also settarget: 'web'. - Use
webpack-dev-server: Run your application usingwebpack-dev-serveras it provides the necessary infrastructure. Ensure that the port configured doesn't conflict. - Accept Module Updates (optional): In your application code, use
module.hot.acceptto specify how to handle updates to specific modules if you need fine-grained control. For example:
If noif (module.hot) { module.hot.accept('./myModule', function() { // Do something with the updated module }); }module.hot.accepthandler is present in a module, a hot update will bubble up until a handler is found or a full refresh happens. React Fast Refresh, for example, provides this automatically for React components.
14. How do you configure Webpack to work with CSS preprocessors like Sass or Less?
To configure Webpack to work with CSS preprocessors like Sass or Less, you typically need to install the appropriate loaders and configure them in your webpack.config.js file. For Sass, you'd install sass-loader, sass, css-loader, and style-loader. For Less, you would install less-loader, less, css-loader, and style-loader. The css-loader interprets @import and url() like import/require() and will resolve them and the style-loader injects CSS into the DOM.
In your webpack.config.js, within the module.rules array, you'd add a rule that identifies Sass or Less files (e.g., using a .scss or .less extension) and then chains the loaders together. For example, for Sass:
module.exports = {
  // ... other webpack configurations
  module: {
    rules: [
      {
        test: /\.scss$/,
        use: ['style-loader', 'css-loader', 'sass-loader']
      }
    ]
  }
};
The order of loaders is important: they are applied from right to left. Therefore, sass-loader compiles Sass to CSS, css-loader interprets the CSS, and style-loader injects the CSS into the DOM.
15. What is the purpose of Webpack's 'optimization' options and how do they impact the build?
Webpack's optimization options are used to fine-tune the build process for improved performance and smaller bundle sizes. They control various aspects of code minification, splitting, and tree shaking to ensure that only necessary code is included in the final output.
These options significantly impact the build by:
- Reducing bundle size: Through minification (using tools like TerserPlugin) and tree shaking (removing unused code).
- Improving load times: By splitting code into smaller chunks (code splitting), enabling parallel downloading.
- Enhancing caching: Using techniques like content hashing for long-term caching.
- Optimizing for production: Configuring mode: 'production' automatically enables many of these optimizations, while 'development' prioritizes faster build times for debugging.
16. Describe how to use Webpack to bundle multiple entry points.
Webpack can bundle multiple entry points by defining them in the entry configuration. Instead of a single string, the entry property becomes an object where each key is the bundle name and the value is the entry point file path or an array of file paths. For example:
module.exports = {
  entry: {
    home: './src/home.js',
    about: './src/about.js'
  },
  output: {
    filename: '[name].bundle.js',
    path: path.resolve(__dirname, 'dist')
  }
};
In this setup, Webpack will create two bundles: home.bundle.js and about.bundle.js. The [name] placeholder in the output.filename option dynamically uses the entry point name. You can add further configuration such as loaders and plugins as needed. Multiple entry points allow you to create separate bundles for different parts of your application, which can improve initial load times.
17. Explain how to handle environment variables in Webpack configurations.
Webpack can access environment variables using process.env. You can pass environment variables when running webpack via the command line (e.g., webpack --mode production --env API_URL=https://example.com). In your webpack.config.js file, access these variables using process.env.API_URL. Alternatively, use libraries like dotenv to load environment variables from a .env file into process.env before webpack runs. Consider using a tool like cross-env for cross-platform environment variable setting. You may need to stringify the variables if they are to be used inline during replacement, for example in plugins like DefinePlugin.
Common plugins for handling environment variables in Webpack include:
- DefinePlugin: Allows you to create global constants which can be configured at compile time.
- EnvironmentPlugin: A convenient shortcut to DefinePlugin, specifically for environment variables. It can throw errors if required environment variables are not defined.
18. How can you configure Webpack to output multiple bundles?
Webpack can be configured to output multiple bundles by using multiple entry points in the webpack.config.js file. Each entry point will generate a separate bundle. The output configuration should be updated to use dynamic filenames based on the entry point name.
For example:
module.exports = {
  entry: {
    app: './src/app.js',
    vendor: './src/vendor.js'
  },
  output: {
    filename: '[name].bundle.js',
    path: path.resolve(__dirname, 'dist')
  }
};
In this configuration, Webpack will create two bundles: app.bundle.js and vendor.bundle.js.
19. Describe how you might analyze your webpack bundle to find out which modules are the largest?
To analyze a webpack bundle and identify the largest modules, several tools and techniques can be used. A common approach is to use webpack's built-in stats functionality in conjunction with a visualization tool. First, configure webpack to generate a stats file by running webpack --profile --json > stats.json. This command outputs detailed information about the bundle in JSON format. Then, use a tool like webpack-bundle-analyzer to visualize the bundle. Install it using npm install --save-dev webpack-bundle-analyzer and then include it in the webpack.config.js file or run it as a CLI command, pointing it to the stats.json file.
Webpack bundle analyzer provides an interactive treemap visualization that clearly shows the size of each module within the bundle. This makes it easy to identify the largest modules and understand what is contributing most to the overall bundle size. Analyzing this information can help identify opportunities for optimization, such as code splitting, lazy loading, or removing unused dependencies.
20. Explain how you can improve your Webpack build times?
To improve Webpack build times, several strategies can be employed. One common approach is to reduce the amount of code Webpack needs to process. This can involve using more specific entry points, leveraging code splitting to generate smaller bundles, and using externals to exclude large libraries like React or Lodash that are already available in the browser.
Other improvements include using faster module resolution techniques by specifying resolve.modules and resolve.extensions appropriately. Loaders like babel-loader can be optimized by caching transpilation results using cache-loader. Also, use plugins like terser-webpack-plugin or css-minimizer-webpack-plugin during production builds to minimize and optimize code. Tools like webpack-bundle-analyzer can also provide valuable insight on where to optimize.
21. How can you manage different environments such as Staging and Production with Webpack?
Webpack can manage different environments like Staging and Production primarily through configuration files and environment variables. You typically have separate webpack configuration files (e.g., webpack.config.js, webpack.config.prod.js, webpack.config.staging.js). The NODE_ENV environment variable is commonly used to determine the current environment.
To configure Webpack for different environments, you can use conditional logic within your main webpack configuration file or merge environment-specific configurations using tools like webpack-merge. You can set environment-specific plugins, output paths, and optimization settings based on the NODE_ENV. For example:
// webpack.config.js
const environment = process.env.NODE_ENV || 'development';

if (environment === 'production') {
  // Production-specific plugins and settings
}
22. How would you use Webpack in a monorepo?
In a monorepo, Webpack can be configured to handle multiple projects or packages within the same repository. Each package can have its own webpack.config.js tailored to its specific needs. Tools like Lerna or Nx can manage the dependencies and build process across these packages, orchestrating Webpack builds for each as needed.
Several strategies can be employed:
- Independent builds: Each package uses its own Webpack configuration, built separately.
- Shared configuration: Common configuration options (like loaders or plugins) can be extracted into a shared file or package and reused across multiple Webpack configurations using
requireorimport. - Module Federation: Webpack's Module Federation feature can enable separately built and deployed parts of the monorepo to be composed at runtime, facilitating code sharing and dynamic updates.
23. How do you handle caching of assets in Webpack to improve performance?
Webpack provides several techniques for asset caching. A common approach is to use content hashing in the output file names. This ensures that when the content of a file changes, its name also changes, forcing the browser to download the new version. We can configure this in webpack.config.js using the output.filename option, such as: output: { filename: '[name].[contenthash].js' }. Additionally, plugins like SplitChunksPlugin can extract common dependencies into separate files, enabling better caching and reducing overall bundle size. This way changes to application code won't invalidate the cache for vendor dependencies and vice-versa.
Another strategy involves leveraging browser caching headers. By setting appropriate Cache-Control and ETag headers on the server serving the assets, you can instruct the browser to cache these assets for a specified duration. Webpack Dev Server also usually allows specifying caching related headers which can be useful during development for testing caching strategies.
24. Explain how to use Webpack's 'externals' configuration.
Webpack's externals configuration allows you to exclude certain modules from your bundle. This is useful when you want to use libraries that are already available in the user's environment (e.g., via a CDN or as a global variable). Instead of including the library's code in your bundle, Webpack will assume it's available at runtime.
To use externals, you define a key-value pair in your webpack.config.js file. The key is the module's import path in your code (e.g., 'lodash'), and the value is how the module is exposed in the environment (e.g., '_' for the global Lodash variable). For example:
module.exports = {
  //...
  externals: {
    'lodash': '_'
  }
  //...
};
With this configuration, if your code imports lodash, Webpack won't include it in the bundle but will assume it's available as the global _ variable.
25. How would you configure webpack to handle static assets like images?
To configure webpack to handle static assets like images, you typically use file-loader or url-loader. file-loader simply emits the files to your output directory and provides you with the public URL. url-loader is similar, but it can also embed the file as a base64 encoded data URI directly in the CSS or JS if the file size is below a specified limit. This reduces HTTP requests for smaller assets.
Here's a basic webpack configuration snippet:
module.exports = {
  module: {
    rules: [
      {
        test: /\.(png|jpe?g|gif|svg)$/i,
        use: [
          {
            loader: 'url-loader',
            options: {
              limit: 8192, // Embed files smaller than 8kb as base64 data URIs
              name: 'images/[name].[ext]', // Output path and filename
            },
          },
        ],
      },
    ],
  },
};
This configuration tells webpack to process images with extensions like .png, .jpg, .jpeg, .gif, and .svg. Files smaller than 8kb will be embedded as base64 data URIs, and larger files will be emitted to the images directory in the output folder, preserving their original names and extensions.
26. How do you integrate Webpack with a backend framework like Express.js?
Integrating Webpack with Express.js typically involves configuring Webpack to output the bundled client-side assets (JavaScript, CSS, images, etc.) to a directory that Express.js can serve as static files. This usually means setting the output.path in your webpack.config.js to a public directory in your Express.js project (e.g., public/).
Then, in your Express.js application, you use express.static() middleware to serve the files from that directory. For example:
const express = require('express');
const path = require('path');
const app = express();
const port = 3000;

app.use(express.static(path.join(__dirname, 'public')));

app.listen(port, () => {
  console.log(`Server is running on port ${port}`);
});
This setup allows Webpack to handle bundling and optimization of your frontend code, while Express.js handles serving the static assets and the backend API or routes.
27. Explain how to write a custom webpack plugin.
To write a custom webpack plugin, you create a JavaScript class with an apply method. This apply method is called by webpack during the compilation process and receives the webpack compiler object as an argument. Inside the apply method, you tap into various webpack hooks (events) using compiler.hooks. For example, you can use compiler.hooks.emit.tapAsync to hook into the emit event, which occurs before webpack writes assets to the output directory.
Here's a basic example:
class MyPlugin {
  apply(compiler) {
    compiler.hooks.emit.tapAsync('MyPlugin', (compilation, callback) => {
      // Modify the compilation object here
      console.log('Assets are being emitted!');
      callback();
    });
  }
}

module.exports = MyPlugin;
You then include your plugin in the plugins array of your webpack.config.js file. The plugin can access and modify the compilation object, allowing you to transform assets, add new files, or perform other custom build steps.
Advanced Webpack interview questions
1. Can you describe a scenario where you might need to write a custom webpack plugin and how you'd approach it?
Imagine a scenario where you want to automatically generate a file containing application version information (like the git commit hash, build date, etc.) and make it available to your application at runtime. Webpack doesn't have a built-in feature to handle this specific task, so a custom plugin is needed.
To approach this, I'd first define the plugin's options (e.g., the output file path, the data to include). Then, I'd tap into the emit hook in the Webpack compiler. Within this hook, I'd gather the necessary version information (using child_process to execute git rev-parse HEAD for example). Finally, I'd create a string representing the file's content (likely in JSON format) and add it as a new asset to the compilation using compilation.assets[outputFilePath] = { source: () => fileContent, size: () => fileContent.length };. This ensures the generated file is included in the final bundle.
2. Explain how you can optimize webpack build times in a large project.
Optimizing Webpack build times in large projects involves several strategies. One common approach is to leverage caching mechanisms. Tools like cache-loader and hard-source-webpack-plugin can cache the results of expensive operations, avoiding redundant work on subsequent builds. Additionally, ensure you're using the latest Webpack version, as updates often include performance improvements. Consider using parallelization with thread-loader or HappyPack to distribute the workload across multiple CPU cores.
Another important aspect is code splitting to reduce the initial bundle size and improve load times. Use dynamic imports and SplitChunksPlugin to create smaller, more manageable chunks. Analyze your bundle with tools like webpack-bundle-analyzer to identify large dependencies and optimize their loading. Also, minimize the work Webpack needs to do. For example, exclude modules from Babel using the exclude option or use include option to narrow the search scope. Upgrade dependencies regularly for the latest performance improvements. Lastly, using a faster machine with more cores and RAM can drastically improve the overall build performance.
3. How would you configure webpack to work with a monorepo setup, considering shared modules and dependencies?
To configure Webpack with a monorepo, use resolve.modules to instruct Webpack to look for modules in the shared packages directory (typically at the monorepo root). resolve.alias can also be helpful to map specific shared modules to their locations, especially if you want to avoid relative imports within packages. For shared dependencies, consider using tools like Lerna or Yarn Workspaces, which symlink dependencies, and configure Webpack to leverage these symlinks.
Here's a basic example of webpack config:
module.exports = {
  //...
  resolve: {
    modules: [path.resolve(__dirname, '../../'), 'node_modules'],
    alias: {
      '@shared': path.resolve(__dirname, '../../packages/shared'),
    },
  },
};
4. What are some strategies for handling different environments (development, staging, production) with webpack?
Webpack can handle different environments using several strategies. One common approach is to leverage webpack.DefinePlugin to set environment variables during the build process. These variables can then be accessed within your application code to conditionally load different configurations or features based on the environment.
Another strategy involves using multiple webpack configuration files (e.g., webpack.dev.js, webpack.staging.js, webpack.prod.js). Each file contains environment-specific settings such as entry points, output paths, plugins, and loaders. You can then use a tool like webpack-merge to combine a common configuration with the environment-specific one. For example:
// webpack.prod.js
const { merge } = require('webpack-merge');
const common = require('./webpack.common.js');

module.exports = merge(common, {
 mode: 'production',
 // ... other production-specific settings
});
This allows for a DRY (Don't Repeat Yourself) approach where shared configurations are defined once, and only environment-specific changes are applied.
5. Describe how you'd use webpack's code splitting features to improve the loading performance of a single-page application.
I'd use webpack's code splitting to break the application into smaller chunks, loading only the necessary code for the current view or functionality. This reduces the initial download size, improving the Time to Interactive (TTI). I would use dynamic imports (using import() syntax) for components or modules that are not immediately needed on page load. Webpack automatically creates separate chunks for these dynamic imports. I would also configure webpack to split vendor libraries (like React, Lodash) into separate chunks using techniques such as SplitChunksPlugin. This allows browsers to cache these dependencies separately, leading to faster subsequent loads. Lazy loading images and other assets in combination would further reduce the initial load and improve overall performance.
6. Explain how webpack handles circular dependencies and what strategies you can use to resolve them.
Webpack detects circular dependencies during the bundling process. When it encounters a circular dependency, it doesn't halt the process but issues a warning. This warning indicates a potential problem, as circular dependencies can lead to unexpected behavior, infinite loops, or performance issues at runtime. Webpack resolves circular dependencies by using a temporary value (usually undefined) for the module that is causing the cycle during the initial evaluation. Once all modules in the cycle have been defined, Webpack updates the module with its actual value.
To resolve circular dependencies, consider these strategies:
- Refactor code: The most effective approach is to restructure your code to eliminate the circular dependency altogether. This might involve moving shared logic to a common module or rethinking the relationships between modules.
- Use
import()for lazy loading: Dynamically import modules usingimport()to break the synchronous dependency chain. This can defer the loading of a module until it's actually needed. - Introduce an intermediary module: Create a new module that acts as a mediator between the two modules involved in the circular dependency. This module can encapsulate the shared logic or state that is causing the cycle.
- Dependency Injection: Inject dependencies rather than directly importing them. This can decouple modules and make it easier to break circular dependencies.
7. How can you integrate webpack with a backend framework like Node.js/Express for server-side rendering?
To integrate Webpack with a Node.js/Express backend for server-side rendering (SSR), you generally compile your React/Vue/Angular application into a bundle that can be executed on the server. This is done using Webpack's configuration to target a Node.js environment.
Here's the common approach:
- Webpack Configuration: Create separate Webpack configurations for client and server builds. The server build should:
- Target
node. - Use
webpack-node-externalsto exclude node_modules from the server bundle. - Output to a file that your Node.js server can import.
- Target
- Node.js/Express Integration: In your Express server, import the server-side bundle generated by Webpack. Use this bundle to render your application to a string using
ReactDOMServer.renderToString()(for React) or similar methods for other frameworks. Send this rendered HTML as the initial response to the client. For example:
const express = require('express');
const React = require('react');
const ReactDOMServer = require('react-dom/server');
const App = require('./dist/server.bundle.js').default; // Path to your server bundle

const app = express();

app.get('/', (req, res) => {
  const appString = ReactDOMServer.renderToString(React.createElement(App));
  res.send(`<!DOCTYPE html><html><head><title>SSR Example</title></head><body><div id="root">${appString}</div></body></html>`);
});
8. What are the benefits and drawbacks of using webpack's module federation, and in what scenarios would you use it?
Module federation in Webpack allows different applications (or parts of applications) to share code at runtime, even if they are built and deployed separately.
Benefits:
- Code sharing: Reduces duplication, leading to smaller bundle sizes overall.
- Independent deployments: Teams can update and deploy their parts of the application without affecting others.
- Improved scalability: Easier to scale individual parts of the application as needed.
- Technology agnostic micro-frontend architecture: Different micro-frontends can use different frameworks.
Drawbacks:
- Increased complexity: Setup and configuration can be challenging.
- Runtime dependencies: Relies on the availability of remote modules at runtime.
- Versioning issues: Careful management of shared module versions is crucial.
- Potential performance overhead: Loading remote modules can introduce latency.
Scenarios: Module federation is ideal for micro-frontend architectures where you want to build independently deployable parts of a larger application and share code between them. Also consider it for plugin architectures where plugins are loaded at runtime, or when migrating a large monolithic application to a micro-frontend architecture incrementally.
Example Configuration (basic):
// webpack.config.js (Host application)
module.exports = {
  // ...
  plugins: [
    new ModuleFederationPlugin({
      name: 'Host',
      remotes: {
        'remoteApp': 'remoteApp@http://localhost:3001/remoteEntry.js',
      },
    }),
  ],
};
9. How can you use webpack to analyze your bundle size and identify potential optimization opportunities?
Webpack offers several ways to analyze bundle size. webpack-bundle-analyzer is a popular plugin that creates an interactive treemap visualization of your bundle's contents, revealing which modules contribute most to the overall size. Install it using npm install --save-dev webpack-bundle-analyzer and configure it in your webpack.config.js. Another option is using webpack's built-in stats functionality. By running webpack --profile --json > stats.json, you can generate a JSON file containing detailed information about the build process. Tools like webpack-visualizer can then be used to analyze the stats.json file and visualize the module dependencies and sizes. Once you've identified large modules, consider code splitting, lazy loading, and optimizing dependencies to reduce the bundle size.
10. Explain how to set up webpack to work with different types of assets, such as images, fonts, and CSS, and optimize them for production.
To set up Webpack for different asset types, you'll typically use loaders. Loaders transform these assets into modules that can be imported into your JavaScript. For images and fonts, file-loader or url-loader are common. file-loader simply emits the files to your output directory and provides the URL, while url-loader can inline small files as base64 URIs. For CSS, use style-loader and css-loader. css-loader interprets @import and url() like import/require() and will resolve them and style-loader injects CSS into the DOM.
For production optimization, use plugins like MiniCssExtractPlugin to extract CSS into separate files for parallel loading, TerserPlugin or UglifyJsPlugin to minify JavaScript, and ImageMinimizerPlugin to optimize images. Configure these in your webpack.config.js file, specifying rules for each asset type using the module.rules array and adding plugins in the plugins array. Use mode production which will enable many optimizations by default.
11. Describe how you can implement hot module replacement (HMR) with webpack and React.
To implement HMR with Webpack and React, you typically use webpack-dev-server and react-hot-loader. First, install the necessary packages: npm install --save-dev webpack webpack-dev-server react-hot-loader. Next, configure your webpack.config.js to use react-hot-loader/babel in your babel loader. Finally, wrap your root component with hot(module)(App) (where App is your root component) from react-hot-loader to enable hot reloading. Your webpack-dev-server configuration should also have hot: true.
Specifically, ensure your entry point in webpack includes webpack-dev-server/client?http://localhost:8080 and webpack/hot/only-dev-server. Also you should add new plugin new webpack.HotModuleReplacementPlugin() in the plugins section in webpack.config.js. This setup allows Webpack to automatically update modules in the browser without a full page reload when changes are detected, preserving the application state.
12. How would you configure webpack to output multiple bundles for different parts of your application?
To configure webpack to output multiple bundles for different parts of your application, you can use the entry configuration option as an object. Each key in the object represents a bundle name, and the value is the entry point (or an array of entry points) for that bundle. Then, in the output configuration, use the [name] placeholder in the filename option to dynamically generate filenames based on the bundle names defined in the entry configuration. For example:
module.exports = {
  entry: {
    home: './src/home.js',
    about: './src/about.js'
  },
  output: {
    path: path.resolve(__dirname, 'dist'),
    filename: '[name].bundle.js'
  }
};
This configuration will create two bundles: home.bundle.js and about.bundle.js. You can also use plugins like HtmlWebpackPlugin to generate HTML files that include these bundles.
13. What are the different caching strategies available in webpack, and how do you choose the right one for your project?
Webpack offers several caching strategies to improve build performance and optimize browser caching.
Common strategies include:
chunkhash/contenthash/hash: These placeholders generate unique hashes based on file content.contenthashis generally preferred as it changes only when the actual content of a file changes.chunkhashis similar but tied to webpack chunks.hashchanges whenever any part of the build changes.immutable: This is useful for assets that are never modified after their initial creation. Webpack will add theimmutabledirective to theCache-Controlheader, allowing browsers to cache them indefinitely. Use withoutput.assetModuleFilename.ETag: Webpack can generate Etags based on the file content by settingoutput.assetModuleFilename: '[hash][ext][query]'.
Choosing the right strategy depends on your project's complexity and caching requirements. For most projects, contenthash is a good default for production builds. For assets known never to change consider using immutable. Use cache: { type: 'filesystem' } in your webpack config to improve build speed by caching webpack modules.
14. Explain how to configure webpack to work with TypeScript, including type checking and code generation.
To configure Webpack for TypeScript, you'll need several packages: typescript, ts-loader, and potentially webpack-cli. First, install these as dev dependencies. Then, create a tsconfig.json file to configure TypeScript compilation options like target ES version, module system, and source maps.
Next, configure your webpack.config.js or webpack.config.ts (if using TypeScript for Webpack config) to use ts-loader for .ts and .tsx files. The ts-loader will compile the TypeScript code, using the settings in tsconfig.json, and pass the results to Webpack. Example Webpack configuration:
module.exports = {
  entry: './src/index.ts',
  module: {
    rules: [
      {
        test: /\.tsx?$/,
        use: 'ts-loader',
        exclude: /node_modules/,
      },
    ],
  },
  resolve: {
    extensions: ['.tsx', '.ts', '.js'],
  },
  output: {
    filename: 'bundle.js',
    path: path.resolve(__dirname, 'dist'),
  },
};
This setup handles both type checking and code generation. ts-loader leverages the TypeScript compiler, configured through tsconfig.json, to perform type checking during the build process. Code generation occurs as TypeScript files are compiled into JavaScript, ready for bundling by Webpack.
15. Describe how to use webpack to create a library or component that can be published to npm.
To create a library or component for npm using webpack, you'll need to configure webpack to output a library bundle. This involves setting the output.library and output.libraryTarget options in your webpack config. output.library specifies the name your library will be exposed as, and output.libraryTarget determines how the library is exposed (e.g., 'umd', 'commonjs2', 'window').
Here's a basic example:
module.exports = {
  entry: './src/index.js',
  output: {
    path: path.resolve(__dirname, 'dist'),
    filename: 'my-library.js',
    library: 'MyLibrary',
    libraryTarget: 'umd',
    globalObject: 'this'
  },
  // ... other webpack configurations
};
After configuring webpack, build your library using webpack. Then, create a package.json file that describes your library. Finally, use npm publish to publish your library to npm. Remember to add relevant keywords to your package.json file to improve discoverability.
16. How can you integrate webpack with a CI/CD pipeline to automate the build and deployment process?
Integrating Webpack with a CI/CD pipeline automates building and deploying your application. The CI/CD pipeline typically involves steps like code checkout, dependency installation, building the application using webpack, testing, and deployment.
To integrate webpack, you'll typically configure your CI/CD tool (e.g., Jenkins, GitLab CI, GitHub Actions) to execute webpack commands. Specifically, the CI/CD configuration file will include steps to:
- Install Node.js and npm (or yarn/pnpm).
- Run
npm installto install project dependencies. - Execute the webpack build command (e.g.,
npm run build,yarn build) as defined in yourpackage.jsonfile. - Potentially run tests (e.g.,
npm test). - Deploy the resulting bundle to your target environment (e.g., AWS S3, a web server).
17. What are some common webpack performance bottlenecks and how can you address them?
Common webpack performance bottlenecks include slow builds due to large bundle sizes, inefficient code splitting, and unoptimized assets. To address these, consider the following:
Code Splitting: Use
import()syntax or SplitChunksPlugin to break down large bundles into smaller, cacheable chunks.Lazy Loading: Load modules only when needed using dynamic imports to reduce initial load time.
Tree Shaking: Eliminate dead code by using
mode: 'production'and ensuring your code is ES modules.Minification and Compression: Use plugins like
TerserPlugin(for JavaScript) and optimize images/other assets. Enable gzip compression on your server.Caching: Leverage browser caching by using content hashes in filenames to avoid unnecessary downloads.
Use faster module resolution: Set
resolve.modulesandresolve.extensionscorrectly. Consider usingresolve.symlinks: false.Profile your build: Use webpack's
--profileand--jsonflags to analyze build times and identify slow loaders/plugins. Also, consider using tools likewebpack-bundle-analyzerto visualize bundle contents.Optimize Loaders: Use specific include/exclude options to limit the scope of loaders and ensure they're only applied to relevant files. For example, use:
module: {
  rules: [
    {
      test: /\.js$/,
      include: path.resolve(__dirname, 'src'),
      use: 'babel-loader'
    }
  ]
}
Upgrade Webpack and Dependencies: Ensure you're using the latest versions of webpack and its plugins, as they often contain performance improvements. Consider tools like
esbuildorswcfor faster transpilation.
18. Explain how to use webpack's 'externals' configuration option and when it would be beneficial.
Webpack's externals configuration option allows you to exclude certain modules from your webpack bundle. Instead of including these modules in the bundle, webpack creates a dependency that looks for them in the user's environment at runtime. This is useful when you want to use libraries that are already available in the user's environment, such as those provided by a CDN or included in a web page's <script> tags. For example:
module.exports = {
  //...
  externals: {
    jquery: 'jQuery'
  }
};
This configuration tells webpack that when the code requires jquery, it should look for the global variable jQuery instead of bundling jQuery into the output. This is beneficial to reduce bundle size, avoid duplicated dependencies, and leverage existing libraries.
19. Describe how to implement error logging and reporting in webpack to track build issues.
Webpack's built-in stats object provides detailed information about the build process, including errors and warnings. We can leverage this for error logging. A simple approach is to tap into Webpack's compilation hooks, specifically done, to inspect the stats. If stats.hasErrors() is true, we can extract the errors using stats.toJson().errors and log them to a file or external service. For reporting, consider integrating with tools like Sentry or Bugsnag to capture and aggregate build errors, enabling proactive issue resolution.
Alternatively, use Webpack plugins like webpack-notifier for immediate desktop notifications on build failures or create a custom plugin to format and send error reports to a chosen platform. Error logs should include relevant details like file paths, line numbers, and error messages. Use a package like winston for configurable and robust logging, which allows for various output targets, log levels, and formatting options. Consider a solution like:
// webpack.config.js
const {WebpackPluginServe: Serve} = require('webpack-plugin-serve');
const {Compiler} = require('webpack');
class ErrorReportingPlugin {
  /** @param {{hookName?: string, cb: function(Compiler, unknown): void}} options */
  apply(compiler) {
    compiler.hooks.done.tap('ErrorReportingPlugin', (stats) => {
      if (stats.hasErrors()) {
        const errors = stats.toJson().errors;
        console.error('Webpack build errors:', errors);
        // Send errors to a logging service or file
      }
    });
  }
}

module.exports = {
  //...
  plugins: [ new ErrorReportingPlugin()]
};
20. How can you configure webpack to use different loaders and plugins based on the target browser or environment?
Webpack can be configured to use different loaders and plugins based on the target browser or environment using several techniques. One common approach is to use environment variables in your webpack.config.js file. You can access these variables using process.env.NODE_ENV or custom environment variables you define. Based on the value of these variables, you can conditionally include different loaders or plugins.
Another approach involves using multiple webpack configuration files, each tailored to a specific target or environment. You can then use a script or command-line argument to specify which configuration file webpack should use. This enables you to maintain separate configurations for development, production, or specific browser targets. Also, you can conditionally load modules using dynamic imports based on environment variables inside your code.
21. Explain how you can use webpack to optimize images, including compression, resizing, and format conversion.
Webpack can optimize images through various loaders and plugins. For compression, you can use image-webpack-loader, which applies different optimization techniques based on the image type (e.g., lossless compression for PNG, lossy for JPEG). Resizing can be handled using responsive-loader, which generates multiple sizes of an image and helps implement responsive images. Format conversion (e.g., to WebP) can be done using image-webpack-loader in conjunction with specific image processing libraries or through plugins like imagemin-webpack-plugin, configured with appropriate converters. The general workflow is:
- Install necessary loaders/plugins (e.g.,
npm install image-webpack-loader responsive-loader --save-dev). - Configure the
webpack.config.jsfile, adding rules that target image files (e.g.,.png,.jpg,.svg) and apply the chosen loaders. These loaders will then process the images during the build process, optimizing them as specified.
Expert Webpack interview questions
1. How does Webpack handle circular dependencies, and what strategies can prevent them from breaking your build?
Webpack detects circular dependencies during the bundling process. When it encounters one, it issues a warning, but by default, it doesn't halt the build. Instead, it attempts to resolve the dependencies as best as it can, which can sometimes lead to unexpected runtime errors or incorrect behavior.
To prevent circular dependencies from breaking your build, consider these strategies:
- Refactor code: Restructure your modules to eliminate the circular references. This often involves moving shared functionality into a separate module that both modules can depend on.
- Use
webpack.CircularDependencyPlugin: This plugin will throw an error when a circular dependency is detected, allowing you to catch and fix them during development, rather than at runtime. - Lazy loading: For non-critical dependencies, consider using dynamic imports (
import()) to load modules only when they are needed. This can break the circular dependency cycle. Also consider using techniques likemodule.exportsorexports.fooinstead of the ES6 module formatimport/exportas they handle circular dependencies better at runtime. - Dependency Injection: Implementing dependency injection or inversion of control can reduce tight coupling between modules.
2. Can you describe the process of creating a custom Webpack plugin from scratch?
Creating a custom Webpack plugin involves defining a JavaScript class with an apply method. This apply method is the entry point for the plugin, receiving the Webpack compiler object as an argument. Inside apply, you tap into various Webpack lifecycle hooks (e.g., emit, done, compilation) using compiler.hooks.<hookName>.tap('YourPluginName', (params) => { ... });. These hooks allow you to modify the compilation process at specific stages.
The plugin logic is implemented within the callback function provided to tap. This might involve modifying the webpack's compilation object like manipulating assets, modifying the module graph, or emitting new files. Finally, remember to add your plugin instance to the plugins array in your webpack.config.js file to enable it. For example:
// webpack.config.js
module.exports = {
  // ...
  plugins: [
    new YourCustomPlugin({options: 'value'})
  ]
}
3. Explain how to optimize Webpack's build performance in a large, multi-page application.
To optimize Webpack's build performance in a large, multi-page application, several strategies can be employed. First, use code splitting to break the application into smaller chunks, enabling parallel loading and reducing initial load time. Webpack's SplitChunksPlugin can be configured to automatically split vendor and application code. Also, leverage caching mechanisms like cache-loader and hard-source-webpack-plugin to cache the results of expensive operations, significantly speeding up subsequent builds.
Furthermore, minimize the use of loaders and plugins as each adds to the build time. Optimize images with tools like image-webpack-loader. Enable parallel processing with thread-loader for computationally intensive tasks. Employ module federation to share code between independently built applications and reduce overall build size. Regularly analyze the build output with webpack-bundle-analyzer to identify and address performance bottlenecks.
4. How can you use Webpack to create multiple bundles with shared dependencies, and why would you do that?
Webpack can create multiple bundles with shared dependencies using techniques like SplitChunksPlugin. This plugin identifies common modules across different entry points and extracts them into separate 'chunk' files. These chunks can then be shared between multiple bundles, avoiding duplication of code.
Reasons for doing this include:
- Improved caching: Browsers can cache shared chunks, leading to faster subsequent page loads.
- Reduced bundle size: Avoids duplicated code in multiple bundles, reducing the overall download size.
- Better code organization: Modularizes code, making it easier to maintain and update.
Here is a sample Webpack configuration, showing how SplitChunksPlugin can be used:
module.exports = {
  //...
  optimization: {
    splitChunks: {
      chunks: 'all',
      cacheGroups: {
        vendor: {
          test: /[\/]node_modules[\/]/,
          name: 'vendors',
          chunks: 'all',
        },
      },
    },
  },
};
5. What are the trade-offs between using Webpack's 'mode' option versus manually configuring environment-specific settings?
Webpack's mode option (development, production, none) offers a simplified, high-level configuration. It automatically applies a set of reasonable defaults for the specified environment, like enabling optimizations in production or source maps and hot reloading in development. This reduces boilerplate and gets you up and running quickly. However, the flexibility is limited.
Manually configuring environment-specific settings (e.g., using webpack.DefinePlugin with different variables based on process.env.NODE_ENV) grants much more control. You can precisely tailor every aspect of the build process to meet specific requirements. This becomes necessary when the defaults provided by mode are insufficient or conflict with your needs. The trade-off is increased complexity and the need to manage environment variables and conditional logic in your webpack configuration.
6. Describe how you would implement code splitting based on user behavior or route changes in a single-page application using Webpack.
To implement code splitting based on user behavior or route changes in a single-page application using Webpack, I'd leverage dynamic imports. For route-based splitting, I'd configure my router (e.g., React Router) to load components using React.lazy() and Suspense. React.lazy() lets you render a dynamic import as a regular component. The Suspense component is used to display a fallback UI (like a loading indicator) while the dynamic module is being loaded.
For user behavior, I'd use dynamic imports within event handlers or based on application state. For instance, when a user clicks a specific button or navigates to a rarely used feature, I'd use import() to load the relevant code chunk. I'd also use Webpack's optimization.splitChunks configuration to extract common dependencies into separate chunks, ensuring efficient caching and reducing initial load time. This helps to split vendor and app code effectively, leading to smaller bundle sizes.
7. How do you configure Webpack to work with different versions of the same library in different parts of your application?
To configure Webpack to work with different versions of the same library, you can leverage techniques like alias and Module Federation. alias allows you to map import paths to specific versions of the library. For instance, in webpack.config.js, you can define:
resolve: {
  alias: {
    'old-library': path.resolve(__dirname, 'node_modules/old-library'),
    'new-library': path.resolve(__dirname, 'node_modules/new-library')
  }
}
This allows you to use import from 'old-library' and import from 'new-library' to import the appropriate versions. Module Federation is a more robust and complex solution, particularly suited for microfrontend architectures. It allows different parts of your application to be built and deployed independently, sharing dependencies at runtime. You can expose certain modules using Module Federation, and configure them to use different versions of the library.
8. Explain the process of integrating Webpack with a backend framework like Django or Ruby on Rails.
Integrating Webpack with backend frameworks like Django or Rails typically involves configuring Webpack to output the bundled assets to a directory that the backend framework can serve as static files. The key is to decouple the frontend build process (handled by Webpack) from the backend server's responsibility of serving static assets. In Django, you would configure STATICFILES_DIRS to include the output directory of Webpack. In Rails, you'd place the output files in the public directory, usually within public/packs.
Specifically, during development you might use a Webpack development server alongside your backend, using a proxy to route API requests to the backend. For production, a common pattern is to have Webpack build the assets and then configure your web server (e.g., Nginx, Apache) to serve these optimized, bundled assets directly. For example a typical webpack output in django would be generated in a directory such as /static/webpack_bundles/ and in settings.py in Django, STATICFILES_DIRS will contain the same. The Django template will then load these assets, e.g. {% load static %} and <script src="{% static 'webpack_bundles/bundle.js' %}"></script>.
9. How can you use Webpack to analyze your bundle size and identify opportunities for optimization?
Webpack provides several tools to analyze bundle size. The most common is webpack-bundle-analyzer. You install it as a dev dependency (npm install --save-dev webpack-bundle-analyzer) and configure it in your webpack.config.js. After running your build, it generates an interactive treemap visualization showing the size of each module in your bundle, helping you identify large dependencies or duplicated code.
Another method is using webpack --profile --json > stats.json and then analyzing the stats.json file with tools like webpack-visualizer or online analyzers. These tools help pinpoint modules contributing most to the bundle size, allowing you to optimize by code splitting, lazy loading, or removing unnecessary dependencies.
10. Describe how you would set up Webpack to automatically generate and update service worker files for offline support.
To automatically generate and update service worker files with Webpack for offline support, I'd use the webpack-pwa-manifest and workbox-webpack-plugin plugins. webpack-pwa-manifest generates the manifest.json file, which is crucial for PWA installation. workbox-webpack-plugin then handles the service worker generation and management. Configure GenerateSW option to precache static assets and manage runtime caching based on defined strategies. The Webpack configuration would include these plugins, specifying paths to assets, cache names, and runtime caching rules. Webpack, upon building, will generate/update the service worker based on these configurations.
Here's a basic outline:
- Install dependencies:
npm install workbox-webpack-plugin webpack-pwa-manifest --save-dev - Configure plugins in
webpack.config.js:
const { GenerateSW } = require('workbox-webpack-plugin');
const WebpackPwaManifest = require('webpack-pwa-manifest')

module.exports = {
  //...
  plugins: [
    new WebpackPwaManifest({
        name: 'My Awesome PWA',
        short_name: 'PWA',
        description: 'My Progressive Web App',
        background_color: '#ffffff',
        crossorigin: 'use-credentials', //can be null, use-credentials or anonymous
        icons: [
          {
            src: path.resolve('src/assets/icon.png'),
            sizes: [96, 128, 192, 256, 384, 512]
          }
        ]
      }),
    new GenerateSW({
      // these options encourage the ServiceWorkers to get in there and start fetching assets as soon as possible.
      swDest: 'service-worker.js',
      clientsClaim: true,
      skipWaiting: true,
      // Define runtime caching rules here.
      runtimeCaching: [{
        urlPattern: /^https?.*/,
        handler: 'NetworkFirst',
        networkTimeoutSeconds: 5,
        options: {
          cacheName: 'https-calls',
          expiration: {
            maxEntries: 150,
            maxAgeSeconds: 30 * 24 * 60 * 60, // 30 days
          },
          cacheableResponse: {
            statuses: [0, 200],
          },
        },
      }]
    })
  ]
};
- Register service worker in your main JavaScript file.
11. How would you handle different image optimization strategies for various environments using Webpack?
I would use Webpack's environment configurations along with different image-loader configurations based on the target environment. For example, I might use webpack.DefinePlugin to set an environment variable like process.env.NODE_ENV, and then use that variable in my webpack.config.js to conditionally apply different image optimization settings. For development, I might prioritize faster builds with minimal optimization or even skip optimization entirely. For production, I'd use aggressive compression and resizing with loaders like image-webpack-loader and potentially responsive-loader to generate multiple image sizes for different screen resolutions.
Specifically, I would configure image-webpack-loader with different optimization levels for each environment. Production would use higher compression ratios and potentially more aggressive transformations (e.g., using mozjpeg for better JPEG compression) while development would focus on speed. Conditional configuration can be achieved using simple if/else or ternary operators:
module.exports = (env) => {
 const isProduction = env.production;

 const imageLoaderOptions = isProduction ? {
 mozjpeg: { progressive: true, quality: 75 }
 } : {
 bypassOnDebug: true, // webpack@1.x
 disable: true // webpack@2.x and newer
 };

 return {
 module: {
  rules: [{
   test: /\.(png|jpe?g|gif|svg)$/i,
   use: [
   'file-loader',
   {
    loader: 'image-webpack-loader',
    options: imageLoaderOptions
   },
  ],
  },
 ]
 }
 }
};
12. Can you explain how to debug Webpack configuration issues effectively?
Debugging Webpack configuration often involves a systematic approach. First, validate your webpack.config.js file. Use the webpack --config webpack.config.js --analyze command to visualize the bundle and identify potential size issues or misconfigurations. Inspect the output for errors or warnings. Common issues involve incorrect loaders, plugins, or path configurations. Carefully examine the error messages – they often provide clues about the source of the problem.
Next, use console.log statements in your webpack.config.js to inspect variables and the values of loaders/plugins, or utilize a debugger (like Node.js inspector) to step through the configuration file execution and understand how the configuration is being interpreted. Additionally, simplify the configuration by commenting out sections and incrementally enabling them to isolate the problematic area. If you're using environment variables, double-check that they're being set correctly and accessible within the webpack configuration. Ensure that node_modules are correctly installed and that there are no version conflicts between webpack and its dependencies.
13. How do you integrate Webpack with a CI/CD pipeline for automated builds and deployments?
To integrate Webpack with a CI/CD pipeline, you typically configure your CI/CD tool (e.g., Jenkins, GitLab CI, GitHub Actions) to execute Webpack commands during the build stage. This usually involves:
Installing Node.js and npm/yarn: The CI/CD environment needs Node.js and a package manager to install Webpack and its dependencies.
npm installoryarn installare commonly used.Running Webpack: Execute the Webpack build command (e.g.,
npm run build,yarn build, or directlywebpack --config webpack.config.js) in the CI/CD pipeline's build script. This generates the production-ready bundles.Caching dependencies: To speed up builds, cache the
node_modulesdirectory between pipeline runs.Storing artifacts: The generated bundles (e.g., in the
distfolder) are stored as artifacts of the build. These artifacts are then deployed to the target environment in the deployment stage. An example script section in.gitlab-ci.ymlmight look like this:build: stage: build image: node:latest cache: paths: - node_modules/ script: - npm install - npm run build artifacts: paths: - dist/
14. Explain how you can use Webpack's module federation to share code between completely separate applications.
Webpack's Module Federation allows separately compiled and deployed applications to share code at runtime. One application is configured as a host, exposing certain modules. Other applications are configured as remotes, consuming these exposed modules.
To achieve this, in the host application's webpack.config.js, we define which modules to expose using the exposes configuration within the ModuleFederationPlugin. In the remote application's webpack.config.js, we define which hosts to consume modules from, specifying the host URL and exposed module names using the remotes configuration within the ModuleFederationPlugin. At runtime, the remote application dynamically fetches the exposed modules from the host application, enabling code sharing across application boundaries.
For example:
Host (app1):
// webpack.config.js
plugins: [
  new ModuleFederationPlugin({
    name: 'app1',
    exposes: {
      './Button': './src/Button',
    },
  }),
]
Remote (app2):
// webpack.config.js
plugins: [
  new ModuleFederationPlugin({
    name: 'app2',
    remotes: {
      app1: 'app1@http://localhost:3000/remoteEntry.js',
    },
  }),
]
Then the app2 can import the Button component from app1 at runtime.
15. How would you implement a custom file loader in Webpack to handle a unique file type?
To implement a custom file loader in Webpack for a unique file type, you need to create a module that exports a function. This function takes the file content as input and transforms it into a JavaScript module. The key steps are:
- Create a loader module: This module will contain the logic to process your custom file type. It typically involves parsing the file content and converting it into JavaScript code that Webpack can understand.
- Configure Webpack: In your
webpack.config.js, add a new rule in themodule.rulesarray. This rule should specify atestproperty (a regular expression matching your file extension) and auseproperty that points to your custom loader module. For example:module.exports = { //... module: { rules: [ { test: /\.myext$/, use: [ { loader: path.resolve('path/to/my-custom-loader.js') } ] } ] } }; - Use the file in your project: Import the file as you would any other module. Webpack will use your custom loader to process it.
16. Describe how to set up Webpack to watch for changes in multiple entry points and rebuild only the necessary bundles.
Webpack can watch for changes in multiple entry points and rebuild only the necessary bundles through its configuration. The entry property in webpack.config.js should be an object where keys are bundle names and values are paths to entry files. To enable watching, set watch: true in the configuration or use the --watch flag when running Webpack from the command line. Webpack's internal mechanisms, combined with the configuration, automatically detect changes in the specified entry points (and their dependencies) and trigger rebuilds of only the affected bundles.
Specifically, Webpack builds a dependency graph. When a file changes, it traverses the graph to identify which bundles include the modified file (or its dependencies) and rebuilds only those bundles. Using code splitting techniques (e.g., dynamic imports, SplitChunksPlugin) further isolates changes, allowing Webpack to rebuild even smaller portions of your application. Webpack's caching mechanism and optimized build processes further reduce rebuild times.
17. Explain how you can use Webpack to create a library or component that can be used in different JavaScript environments (e.g., browser, Node.js).
Webpack can bundle your library or component into various formats suitable for different JavaScript environments. To target browsers, use the umd (Universal Module Definition) library target. This creates a bundle that can be loaded directly via a <script> tag, or used as an AMD or CommonJS module.
For Node.js, target commonjs2. This produces a bundle that exports your library using the module.exports syntax, which Node.js understands. In your webpack.config.js, set the output.libraryTarget option accordingly, for example:
module.exports = {
  //...
  output: {
    path: path.resolve(__dirname, 'dist'),
    filename: 'my-library.js',
    library: 'MyLibrary',
    libraryTarget: 'umd',
  },
};
18. How can you leverage Webpack's caching mechanisms to improve build times and browser performance?
Webpack offers several caching mechanisms. For build times, use persistent caching with cache: { type: 'filesystem' } in your webpack config. This stores compiled modules in the file system, so subsequent builds can reuse them instead of recompiling from scratch. Module federation also helps improve build times by enabling you to share dependencies between different webpack builds or applications, reducing the overall compilation effort.
For browser performance, leverage long-term caching via content hashing in your output filenames. For example, output: { filename: '[name].[contenthash].js' }. This ensures that when a file's content changes, its filename also changes, forcing the browser to download the new version. Configure your server to set appropriate Cache-Control headers for these files to maximize caching benefits. Also, consider code splitting (e.g., using dynamic import()) to create smaller bundles that can be cached independently, which reduces the amount of code a browser needs to download on initial load and subsequent visits.
19. Describe a scenario where you would use Webpack's 'externals' option, and explain how it works.
A common scenario for using Webpack's externals option is when you're building a library or application that will be used in an environment where certain dependencies are already provided. For example, if you're creating a React component library that you expect to be used in projects that already have React and ReactDOM loaded globally, you wouldn't want to bundle those libraries into your component library.
The externals option allows you to tell Webpack to treat certain imports as external dependencies. Webpack will not include those libraries in your bundle. Instead, it will assume that these libraries will be available at runtime. You configure it using an object where keys are the module import paths and values are the global variable names. For instance:
module.exports = {
  //...
  externals: {
    'react': 'React',
    'react-dom': 'ReactDOM'
  }
};
With this configuration, when you import react or react-dom in your code, Webpack will not bundle these libraries. Instead, it expects React and ReactDOM to be available globally in the browser.
20. How can you use Webpack to create different builds for different browsers or devices, taking advantage of modern features where available?
Webpack can be used to create different builds targeting various browsers or devices using a combination of techniques. One common approach is to leverage babel-loader with the @babel/preset-env preset. This preset allows you to specify target browsers using a browserslist query in your package.json or .browserslistrc file. Based on this query, Babel will transpile your code to the lowest common denominator of JavaScript syntax supported by the targeted browsers.
Another strategy is to use dynamic imports and feature detection. You can conditionally load polyfills or different versions of your code based on the browser's capabilities. Webpack's splitChunks optimization can then be used to create separate chunks for modern and legacy code. This allows modern browsers to receive smaller, more efficient bundles while older browsers receive polyfilled or transpiled code. Example:
if ('fetch' in window) {
  // Use native fetch
} else {
  // Load polyfill
  require('whatwg-fetch');
}
21. Explain how to configure Webpack to work with TypeScript and generate declaration files for your library.
To configure Webpack for TypeScript and generate declaration files, you'll need the following:
First, install necessary packages: npm install --save-dev typescript ts-loader webpack webpack-cli. Then, configure webpack.config.js:
module.exports = {
  entry: './src/index.ts',
  module: {
    rules: [
      {
        test: /\.tsx?$/,
        use: 'ts-loader',
        exclude: /node_modules/,
      },
    ],
  },
  resolve: {
    extensions: ['.tsx', '.ts', '.js'],
  },
  output: {
    filename: 'bundle.js',
    path: path.resolve(__dirname, 'dist'),
  },
};
Create a tsconfig.json file at the root to specify the project's Typescript options and to generate the declaration files ensure that you include "declaration": true in the compilerOptions like so:
{
  "compilerOptions": {
    "declaration": true,
    "module": "esnext",
    "target": "es5",
    "jsx": "react",
    "esModuleInterop": true,
    "outDir": "./dist",
    "strict": true
  },
  "include": ["src/**/*"]
}
This setup uses ts-loader to transpile TypeScript and webpack to bundle your code. Setting declaration: true in tsconfig.json alongside the other settings (like specifying a directory in outDir) ensures that declaration files are generated when the project is compiled, typically in the dist folder along with the Javascript files.
22. How do you ensure that your Webpack configuration is maintainable and scalable as your project grows?
To ensure Webpack configuration maintainability and scalability, I use several strategies. First, I split the configuration into multiple files based on environment (development, production) or functionality (loaders, plugins). This keeps individual files smaller and easier to understand.
Second, I leverage webpack-merge to combine common configurations with environment-specific overrides. Third, I use npm or yarn scripts to pass environment variables to Webpack, avoiding hardcoding values in the config. Fourth, I define aliases for commonly used paths. For example:
resolve: {
 alias: {
  '@components': path.resolve(__dirname, 'src/components/'),
  '@utils': path.resolve(__dirname, 'src/utils/')
 }
}
This allows for easier refactoring. Finally, I regularly review and refactor the configuration as the project evolves, removing unused code and improving clarity.
23. Describe the challenges of migrating from an older Webpack version to the latest one, and how you would approach it.
Migrating to a newer Webpack version often presents challenges due to breaking changes in configuration, plugin APIs, and module handling. Common issues include: outdated loaders/plugins requiring updates or replacements, deprecated options causing build failures, and changes in default behavior affecting output. Babel configurations might also need adjustments to align with the new Webpack version's module handling.
To approach this, I'd start by thoroughly reviewing the official Webpack migration guide for the specific versions involved. I'd then incrementally update Webpack and related dependencies (loaders, plugins) one at a time, running the build process after each update to identify and address compatibility issues. A good test suite is crucial for verifying that the application still functions correctly after the migration. Utilizing tools like npx webpack-cli migrate can help automate some aspects. Finally, carefully review and update the webpack.config.js file to align with the latest syntax and options.
24. How can you use Webpack to implement hot module replacement (HMR) in a React application?
To implement Hot Module Replacement (HMR) in a React application using Webpack, you'll need to configure both Webpack and your React application. First, ensure you have webpack, webpack-dev-server, and react-hot-loader installed. Update your webpack.config.js to include webpack.HotModuleReplacementPlugin. In the devServer configuration, set hot: true. Finally, in your React application's entry point (e.g., index.js), use react-hot-loader/patch at the very top, and wrap your root component with the hot function from react-hot-loader. Here's a code example for your webpack config:
// webpack.config.js
const webpack = require('webpack');
module.exports = {
  // ... other configurations
  devServer: {
    hot: true,
  },
  plugins: [
    new webpack.HotModuleReplacementPlugin(),
  ],
}
25. Explain how you would configure Webpack to handle environment variables securely and prevent them from being exposed in the client-side code.
To securely handle environment variables in Webpack and prevent their exposure in client-side code, I would use the dotenv package along with webpack.DefinePlugin. First, install dotenv as a development dependency: npm install dotenv --save-dev. Then, in your webpack.config.js, use dotenv to load environment variables from a .env file into process.env. Next, utilize webpack.DefinePlugin to selectively expose only the necessary environment variables to your application. For example:
const webpack = require('webpack');
const dotenv = require('dotenv').config({ path: __dirname + '/.env' });

module.exports = {
  //...
  plugins: [
    new webpack.DefinePlugin({
      'process.env.API_URL': JSON.stringify(process.env.API_URL),
      // Expose other necessary environment variables similarly
    })
  ]
};
By stringifying the values and only exposing specific variables, you prevent accidental exposure of sensitive information. Ensure your .env file is added to .gitignore to avoid committing sensitive data to your repository. This ensures that only the specified, non-sensitive variables are available in the client-side code, while sensitive credentials remain secure on the server.
26. Describe the process of using Webpack to pre-render a single-page application for improved SEO and initial load time.
Webpack can pre-render a single-page application (SPA) by executing the application's code during the build process and saving the resulting HTML to static files. This improves SEO because search engine crawlers can easily index the pre-rendered content. It also improves initial load time because the browser receives fully rendered HTML instead of having to wait for JavaScript to download and execute. A common approach involves using a headless browser like Puppeteer or a library like react-snap within a webpack plugin. This plugin launches the browser, navigates to the SPA's routes, waits for the content to load, and then serializes the DOM to HTML files. These HTML files are then served instead of the blank SPA shell on initial requests.
The basic steps are:
- Install necessary packages:
npm install --save-dev webpack puppeteerornpm install --save-dev react-snap - Configure Webpack to use a plugin that handles pre-rendering. This plugin will use the headless browser to visit each route in your application.
- The plugin captures the rendered HTML for each route and saves it to corresponding HTML files in the output directory.
- The web server serves these pre-rendered HTML files for initial requests, and the SPA's JavaScript takes over for subsequent interactions.
Webpack MCQ
Question 1.
Which of the following configurations correctly sets the entry point as src/index.js and the output file as dist/bundle.js using the 'path' module?
Options:
Question 2.
What is the primary purpose of loaders in Webpack?
Options:
Question 3.
What is the primary difference between Webpack loaders and Webpack plugins?
Options:
Question 4.
What is the primary benefit of code splitting in Webpack?
Options:
Question 5.
In Webpack, what is a 'chunk'?
Options:
Question 6.
In Webpack, what is 'Tree Shaking' and what problem does it primarily solve?
options:
Options:
Question 7.
What is the primary purpose of a module bundler like Webpack?
Options:
Options:
Question 8.
What is module federation in Webpack, and what is a primary advantage it offers?
Options:
Question 9.
What is the primary goal of optimization in Webpack?
Options:
Question 10.
What is the primary purpose of the resolve configuration option in Webpack?
Options:
Question 11.
What is the purpose of the mode configuration option in Webpack?
Options:
Options:
Question 12.
What is the primary purpose of the devtool configuration option in Webpack?
Options:
Question 13.
What is the primary purpose of the target configuration option in Webpack?
Options:
Question 14.
What is the primary purpose of the webpack-dev-server?
Options:
Question 15.
What is the purpose of the context configuration option in Webpack?
Options:
Question 16.
What is Hot Module Replacement (HMR) in Webpack, and what is its primary benefit?
Options:
Question 17.
What is the primary use case for the externals configuration option in Webpack?
options:
Options:
Question 18.
Which of the following is a key benefit of using Webpack in a modern web development workflow?
options:
Options:
Question 19.
What is the primary purpose of the watch configuration option in Webpack?
Options:
Question 20.
What is the primary purpose of the stats configuration in Webpack?
Options:
Question 21.
In a Webpack configuration, what is the key difference between the output.filename and output.path options?
Options:
Question 22.
What is the primary purpose of Webpack's optimization.splitChunks configuration option?
options:
Options:
Question 23.
In Webpack, what is the primary purpose of the module.rules configuration option?
Options:
Question 24.
Which of the following BEST describes the role of Webpack's dependency graph?
Options:
Question 25.
In what order does Webpack generally apply loaders and plugins to your project?
Options:
Which Webpack skills should you evaluate during the interview phase?
Assessing a candidate's Webpack expertise in a single interview isn't easy, but focusing on key skills can help you identify strong candidates. Prioritizing these core areas ensures you're evaluating the most relevant competencies. This approach offers the best chance of gauging a candidate's potential impact on your team.
Webpack Configuration
Gauge their configuration expertise using an assessment that covers file structure, loaders, and plugins. Our JavaScript test can help you assess their understanding of these core concepts.
To assess this skill directly, present a scenario where the candidate needs to configure Webpack for a specific task.
Describe how you would configure Webpack to use different loaders for different file types (e.g., CSS, JavaScript, images). What considerations would you make for production vs. development environments?
Look for a clear explanation of how loaders are chained and how configurations can be tailored for different environments. Bonus points if they mention environment variables or separate configuration files.
Module Bundling and Optimization
You can quickly evaluate a candidate's module bundling and optimization skills using targeted MCQs. Adaface's Frontend test can help you filter candidates effectively based on these key skills.
Present a scenario where the candidate needs to optimize a Webpack configuration for a large application.
What are some strategies you would use to optimize the bundle size of a Webpack project? Explain how code splitting and tree shaking contribute to this optimization.
Look for answers that include code splitting with dynamic imports, tree shaking to remove dead code, and minifying/compressing output files. Knowledge of tools like TerserPlugin or optimization plugins is a plus.
Webpack Loaders and Plugins
You can efficiently assess their knowledge of loaders and plugins with well-designed MCQs. You might find similar questions on the JavaScript test.
To directly assess this skill, ask the candidate about specific loaders and plugins they've used and how they configured them.
Describe your experience with Webpack loaders and plugins. Can you give an example of a time when you used a custom loader or plugin to solve a specific problem?
Look for a clear explanation of how loaders transform files and how plugins hook into the build process. Real-world examples of custom loaders or plugins demonstrate a deeper understanding.
Tips for Using Webpack Interview Questions
Now that you're equipped with a range of Webpack interview questions, let's discuss how to use them effectively. Here are some tips to help you maximize your candidate evaluation process before you put your new found knowledge to use.
1. Leverage Skills Tests to Screen Candidates
Before diving into interviews, using skills tests can significantly streamline your candidate selection process. These tests provide an objective measure of a candidate's proficiency, ensuring you focus your interview time on the most promising individuals.
For front-end roles involving Webpack, consider using Adaface's JavaScript online test, Typescript online test, or HTML/CSS online test to assess their practical skills. You can also evaluate their framework knowledge with ReactJS or VueJS assessment. This targeted approach helps filter candidates based on demonstrable skills.
Skills tests allow you to quickly identify candidates who possess the necessary technical abilities, saving valuable time and resources in the interview phase. By focusing on candidates who perform well on these tests, you ensure that your interviews are more productive and focused on deeper discussions.
2. Strategically Outline Your Interview Questions
Time is a precious commodity during interviews, so it's important to select the right questions. A well-structured outline ensures you cover the most important aspects of a candidate's Webpack knowledge and experience.
Consider supplementing your Webpack questions with those from our other interview question lists like JavaScript interview questions. These will help you holistically assess the candidate's overall capabilities.
By focusing on key areas and using a strategic set of questions, you can effectively evaluate candidates on the most relevant subskills and aspects. This approach will lead to more informed hiring decisions.
3. Don't Underestimate The Power of Follow-Up Questions
Simply asking pre-defined questions isn't always enough to gauge a candidate's true depth of knowledge. Asking well-crafted follow-up questions is key to uncovering a candidate's real understanding and experience.
For instance, if a candidate explains a Webpack configuration, ask them to elaborate on the trade-offs of using a particular plugin or loader. This helps determine if they have a surface-level understanding or a deeper grasp of the concepts and the impact of their choices.
Hire Top Webpack Talent with Skills Tests
If you're aiming to bring on board developers with strong Webpack skills, verifying their proficiency is key. Using skills tests is the most accurate way to assess their capabilities. Explore Adaface's range of assessments, including our JavaScript online test and ReactJS test, to identify candidates who truly understand Webpack.
Once you've used our assessments to identify top performers, you can confidently move forward with interview rounds. To get started, you can sign up for Adaface and start evaluating candidates today!
JavaScript Online Test
40 mins | 8 MCQs and 1 Coding Question
The JavaScript test uses scenario-based MCQs to evaluate candidates on JavaScript fundamentals (ES5, ES6), ability to manipulate HTML DOM and Asynchronous programming with Ajax, Fetch API, Promises & Async / Await. The test includes coding questions to evaluate hands-on JavaScript programming skills.
Try JavaScript Online Test
Download Webpack interview questions template in multiple formats
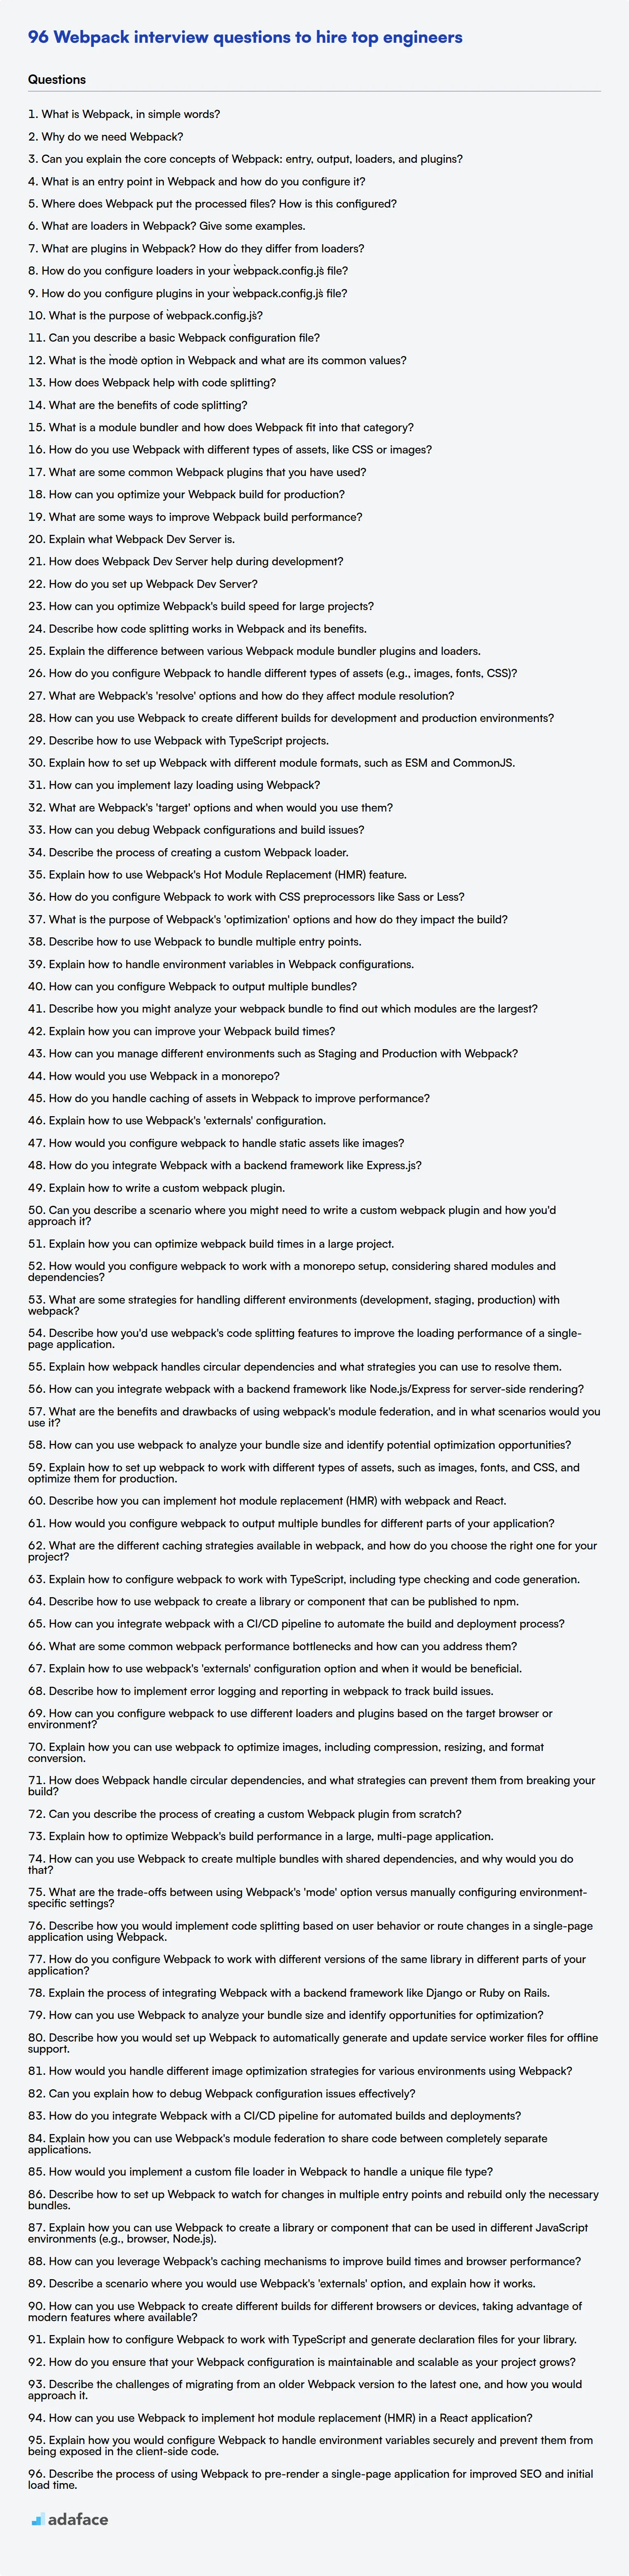
Webpack Interview Questions FAQs
What are some basic Webpack interview questions?
Basic questions cover Webpack's core concepts like entry points, output, loaders, and plugins. These help assess a candidate's foundational understanding of Webpack.
What are some intermediate Webpack interview questions?
Intermediate questions explore configuration options, optimization techniques, and common use cases. They gauge a candidate's ability to apply Webpack in practical scenarios.
What are some advanced Webpack interview questions?
Advanced questions cover topics like custom loaders and plugins, code splitting, and performance tuning. These evaluate a candidate's in-depth knowledge and problem-solving skills.
What are some expert Webpack interview questions?
Expert questions focus on complex configurations, debugging strategies, and contributions to the Webpack ecosystem. These determine a candidate's mastery and experience with Webpack.
How can skills tests help in hiring Webpack talent?
Skills tests provide an objective assessment of a candidate's Webpack abilities. They can efficiently filter candidates and identify those with the strongest practical skills before the interview stage.
40 min skill tests.
No trick questions.
Accurate shortlisting.
We make it easy for you to find the best candidates in your pipeline with a 40 min skills test.
Try for freeRelated posts
Free resources

Join 1200+ companies in 80+ countries.
Try the most candidate friendly skills assessment tool today.

40 min tests.
No trick questions.
Accurate shortlisting.
No trick questions.
Accurate shortlisting.