
Basic Magento 2 interview questions
1. What is Magento 2, in simple terms?
2. Can you name some key benefits of using Magento 2?
3. What are the different Magento 2 editions, and who are they for?
4. What is the purpose of the di.xml file in Magento 2?
5. Explain what a module is in Magento 2.
6. What's the difference between an area code and a scope in Magento 2?
7. How would you enable or disable a module in Magento 2?
8. What are the different types of events in Magento 2?
9. How do you create a custom theme in Magento 2?
10. Explain the purpose of the setup:upgrade command.
11. What is the difference between a block, a template, and a layout in Magento 2?
12. How do you clear the cache in Magento 2?
13. What is the purpose of the pub/static directory?
14. How does Magento 2 handle indexing?
15. What is the purpose of the object manager?
16. Explain how you would override a block in Magento 2.
17. Describe the role of observers in Magento 2.
18. What is the purpose of the composer.json file in a Magento 2 module?
19. How would you add a custom JavaScript file to a Magento 2 theme?
20. What is the difference between a virtual type and a preference in di.xml?
21. How do you create a new product attribute in Magento 2?
22. Explain the purpose of UI components in Magento 2.
23. Describe the process of creating a simple module that displays 'Hello World' on a page.
Intermediate Magento 2 interview questions
1. Describe the process of creating a custom module in Magento 2, including the necessary files and their functions.
2. Explain the role of the di.xml file in Magento 2 and how it is used for dependency injection.
3. What are interceptors in Magento 2, and how can they be used to modify the behavior of existing classes?
4. How do you create a custom layout update in Magento 2 and apply it to a specific page?
5. Explain the difference between a virtual type and a preference in Magento 2's di.xml.
6. Describe the different types of events in Magento 2 (e.g., global, area-specific) and how to dispatch and observe them.
7. How do you create a custom product attribute in Magento 2, and what are the different input types available?
8. Explain the purpose of the Magento 2 UI component library and how it is used to build admin grids and forms.
9. How do you create a custom command-line interface (CLI) command in Magento 2?
10. Describe the different cache types in Magento 2 and how to invalidate them programmatically.
11. How can you override a core Magento 2 block, model, or helper?
12. Explain how to create a custom shipping method in Magento 2.
13. What are plugins in Magento 2, and what are the different plugin types (before, after, around)?
14. Describe the process of creating a custom theme in Magento 2, including the fallback mechanism.
15. How do you use the Magento 2 service contracts to create a web API?
16. Explain how to use the Magento 2 logging system to debug and troubleshoot issues.
17. How do you create a custom widget in Magento 2 and configure its parameters?
18. Describe the purpose of the setup scripts (InstallData, UpgradeData, InstallSchema, UpgradeSchema) in Magento 2 modules.
19. How do you implement a custom cron job in Magento 2?
20. Explain how to use the Magento 2 message queue system for asynchronous processing.
21. How do you create a custom payment gateway integration in Magento 2?
22. Describe how you would debug a performance issue in Magento 2.
23. How can you extend the Magento 2 REST API to add custom endpoints or modify existing ones?
24. Explain how to work with the Magento 2 customer session.
25. How can you add a custom system configuration setting in Magento 2?
26. Describe your experience with automated testing in Magento 2 (e.g., unit tests, integration tests).
27. How do you handle database transactions in Magento 2?
28. Explain the concept of the Magento 2 object manager.
29. How do you implement a custom validator for a form field in Magento 2?
30. Describe how you would optimize a Magento 2 store for SEO.
Advanced Magento 2 interview questions
1. Explain the implications of using the same event observer for multiple events in Magento 2. What are the potential drawbacks and how can they be mitigated?
2. Describe a scenario where you would implement a plugin on a public interface versus rewriting a class in Magento 2. What are the trade-offs?
3. How does Magento 2's dependency injection container handle circular dependencies? What strategies can you employ to resolve them?
4. Explain the process of creating and using a custom indexer in Magento 2. What are the key considerations for performance and scalability?
5. Describe how you would implement a custom cache type in Magento 2. What configuration is required, and how would you invalidate the cache?
6. What are the different types of virtual types in Magento 2, and how do they impact performance and maintainability?
7. Explain the role of message queues (e.g., RabbitMQ) in Magento 2, and describe a use case where they would be beneficial.
8. How does Magento 2 handle versioning of database schema? Explain the process of creating and applying upgrade scripts.
9. Describe the process of creating a custom admin grid with mass actions and filters in Magento 2. What are the key components involved?
10. Explain how you would implement a multi-tenant architecture in Magento 2, where multiple stores share the same codebase and database.
11. What are the different types of collectors in Magento 2's sales rules, and how do they impact the cart price rules application process?
12. Describe the implications of using different session storage options (e.g., file, database, Redis) in Magento 2. What are the performance and security considerations?
13. How does Magento 2's code generation framework work? Explain the role of interceptors and factories in the process.
14. Explain the difference between using before, after, and around plugins in Magento 2. Provide a specific example for each plugin type.
15. Describe how you would implement a custom payment gateway in Magento 2, including the steps involved in processing payments and handling callbacks.
16. What are the different types of events in Magento 2 (e.g., global, area-specific), and how do they differ in terms of scope and availability?
17. Explain how you would optimize Magento 2's performance for a high-traffic e-commerce website, including caching strategies, database optimization, and code profiling.
18. Describe the process of creating a custom widget in Magento 2, including the configuration options and template rendering.
19. How does Magento 2 handle customer segments? Explain the different types of conditions and actions that can be used to define segments.
20. Explain the role of the service contracts in Magento 2. How can you ensure that your custom modules adhere to best practices for service contracts?
21. Describe how you would implement a custom shipping method in Magento 2, including the steps involved in calculating shipping rates and displaying options to the customer.
22. What are the key considerations for securing a Magento 2 website against common vulnerabilities such as SQL injection and cross-site scripting (XSS)?
Expert Magento 2 interview questions
1. Explain the nuances between interceptors and plugins in Magento 2.
2. Describe advanced techniques for optimizing Magento 2 performance in high-traffic scenarios.
3. Discuss your experience with implementing complex data import/export processes in Magento 2.
4. How would you approach debugging a complex performance bottleneck in a Magento 2 application?
5. Describe your experience with different caching strategies in Magento 2 and when to use them.
6. Explain the architectural differences between Magento 1 and Magento 2 and the reasons for the changes.
7. Describe how you would implement a complex custom shipping module with advanced rate calculation logic in Magento 2.
8. Discuss your experience with using message queues for asynchronous processing in Magento 2.
9. Explain how you would implement a custom payment gateway integration with complex transaction processing requirements in Magento 2.
10. Describe your approach to securing a Magento 2 application against common web vulnerabilities.
11. How do you handle complex dependency injection scenarios involving circular dependencies in Magento 2?
12. Explain the role and implementation of Elasticsearch in a Magento 2 environment.
13. Describe your experience with contributing to open-source Magento 2 projects or developing custom modules.
14. How would you approach load testing a Magento 2 application to identify performance bottlenecks?
15. Explain the concepts of Domain-Driven Design (DDD) and how they can be applied in a Magento 2 project.
16. Describe the process of creating and managing API integrations (REST or GraphQL) in Magento 2.
17. How do you stay up-to-date with the latest Magento 2 releases, security patches, and best practices?
18. Explain how you would implement a multi-website or multi-store setup with complex shared catalog and customer management rules.
19. Describe your experience with using tools for automated testing (unit, integration, functional) in Magento 2 projects.
20. Explain the process of customizing the Magento 2 checkout flow with complex validation and data manipulation requirements.
21. Describe the differences between a ViewModel and a Block in Magento 2 and when you would use each.
22. Explain the nuances between different types of events in Magento 2 (e.g., global, area-specific).
23. Describe your approach to handling complex data migrations from older versions of Magento or other platforms to Magento 2.
24. How would you approach integrating Magento 2 with a third-party ERP or CRM system with complex data synchronization requirements?
25. Explain the role of service contracts and data interfaces in Magento 2 module development.
26. Describe the steps involved in creating a custom indexer in Magento 2 for optimizing search performance.
27. Explain the differences between UI components, layouts, and templates in Magento 2 and how they work together.

When hiring Magento 2 developers, recruiters and hiring managers need to assess candidates on a range of skills, from basic PHP to advanced knowledge of the Magento architecture and it's sometimes challenging to gauge a candidate's expertise without the right questions. This guide is designed to equip you with those questions, helping you identify top-tier Magento 2 talent.
This blog post provides a carefully curated collection of Magento 2 interview questions, divided into basic, intermediate, advanced, and expert levels, complete with a Magento 2 MCQ section. We have organized them to help you evaluate candidates at every stage of their career, ensuring you find the perfect fit for your team, similar to how you would when assessing a PHP developer.
By using these interview questions, you can streamline your hiring process and make informed decisions. To ensure a fair and data-driven evaluation, consider using Adaface's online Magento test to screen candidates before the interview stage.
Table of contents
Basic Magento 2 interview questions
Intermediate Magento 2 interview questions
Advanced Magento 2 interview questions
Expert Magento 2 interview questions
Magento 2 MCQ
Which Magento 2 skills should you evaluate during the interview phase?
Hire Top Magento 2 Developers with Skills Tests and Targeted Interview Questions
Download Magento 2 interview questions template in multiple formats
Basic Magento 2 interview questions
1. What is Magento 2, in simple terms?
Magento 2 is a popular open-source e-commerce platform written in PHP. Think of it as a pre-built online store framework that allows businesses to create and manage their online shops easily. It provides features like product catalog management, shopping cart, order processing, customer accounts, and marketing tools.
In short, Magento 2 is a flexible and scalable solution for businesses of all sizes to build and run their e-commerce operations. Compared to building an e-commerce site from scratch, Magento 2 provides all the essential features along with an extensive ecosystem of extensions and themes.
2. Can you name some key benefits of using Magento 2?
Magento 2 offers several key benefits. It provides improved performance and scalability compared to its predecessor, thanks to technologies like full-page caching and optimized indexing. This translates to faster page load times and the ability to handle a larger number of visitors and transactions. It offers a more user-friendly admin interface, making it easier for merchants to manage their stores.
Furthermore, Magento 2 boasts enhanced security features, a modular architecture for easier customization and upgrades, and improved SEO capabilities. The platform is also mobile-friendly, which is crucial in today's e-commerce landscape. Its robust API also allows seamless integrations with third-party systems and services.
3. What are the different Magento 2 editions, and who are they for?
Magento 2 offers different editions tailored to various business needs. The two main editions are:
- Magento Open Source (formerly Community Edition): This is a free, open-source platform ideal for small to medium-sized businesses and developers. It provides the core e-commerce functionality, allowing for extensive customization and flexibility.
- Magento Commerce (formerly Enterprise Edition): This is a paid, feature-rich platform designed for medium to large enterprises. It includes advanced features like customer segmentation, targeted promotions, visual merchandising, and enhanced security. Magento Commerce also offers dedicated support and service-level agreements (SLAs).
4. What is the purpose of the di.xml file in Magento 2?
The di.xml file in Magento 2 is a crucial configuration file that manages dependency injection. It defines how Magento 2's object manager should create and configure objects (classes). Specifically, it's used to configure object dependencies, define object preferences (interface implementations), virtual types, and plugins.
Essentially, it dictates how different components of the system are wired together. This includes:
- Dependencies: Specifying which classes should be injected into a constructor as arguments.
- Preferences: Defining which concrete class should be used when an interface is requested.
- Virtual Types: Creating aliases for existing classes, allowing for configuration of the same class with different parameters.
- Plugins (Interceptors): Allowing modification of the behavior of public methods in other classes without directly changing those classes. For example:
<type name="Magento\Catalog\Model\Product"> <plugin name="vendor_module_product_plugin" type="Vendor\Module\Plugin\Product" sortOrder="10" disabled="false"/> </type>
5. Explain what a module is in Magento 2.
In Magento 2, a module is a self-contained unit of code that provides specific functionality. It encapsulates features, business logic, and presentation elements, enabling developers to extend or modify the core Magento platform without directly altering the core files. Think of it as a plugin or extension.
A module typically consists of PHP code, XML configuration files, templates, and potentially JavaScript and CSS files. Magento uses these files to understand the module's purpose, how it interacts with the system, and how to render its output. Magento modules follow a specific directory structure and naming convention to ensure proper loading and functionality.
6. What's the difference between an area code and a scope in Magento 2?
In Magento 2, an area code defines the context or part of the application that is currently running (e.g., frontend, adminhtml, webapi_rest). It determines which set of modules, configurations, and themes are loaded. It primarily handles dispatching the request to the correct application and loading only necessary modules.
Scope, on the other hand, refers to the hierarchy of configuration settings. It defines at what level a configuration value is applied. Scope levels include default, website, and store. Configuration values can be defined at any of these scopes, and Magento resolves them based on the currently active scope. For example, a website-level configuration will override a default-level configuration, while a store-level configuration will override website and default configurations.
7. How would you enable or disable a module in Magento 2?
To enable or disable a module in Magento 2, you would typically use the command-line interface (CLI). You can use the following commands:
- To enable a module:
php bin/magento module:enable Module_Name - To disable a module:
php bin/magento module:disable Module_Name
After enabling or disabling a module, you need to run the following commands to update the Magento setup and clear the cache:
php bin/magento setup:upgrade
php bin/magento setup:di:compile
php bin/magento setup:static-content:deploy -f
php bin/magento cache:flush
8. What are the different types of events in Magento 2?
Magento 2 events are categorized into several types, each serving a different purpose. The main types are:
- Generic Events: These are standard events dispatched by modules and the core Magento system. Observers are configured in
events.xmlto listen for these events and execute custom logic. - Controller Events: These events are triggered during the execution of controllers, allowing modifications to the request or response. Examples include events before and after actions are dispatched.
- Model Events: Fired during model lifecycle events like
beforeSave,afterSave,beforeDelete, andafterDelete. They allow interception and modification of model data. - Layout Events: These events are triggered during the layout rendering process, allowing modifications to blocks, containers, and the overall page structure. Example:
layout_load_before. - EAV Events: EAV (Entity-Attribute-Value) model events are triggered during operations related to EAV entities (products, categories, customers). For example
catalog_product_save_before.
Observers can be configured to listen for specific events using the events.xml file within a module. Example of configuration:
<event name="checkout_cart_product_add_after">
    <observer name="custom_cart_observer" instance="Vendor\Module\Observer\CartObserver" />
</event>
9. How do you create a custom theme in Magento 2?
To create a custom theme in Magento 2, you typically start by creating a new theme directory under app/design/frontend/<Vendor>/<theme>. The <Vendor> is your company name and <theme> is your theme name. Next, you need to declare your theme by creating a theme.xml file inside your theme directory. This file defines the parent theme if any and a theme name. Finally, you need to register your theme by creating a registration.php file inside your theme directory. This file registers the theme with Magento.
Remember to apply the theme in the Magento admin panel under Content > Design > Themes and Content > Design > Configuration. You can then start customizing the theme by overriding templates, layouts, styles, and other assets in your custom theme directory. If you are extending the blank theme, you can use it without adding styles, but if you have created a standalone theme copy the required css/js/images etc.
10. Explain the purpose of the setup:upgrade command.
The setup:upgrade command in Magento 2 is crucial for updating the database schema and data after you've installed new modules, updated existing modules, or upgraded the Magento core version. It executes any install or upgrade scripts present in modules, ensuring that the database structure and data are compatible with the new code.
Specifically, it performs tasks such as:
- Applying schema changes (creating, modifying, or deleting database tables and columns).
- Applying data patches (updating or inserting data into the database).
- Registering modules.
- Clearing the cache.
Essentially, it brings the database up to date with the current codebase.
11. What is the difference between a block, a template, and a layout in Magento 2?
In Magento 2, blocks, templates, and layouts work together to structure the presentation layer of a page. A layout is an XML file that defines the overall structure of a page, determining which blocks will be included and where they will be placed. Think of it as the blueprint for the page's structure.
A block is a PHP class that prepares data for a template. It acts as a bridge between the model (data) and the view (template). Blocks handle business logic related to the presentation. A template is a .phtml file that uses HTML and PHP to render the data prepared by the block. It's responsible for the visual presentation of the information. In short, layout defines the page structure, blocks prepare the data, and templates display the data.
12. How do you clear the cache in Magento 2?
To clear the cache in Magento 2, you can use the Magento Admin Panel or the command-line interface (CLI). From the admin panel, navigate to System -> Tools -> Cache Management. Select the cache types you want to refresh, choose the 'Refresh' action from the dropdown, and submit.
Alternatively, you can use the CLI:
php bin/magento cache:clean [cache type]
php bin/magento cache:flush [cache type]
cache:clean selectively cleans outdated cache types, while cache:flush clears all cache storage. If no cache type is specified, both commands act on all cache types. It's generally recommended to start with cache:clean and use cache:flush only if necessary.
13. What is the purpose of the pub/static directory?
The pub/static directory in Magento is where static view files are stored. These files include CSS, JavaScript, images, and fonts. Magento publishes (copies) files from module, theme, and component web directories into pub/static to make them accessible via the web server. This process centralizes all static assets into a single, publicly accessible directory.
Using pub/static enables efficient caching and delivery of these assets by the web server (like Apache or Nginx). Instead of serving static files directly from the module or theme directories, Magento serves them from pub/static, improving performance. During development, the static-content:deploy command is used to generate these static files.
14. How does Magento 2 handle indexing?
Magento 2 uses indexing to transform merchant data like products, categories, and prices to improve storefront performance. When data changes, Magento invalidates the affected indexes.
Magento offers two indexing modes:
- Real-time indexer (Update on Save): Updates indexes immediately after a data change. Good for smaller catalogs.
- Scheduled indexer (Update by Schedule): Updates indexes according to a cron schedule. Better for larger catalogs to avoid performance impacts from constant reindexing.
Indexed data is stored in index tables, which are optimized for faster retrieval compared to the original data tables.
15. What is the purpose of the object manager?
The object manager (often found in programming environments like operating systems, frameworks, or game engines) serves as a central registry and controller for objects. Its primary purpose is to manage the lifecycle of objects, including their creation, access, and destruction. This central management provides benefits like efficient resource allocation, controlled object instantiation, and simplified object lookup and manipulation. In some contexts, such as Windows, the Object Manager manages various system resources like files, devices, and processes, presenting them as objects with properties and methods.
16. Explain how you would override a block in Magento 2.
To override a block in Magento 2, you typically use a custom module. First, you declare a preference in your module's di.xml file. This preference tells Magento to use your custom block class instead of the original Magento block class. For example:
<preference for="Magento\Catalog\Block\Product\ListProduct" type="YourVendor\YourModule\Block\Product\ListProduct" />
Then, you create your custom block class, extending the original block you want to override. In your custom block, you can then override specific methods to modify the block's behavior or output. Remember to clear the Magento cache after deploying your module to see the changes reflected.
17. Describe the role of observers in Magento 2.
Observers in Magento 2 are classes that execute code in response to specific events that are triggered within the Magento application. They allow you to extend or modify Magento's functionality without directly altering the core code, promoting loose coupling and maintainability. Observers 'observe' events and execute custom logic when those events are dispatched.
Observers are configured in the events.xml file, where you specify the event to observe, the observer class to execute, and the method to call. The method within the observer class then contains the custom logic to be executed when the event occurs. This is a powerful tool for customizing Magento's behavior in a non-destructive way.
18. What is the purpose of the composer.json file in a Magento 2 module?
The composer.json file in a Magento 2 module serves as a manifest, defining the module's metadata and dependencies. It's essential for managing and installing the module using Composer, the PHP dependency manager. Specifically, it:
- Specifies the module's name, version, and description.
- Declares dependencies on other PHP packages, including Magento 2 core modules or third-party libraries. Composer uses this to install the required libraries.
- Defines autoloading rules, which map namespaces to the physical location of PHP files within the module. This ensures that classes can be loaded automatically when needed (e.g.
"Psr\Log\": "src/Psr/Log/").
19. How would you add a custom JavaScript file to a Magento 2 theme?
To add a custom JavaScript file to a Magento 2 theme, you'll typically follow these steps:
- Place your JavaScript file in the correct theme directory. The recommended location is usually
app/design/frontend/<Vendor>/<Theme>/web/js/. For example:app/design/frontend/MyVendor/MyTheme/web/js/custom.js. - Declare your JS file in
requirejs-config.jswithin your theme's directory (app/design/frontend/<Vendor>/<Theme>/). This file tells Magento to load your script. The contents would look like this:var config = { map: { '*': { 'custom': 'js/custom' } } }; - Now you can call your javascript anywhere by using the alias, example in
.phtmlfile:<script type="text/javascript"> require(['jquery', 'custom'], function($, custom){ //Your code here }); </script> - Finally, clear the Magento cache using the command
php bin/magento cache:flushto ensure the changes are applied.
20. What is the difference between a virtual type and a preference in di.xml?
A virtual type in di.xml allows you to define an alias for a class or interface without actually implementing it. Think of it as a 'soft' type definition. It's primarily used to configure dependencies of other classes, essentially creating a named configuration set. Preferences, on the other hand, are used to replace one class/interface with another throughout the application. If a class hints at interface A, you can use preference in di.xml to configure the object manager so that any request for A returns an object of type B. In short, preference provides a concrete implementation for an interface or abstract class.
Consider the following:
- Virtual Type: Configures dependencies or options for a specific context.
- Preference: Globally replaces one class/interface with another. Use this if you want to use a completely different class as the implementation of an interface.
21. How do you create a new product attribute in Magento 2?
To create a new product attribute in Magento 2, you typically use a combination of code and admin panel configuration. Programmatically, you'd create a InstallData script in your module. This script defines the attribute's properties, such as its attribute code, frontend input type, scope, whether it's required, and its source model (if it's a select or multi-select attribute).
Alternatively, you can create the attribute through the Magento admin panel by navigating to Stores > Attributes > Product. Here, you can define attribute properties through a user interface without writing any code. Once created, you'll likely need to reindex and clear the cache. Remember to set the attribute to be used in attribute sets for it to be available in the product edit form.
22. Explain the purpose of UI components in Magento 2.
UI components in Magento 2 are reusable and configurable blocks of user interface elements. They are used to build dynamic and interactive interfaces within the admin panel and storefront. They abstract complex UI logic, making it easier to manage and maintain the front-end.
They provide a structured approach to UI development through XML configurations, PHP classes, and JavaScript files. Common UI components include grids, forms, buttons, and modals, allowing developers to create consistent and efficient user experiences. Key aspects of UI components include data providers (for fetching data), modifiers (for manipulating data), and form elements (for user input).
23. Describe the process of creating a simple module that displays 'Hello World' on a page.
To create a simple module that displays 'Hello World', you generally need to create a module file (e.g., hello_world.py). Inside this file, you would define a function or class that generates the 'Hello World' string.
Then, you would import and call this function or class from a page or template. For example, you might have a python function def hello(): return 'Hello World' which you would import in your template file and invoke inside the template where you want 'Hello World' to appear. Depending on the system or framework in use, there will be an associated process or method to properly register and render the module. Different frameworks will have different approaches (e.g. React, Angular, Vue, Django).
Intermediate Magento 2 interview questions
1. Describe the process of creating a custom module in Magento 2, including the necessary files and their functions.
Creating a custom module in Magento 2 involves several steps and required files. First, you need to choose a unique namespace and module name (e.g., VendorName_ModuleName). Then, create the module directory structure: app/code/VendorName/ModuleName. Key files include:
app/code/VendorName/ModuleName/etc/module.xml: This file declares the module and its version. It includes the module name and a setup version.app/code/VendorName/ModuleName/registration.php: This file registers the module with Magento. It contains the line\Magento\Framework\Component\ComponentRegistrar::register(\Magento\Framework\Component\ComponentRegistrar::MODULE, 'VendorName_ModuleName', __DIR__);- Optionally
app/code/VendorName/ModuleName/etc/config.xml: For configuring the module and its components. Here modules can be configured to interact with various magento features.
2. Explain the role of the di.xml file in Magento 2 and how it is used for dependency injection.
The di.xml file in Magento 2 is the primary configuration file for dependency injection. It tells the object manager how to create and manage objects, specifically which classes to instantiate, what dependencies to inject into them, and how they should be shared.
It essentially defines rules for:
- Type Hints: Declares preferred implementations for interfaces.
- Constructor Arguments: Specifies which objects or values should be passed to a class's constructor.
- Object Sharing: Determines whether an object should be created as a singleton (shared instance) or a new instance each time it's requested.
- Virtual Types: Allows you to define an alias for existing classes or interfaces, potentially modifying constructor arguments. This can be done using
<virtualType name="virtualTypeName" type="OriginalClass"></virtualType>
di.xml files are merged from different modules and areas (global, frontend, adminhtml, etc.) to create a unified configuration for the dependency injection container.
3. What are interceptors in Magento 2, and how can they be used to modify the behavior of existing classes?
Interceptors in Magento 2, also known as plugins, allow you to modify the behavior of public methods of classes and interfaces before, after, or around the original method execution, without directly changing the core code. They follow the AOP (Aspect-Oriented Programming) principles.
Interceptors are configured in di.xml using the <type name="TargetClass"> tag and specifying the plugin with <plugin name="plugin_name" type="PluginClass" sortOrder="10" disabled="false"/>. The PluginClass then defines methods like beforeMethodName, afterMethodName, or aroundMethodName that are executed at the corresponding points in the original method's execution. For example:
class MyPlugin {
    public function beforeGetPrice(
        \Vendor\Module\Model\Product $subject
    ) {
        // Logic to execute before getPrice
    }

    public function afterGetName(
        \Vendor\Module\Model\Product $subject,
        $result
    ) {
        // Logic to execute after getName, modifying the $result
        return $result . ' - Custom Text';
    }

    public function aroundGetFinalPrice(
        \Vendor\Module\Model\Product $subject,
        callable $proceed
    ) {
        // Logic to execute around getFinalPrice
        // Can modify arguments before calling $proceed()
        $result = $proceed(); // Execute the original method
        // Logic to execute after getFinalPrice, modifying the $result
        return $result;
    }
}
4. How do you create a custom layout update in Magento 2 and apply it to a specific page?
To create a custom layout update in Magento 2 and apply it to a specific page, you'll need to create a custom module (if you don't already have one). Within your module, create a view/frontend/layout directory. Inside this directory, create an XML file named after the page's handle you want to modify, such as catalog_product_view.xml for a product page. In this XML file, add your layout updates. For example:
<page xmlns:xsi="http://www.w3.org/2001/XMLSchema-instance" xsi:noNamespaceSchemaLocation="urn:magento:framework:View/Layout/etc/page_configuration.xsd">
    <body>
        <referenceContainer name="product.info.main">
            <block class="Magento\Framework\View\Element\Text" name="custom.text" before="product.info.price">
                <arguments>
                    <argument name="text" xsi:type="string">This is a custom text.</argument>
                </arguments>
            </block>
        </referenceContainer>
    </body>
</page>
This XML adds a block with custom text before the product price on the product view page. After creating the file, clear the Magento cache using bin/magento cache:flush to apply the changes.
5. Explain the difference between a virtual type and a preference in Magento 2's di.xml.
In Magento 2's di.xml, both virtual types and preferences are used for dependency injection, but they serve different purposes. A preference is a global replacement of one interface or abstract class with a concrete class. It tells the object manager that whenever an instance of interface A is requested, it should actually provide an instance of concrete class B. This is a global setting affecting all requests for that interface.
Conversely, a virtual type is a named configuration that defines a new type based on an existing type. It doesn't replace an existing interface globally. Instead, it's a new, configurable type. You can then inject this virtual type as a dependency. This allows customizing constructor arguments or other configurations of the base type without affecting other usages of the base type. It's useful when you need different configurations of the same class in different contexts.
6. Describe the different types of events in Magento 2 (e.g., global, area-specific) and how to dispatch and observe them.
Magento 2 events allow you to execute custom code in response to specific actions within the system. There are primarily two scopes of events: global and area-specific. Global events are dispatched regardless of the area (frontend, adminhtml, etc.), while area-specific events are only dispatched within the defined area, for instance, only in the frontend or adminhtml. This distinction enhances modularity and reduces unnecessary processing.
To dispatch an event, you use the Magento\Framework\Event\ManagerInterface. The following example illustrates dispatching an event:
$this->_eventManager->dispatch('your_event_name', ['data' => $yourData]);
To observe an event, you need to define an observer in your module's events.xml file (located in the appropriate area's directory, e.g., frontend/events.xml or etc/events.xml for global). The observer class will have an execute() method that gets called when the event is dispatched. An example of events.xml content:
<event name="your_event_name">
    <observer name="your_observer_name" instance="Your\Module\Observer\YourObserver" />
</event>
Your observer class would then implement the Magento\Framework\Event\ObserverInterface:
namespace Your\Module\Observer;

use Magento\Framework\Event\ObserverInterface;
use Magento\Framework\Event\Observer;

class YourObserver implements ObserverInterface
{
    public function execute(Observer $observer)
    {
        $eventData = $observer->getData('data');
        // Your logic here
    }
}
7. How do you create a custom product attribute in Magento 2, and what are the different input types available?
To create a custom product attribute in Magento 2, you typically use the admin panel or install a module. In the admin panel, navigate to Stores > Attributes > Product. Then, click 'Add New Attribute'. You'll need to fill out various fields like Default Label, Attribute Code (which should be unique), and select an Input Type.
Available input types include: text field, text area, date, yes/no, multiple select, dropdown, price, media image, fixed product tax, boolean, and visual swatch. Each input type dictates how the attribute's value is entered and displayed. You can also define options for select-type attributes (dropdown, multiple select).
8. Explain the purpose of the Magento 2 UI component library and how it is used to build admin grids and forms.
The Magento 2 UI component library provides a declarative way to build user interfaces, especially admin grids and forms. Instead of writing procedural code, you define the structure and behavior of UI elements in XML configuration files. This approach promotes code reusability, maintainability, and customization.
For admin grids and forms, UI components define:
- Data source: Where the data comes from.
- Columns/fields: How data is displayed or input.
- Buttons/actions: What operations are available.
- Filters/sorting: How data can be manipulated. Magento renders these configurations into HTML and JavaScript, handling data loading, saving, and user interactions. This separation of concerns simplifies development and allows developers to extend and customize the UI without modifying core code.
9. How do you create a custom command-line interface (CLI) command in Magento 2?
To create a custom CLI command in Magento 2, you need to follow these steps:
- Create a module: If you don't already have one, create a new Magento 2 module (e.g.,
Vendor/Module). - Define the command: Create a
Console/Commanddirectory in your module and create a PHP class that extendsSymfony\Component\Console\Command\Command. This class will define your command's logic. You need to configure your command name with thesetNamemethod, along with defining the command's arguments and options usingaddArgumentandaddOptionrespectively. Finally, implement theexecutemethod, which contains the code that will be executed when the command is run. - Register the command: Create a
di.xmlfile in your module'setcdirectory. This file will register your command with the Magento 2 CLI. You can inject dependencies into your command class through the constructor.
Example code snippet:
<?php

namespace Vendor\Module\Console\Command;

use Symfony\Component\Console\Command\Command;
use Symfony\Component\Console\Input\InputInterface;
use Symfony\Component\Console\Output\OutputInterface;

class MyCommand extends Command
{
    protected function configure()
    {
        $this->setName('vendor:my-command');
        $this->setDescription('My custom command');
    }

    protected function execute(InputInterface $input, OutputInterface $output)
    {
        $output->writeln('Hello, world!');
        return 0;
    }
}
10. Describe the different cache types in Magento 2 and how to invalidate them programmatically.
Magento 2 uses several cache types to improve performance. These include:
- Configuration Cache: Stores merged configuration data.
- Layout Cache: Stores page layout structures.
- Block HTML Cache: Stores rendered HTML output of blocks.
- Reflection Cache: Caches class reflection data.
- Full Page Cache (FPC): Caches entire HTML pages for anonymous users.
- EAV Cache: Caches EAV attributes and values.
- Translation Cache: Stores translated strings.
- Webservice Cache: Stores webservice request and response.
- Custom Cache: Developer defined cache types.
To invalidate caches programmatically, you can use the Magento\Framework\App\Cache\TypeListInterface. For example, to invalidate the configuration cache:
use Magento\Framework\App\Cache\TypeListInterface;

class MyClass {
    private $cacheTypeList;

    public function __construct(TypeListInterface $cacheTypeList) {
        $this->cacheTypeList = $cacheTypeList;
    }

    public function invalidateConfigCache() {
        $this->cacheTypeList->cleanType('config');
    }
}
Alternatively, to flush all caches, you can use Magento\Framework\App\Cache\Frontend\Pool to iterate through all cache frontends and clean them. You can also use the command line interface (CLI) php bin/magento cache:flush or php bin/magento cache:clean to manage caches.
11. How can you override a core Magento 2 block, model, or helper?
To override a core Magento 2 block, model, or helper, you should use preference in your custom module's di.xml file. A preference tells Magento to use your class instead of the core class whenever the core class is requested.
For example, to override a block:
<preference for="Magento\Catalog\Block\Product\ListProduct" type="Vendor\Module\Block\Product\ListProduct" />
Here, Magento\Catalog\Block\Product\ListProduct is the original class name and Vendor\Module\Block\Product\ListProduct is the name of your overriding class. Ensure your overriding class extends the original class to maintain functionality or implements the interface that the original class implements. Remember to clear the cache after making changes to di.xml.
12. Explain how to create a custom shipping method in Magento 2.
To create a custom shipping method in Magento 2, you need to create a module. First, create the necessary module files, including registration.php, module.xml, and a config.xml file to declare your shipping carrier.
Next, define the carrier model class that extends Magento\Shipping\Model\Carrier\AbstractCarrier and implements Magento\Framework\DataObject\Interfaces\ServiceObjectInterface. Within this class, implement the collectRates() method to calculate shipping rates based on your custom logic. Configure system settings in system.xml for admin configuration. Finally, create a di.xml to inject your custom carrier and enable it. Remember to enable your module, clear the cache and test the new shipping method.
13. What are plugins in Magento 2, and what are the different plugin types (before, after, around)?
Plugins (also known as interceptors) in Magento 2 are a powerful feature that allows you to modify the behavior of public methods in classes without directly changing the core code. They are used to add functionality, modify input parameters, or alter the return values of methods.
There are three main types of plugins:
Before Plugins: These execute before the target method. They can modify the input arguments of the method.
After Plugins: These execute after the target method. They can modify the return value of the method.
Around Plugins: These completely wrap the target method. They can execute code before and after the method, and even prevent the original method from being executed. Example:
public function aroundGetPrice(\Magento\Catalog\Model\Product $subject, callable $proceed)
{
    // Code before the original getPrice() method
    $price = $proceed(); // Executes the original getPrice() method
    // Code after the original getPrice() method
    return $price * 1.1; // Example: Increase price by 10%
}
14. Describe the process of creating a custom theme in Magento 2, including the fallback mechanism.
To create a custom theme in Magento 2, you first create a new directory under app/design/frontend/<Vendor>/<theme>. Inside this directory, you need a theme.xml file which declares the parent theme (if any). You also typically have a registration.php file that registers the theme with Magento. Then you can add your custom templates, layouts, styles (CSS/Less), and web assets. You configure the theme in the Magento admin panel under Content -> Design -> Themes.
The fallback mechanism in Magento 2 allows themes to inherit from parent themes or the Luma or Blank themes. When Magento needs a file (e.g., a template or layout), it searches for it in the current theme first. If the file isn't found, it checks the parent theme, and so on, until it reaches the default Luma or Blank theme. This promotes code reuse and reduces redundancy. The theme inheritance is declared in theme.xml using the <parent> tag. Static files use similar fallback rules based on module dependencies declared in requirejs-config.js. You can override files from parent themes or modules by placing files with the same name in the custom theme's directory. The order of theme declaration in theme.xml is also very important and defines the fallback priority.
15. How do you use the Magento 2 service contracts to create a web API?
Magento 2 service contracts define interfaces for modules, enabling interaction without direct database access. To create a web API, you expose these service contracts as REST or GraphQL endpoints. First, define your service contract interfaces (data and API interfaces). Then, implement these interfaces in your module. Next, create webapi.xml to map your service contract methods to specific API endpoints (URLs) and HTTP methods (GET, POST, PUT, DELETE). This file also handles authentication and authorization.
For example:
<route url="/V1/yourmodule/yourmethod" method="GET">
    <service class="Your\Module\Api\YourInterface" method="yourMethod"/>
    <resources>
        <resource ref="anonymous"/>
    </resources>
</route>
Finally, after defining the endpoint, clear the Magento cache and test your API using tools like Postman. Magento will automatically generate the necessary classes to handle request dispatching to the correct service contract implementation.
16. Explain how to use the Magento 2 logging system to debug and troubleshoot issues.
Magento 2 utilizes a robust logging system based on Monolog. To debug and troubleshoot, you can use the LoggerInterface. Inject \Psr\Log\LoggerInterface into your class. Then use methods like $this->logger->info('Your message');, $this->logger->error('An error occurred');, $this->logger->critical('A critical error');, $this->logger->debug('Debug information'); to write to the logs. The logs are typically located in the var/log directory, such as system.log and debug.log.
To configure logging behavior (e.g., log levels, file rotation), modify the env.php file or create a di.xml configuration to override the default settings. Ensure that logging is enabled in the Magento admin under Stores -> Configuration -> Advanced -> Developer -> Log Settings. Pay attention to enabling System Log Enabled and Exception Log Enabled.
17. How do you create a custom widget in Magento 2 and configure its parameters?
To create a custom widget in Magento 2, you need to create a module with the necessary files. The core components include a widget.xml file to define the widget, a block class to handle the widget's logic, and a template file (.phtml) to render the widget's output.
To configure the widget's parameters, you define them within the widget.xml file. For example:
<widget id="your_widget_id" class="Your\Module\Block\Widget\YourWidget">
 <label translate="true">Your Custom Widget</label>
 <description translate="true">A custom widget example.</description>
 <parameters>
 <parameter name="title" xsi:type="text" required="true" label="Title"/>
 <parameter name="is_enabled" xsi:type="select" required="true" visible="1" label="Enable Widget">
 <options>
 <option name="1" value="1" translate="true">Yes</option>
 <option name="0" value="0" translate="true">No</option>
 </options>
 </parameter>
 </parameters>
</widget>
In this example, title is a required text field, and is_enabled is a select box with 'Yes' and 'No' options. These parameters can then be accessed in your block class and used in your template.
18. Describe the purpose of the setup scripts (InstallData, UpgradeData, InstallSchema, UpgradeSchema) in Magento 2 modules.
Magento 2 setup scripts are used to manage the database schema and initial data during module installation and upgrades. InstallSchema and UpgradeSchema scripts handle the creation and modification of database tables. InstallSchema runs only during the initial module installation, creating the necessary tables. UpgradeSchema executes when the module version changes, allowing you to alter existing tables or create new ones based on version differences.
InstallData and UpgradeData scripts are responsible for populating the database with initial or updated data. InstallData inserts default data when the module is first installed. UpgradeData updates or adds data when the module version is upgraded. For example:
// UpgradeData.php
use Magento\Framework\Setup\ModuleDataSetupInterface;

public function upgrade(ModuleDataSetupInterface $setup, ModuleContextInterface $context)
{
    if (version_compare($context->getVersion(), '1.0.1', '<')) {
        $setup->startSetup();
        // Add new attribute to eav_attribute table
        $setup->endSetup();
    }
}
19. How do you implement a custom cron job in Magento 2?
To implement a custom cron job in Magento 2, you need to create a custom module and configure the cron job within the crontab.xml file. This file specifies the schedule and the class/method to be executed. Example:
<config xmlns:xsi="http://www.w3.org/2001/XMLSchema-instance" xsi:noNamespaceSchemaLocation="urn:magento:module:Magento_Cron:etc/crontab.xsd">
<group id="default">
<job name="your_module_cron" instance="Your\Module\Cron\YourCron" method="execute">
<schedule>*/5 * * * *</schedule>
</job>
</group>
</config>
Next, you need to create the class Your\Module\Cron\YourCron with an execute method containing the logic you want to run. Ensure your module is enabled. Magento's cron will then pick up your job and execute it according to the schedule.
20. Explain how to use the Magento 2 message queue system for asynchronous processing.
Magento 2's message queue system enables asynchronous processing, improving performance by deferring tasks. First, you define a queue.xml file to declare exchanges, queues, and bindings. Exchanges route messages, queues store them, and bindings connect them. Then, a publisher (e.g., a plugin or module) sends a message to an exchange using the Magento\Framework\MessageQueue\PublisherInterface. A consumer, defined in queue.xml and implemented as a class with a process method, listens to a queue and processes the messages. The consumer is configured with a consumer.xml file, specifying the queue it listens to and the class that handles the message.
Example:
In queue.xml:
<config xmlns:xsi="http://www.w3.org/2001/XMLSchema-instance" xsi:noNamespaceSchemaLocation="urn:magento:framework-message-queue:etc/queue.xsd">
    <exchange name="my.custom.exchange" type="topic">
        <binding id="my.custom.binding" topic="my.custom.topic" destination="my.custom.queue"/>
    </exchange>
    <queue name="my.custom.queue">
        <consumer name="myCustomConsumer" instance="\My\Module\Consumer" method="process"/>
    </queue>
</config>
In consumer.xml:
<config xmlns:xsi="http://www.w3.org/2001/XMLSchema-instance" xsi:noNamespaceSchemaLocation="urn:magento:framework-message-queue:etc/consumer.xsd">
    <consumer name="myCustomConsumer" queue="my.custom.queue" handler="\My\Module\Consumer::process"/>
</config>
The publisher would use the Magento\Framework\MessageQueue\PublisherInterface to send messages to the my.custom.exchange with the topic my.custom.topic.
21. How do you create a custom payment gateway integration in Magento 2?
To create a custom payment gateway integration in Magento 2, you'll primarily need to create a custom module. This module will contain the logic for interacting with the payment gateway's API.
Key steps include: 1. Create a module with necessary files (registration.php, module.xml). 2. Define the payment method in etc/config.xml. 3. Create a model class extending Magento\Payment\Model\Method\AbstractMethod which handles payment processing, data validation, and API calls to the payment gateway. 4. Create a block and template for the payment method's form on the checkout page. 5. Implement data transfer objects (DTOs) to handle communication with the payment gateway. 6. Implement necessary configurations (system.xml) for the admin panel. You may also need to create a handler for the response coming from the payment gateway and update the order accordingly. Ensure you implement proper error handling and logging.
22. Describe how you would debug a performance issue in Magento 2.
Debugging a Magento 2 performance issue involves a systematic approach. First, identify the bottleneck using tools like New Relic, Blackfire.io, or even the built-in Magento profiler. These tools help pinpoint slow database queries, excessive memory usage, or slow code execution. Analyze slow queries using MySQL's slow query log or EXPLAIN statement. Look for N+1 query problems, full table scans, or missing indexes.
Next, optimize the identified areas. This might include optimizing database queries, enabling caching (Varnish, Redis), minimizing HTTP requests (merging CSS/JS), using a CDN for static assets, or refactoring inefficient code. For code-level optimization, use Xdebug to step through the code and identify slow function calls. Finally, after implementing changes, re-profile to ensure the issue is resolved and no new problems were introduced. Always test changes in a staging environment before deploying to production. Ensure that you have enabled production mode to benefit from static content caching and code compilation. Remember to clear the cache (bin/magento cache:clean) after configuration changes.
23. How can you extend the Magento 2 REST API to add custom endpoints or modify existing ones?
To extend the Magento 2 REST API, you can use custom modules. To add a new endpoint, you define a new route in your module's etc/webapi.xml file, specifying the HTTP method (GET, POST, PUT, DELETE), the URL path, and the corresponding interface and method that will handle the request. Then, you implement the interface (often as a Service Contract) with your custom logic in a class within your module.
To modify existing endpoints, you can use plugins (interceptors). Plugins allow you to intercept the execution of existing API methods before, after, or around the original method's execution. This way you can modify the request data, the response data, or even skip the original method execution altogether based on your needs. For example, in di.xml, you can define a plugin for a specific API interface method. Here's a sample code snippet:
<config xmlns:xsi="http://www.w3.org/2001/XMLSchema-instance" xsi:noNamespaceSchemaLocation="urn:magento:framework:Acl/etc/acl.xsd">
    <type name="Vendor\Module\Api\ServiceInterface">
        <plugin name="vendor_module_plugin_name" type="Vendor\Module\Plugin\PluginName" sortOrder="10" disabled="false"/>
    </type>
</config>
24. Explain how to work with the Magento 2 customer session.
In Magento 2, the customer session is managed through the Magento\Customer\Model\Session class. To work with it, you inject this class into your constructor. You can then use its methods to get and set customer data. To get the current customer's ID, you can use $this->session->getCustomerId(). To check if a customer is logged in, use $this->session->isLoggedIn(). You can set custom session data using $this->session->setData('key', 'value') and retrieve it with $this->session->getData('key'). To remove specific data from the session you can use $this->session->unsData('key').
The session uses cookies to persist data across requests. When a customer logs in or interacts with the site, Magento stores their information (such as customer ID, group ID, and cart details) in the session. This allows Magento to personalize the customer's experience and maintain their state as they navigate the site. Always handle customer session data securely, particularly when dealing with sensitive information.
25. How can you add a custom system configuration setting in Magento 2?
To add a custom system configuration setting in Magento 2, you need to create a new system configuration file. This file is typically located in etc/adminhtml/system.xml within your module. Define your sections, groups, and fields within this file to represent the configuration settings.
Here's a basic example of the configuration structure:
<config xmlns:xsi="http://www.w3.org/2001/XMLSchema-instance" xsi:noNamespaceSchemaLocation="urn:magento:module:Magento_Config:etc/system_file.xsd">
 <system>
 <tab id="your_tab" translate="label" sortOrder="10">
 <label>Your Tab Label</label>
 </tab>
 <section id="your_section" translate="label" sortOrder="130" showInDefault="1" showInWebsite="1" showInStore="1">
 <label>Your Section Label</label>
 <tab>your_tab</tab>
 <resource>Your_Module::config</resource>
 <group id="your_group" translate="label" sortOrder="10" showInDefault="1" showInWebsite="1" showInStore="1">
 <label>Your Group Label</label>
 <field id="your_field" translate="label" type="text" sortOrder="10" showInDefault="1" showInWebsite="1" showInStore="1">
 <label>Your Field Label</label>
 <comment>Your Field Comment</comment>
 </field>
 </group>
 </section>
 </system>
</config>
After creating the system.xml file, you might need to flush the Magento cache to see the changes in the admin panel. You can then access and modify the configuration settings under the specified tab, section, and group in the Magento admin panel. You can retrieve the saved configuration values using the Magento\Framework\App\Config\ScopeConfigInterface in your PHP code.
26. Describe your experience with automated testing in Magento 2 (e.g., unit tests, integration tests).
I have experience with automated testing in Magento 2, primarily focusing on unit and integration tests. For unit testing, I've used PHPUnit to test individual components, classes, and functions in isolation. This involved mocking dependencies to ensure the tests are focused and fast. I have written tests to cover various scenarios, including positive and negative cases, boundary conditions, and exception handling. I followed practices like Arrange-Act-Assert to structure my unit tests. Code coverage tools were used to identify untested code paths and improve the overall quality of individual modules.
For integration tests, I've used Magento's Integration Testing Framework and PHPUnit to test the interactions between different modules or components within the Magento 2 application. This included testing database interactions, API calls, and event dispatching. I have utilized Magento's testing fixtures and factories to create test data and set up the testing environment. I paid attention to properly cleaning up the database and file system after each test to avoid conflicts. I have also automated testing using tools like Github Actions.
27. How do you handle database transactions in Magento 2?
Magento 2 uses database transactions to ensure data integrity and consistency during operations involving multiple database modifications. Transactions allow you to group a series of database operations into a single logical unit of work. If any operation within the transaction fails, all changes are rolled back, preventing partial updates and maintaining data consistency.
To use transactions in Magento 2, you can use the Magento\Framework\DB\Transaction class. You inject an instance of this class, and then use the addObject() method to add objects (usually models) that you want to save. Finally, you call save() to commit the transaction. If an exception occurs during the save process, Magento will automatically rollback the transaction. For example:
use Magento\Framework\DB\Transaction;

public function __construct(
    Transaction $transaction
) {
    $this->transaction = $transaction;
}

public function someMethod() {
    try {
        $this->transaction->addObject($model1);
        $this->transaction->addObject($model2);
        $this->transaction->save();
    } catch (\Exception $e) {
        // Handle exception, log error
    }
}
Alternative approach involves directly using $resource->getConnection()->beginTransaction(), $resource->getConnection()->commit(), and $resource->getConnection()->rollBack() methods, though using the Magento\Framework\DB\Transaction class is generally preferred for its object-oriented approach and better integration with Magento's architecture.
28. Explain the concept of the Magento 2 object manager.
The Magento 2 Object Manager is a central component responsible for object instantiation and dependency injection. It acts as a factory for creating and retrieving objects within the Magento application. It primarily addresses the problem of managing dependencies between classes, enabling loose coupling and promoting code reusability and testability.
Instead of directly creating objects with the new keyword, you request them from the Object Manager. It then resolves the object's dependencies (constructor arguments), injecting the required instances. While directly using $objectManager->get() is discouraged in application code (favored are constructor injections), it is still a crucial part of the framework in certain situations like plugins or factories. Prefer dependency injection by declaring dependencies in the class's constructor. This makes it easier to test and maintain code.
29. How do you implement a custom validator for a form field in Magento 2?
To implement a custom validator for a form field in Magento 2, you need to create a custom module. The key steps involve: First, define a JavaScript mixin to extend the default validation rules. This mixin typically resides in view/frontend/requirejs-config.js and points to your custom JavaScript file. Inside your JavaScript file, use the jquery.validate library to add a new validation rule, specifying a unique rule name, a validation function, and an error message. Then, apply the validation rule to your form field using the data-validate attribute in your form's HTML. For example, data-validate='{"custom-rule": true}'.
Finally, clear the Magento cache and static content to ensure the changes are applied correctly. Here's an example of adding a custom rule:
//Example
require([ 'jquery', 'jquery.validate' ], function($) {
  $.validator.addMethod(
    'custom-rule',
    function (value, element, params) {
      return value === 'expectedValue'; // Your validation logic here
    },
    $.mage.__('Error Message')
  );
});
30. Describe how you would optimize a Magento 2 store for SEO.
Optimizing a Magento 2 store for SEO involves several key areas. First, focus on technical SEO: ensure proper site structure with a clear hierarchy, optimize the robots.txt and sitemap.xml files, and use schema markup for rich snippets. Improve site speed through image optimization, enabling browser caching, and using a Content Delivery Network (CDN). Resolve duplicate content issues using canonical tags and 301 redirects. Ensure mobile-friendliness by using a responsive theme.
Next, optimize on-page SEO: craft compelling meta titles and descriptions for all pages. Optimize product descriptions with relevant keywords, incorporating them naturally. Use header tags (H1-H6) effectively to structure content. Build high-quality backlinks from reputable websites through outreach and content marketing. Regularly update content to keep it fresh and relevant. Perform keyword research to identify high-value keywords and incorporate them into your content strategy. Finally, utilize Magento's built-in SEO features and extensions effectively.
Advanced Magento 2 interview questions
1. Explain the implications of using the same event observer for multiple events in Magento 2. What are the potential drawbacks and how can they be mitigated?
Using the same event observer for multiple events in Magento 2 can lead to a tightly coupled system and reduced code clarity. The observer's execute() method needs to handle different event data and logic, making it more complex and harder to maintain. A potential drawback is the increased risk of unintended side effects. If a change is made to the observer's logic to handle one event, it might inadvertently affect the behavior when triggered by other events.
Mitigation strategies include:
- Using Conditional Logic: Implement conditional statements within the
execute()method to handle each event type separately. This keeps everything in one place but can make code harder to read as complexity grows. - Creating Separate Observers: The best way is to create distinct observers for each event. This promotes the single responsibility principle and improves code maintainability. Each observer will be focused only on its related event and the execution logic becomes much simpler to implement.
- Utilizing Helper Classes: Extract common logic into helper classes that can be shared between different observers. This avoids code duplication while still maintaining separation of concerns.
2. Describe a scenario where you would implement a plugin on a public interface versus rewriting a class in Magento 2. What are the trade-offs?
I would implement a plugin (interceptor) on a public interface when I need to modify the behavior of a class without directly altering its code, especially when the class is provided by a third-party vendor or is part of the Magento core. This is useful for adding functionality, modifying input parameters, or altering the output of a method without risking upgrade conflicts or code instability.
Rewriting a class, on the other hand, should be considered when a more fundamental change to the class's logic is required. Trade-offs: Plugins offer better compatibility and easier upgrades but are limited to modifying existing methods. Rewrites provide greater flexibility to change the class's core functionality but introduce a higher risk of conflicts during upgrades and require more extensive testing. Rewrites also create a dependency on the class being rewritten, whereas plugins only depend on the interface.
3. How does Magento 2's dependency injection container handle circular dependencies? What strategies can you employ to resolve them?
Magento 2's dependency injection (DI) container throws an exception when it detects a circular dependency. It cannot automatically resolve these. To resolve circular dependencies in Magento 2, you can use the following strategies:
- Setter Injection: Instead of constructor injection, use setter methods or interface injection to inject dependencies. This can break the circular dependency chain because the dependency is not required at the time of object creation.
- Lazy Loading/Proxy Objects: Use proxy objects (Magento uses the
ObjectManagerInterface::create()method under the hood) to delay the instantiation of one of the dependencies until it is actually needed. This breaks the immediate circular dependency. - Refactoring: The best solution is to refactor the code to remove the circular dependency altogether. This often involves identifying the shared functionality and moving it to a separate class or service that both classes can depend on without creating a cycle. Consider whether the classes are truly cohesive and whether their responsibilities can be re-assigned. You may also consider using events to decouple the dependencies between modules.
4. Explain the process of creating and using a custom indexer in Magento 2. What are the key considerations for performance and scalability?
Creating a custom indexer in Magento 2 involves several steps. First, you define an indexer.xml file to declare the indexer, specifying its ID, class, and title. The class you define must implement \Magento\Framework\Indexer\ActionInterface (for full reindex) and \Magento\Framework\Mview\View\SubscriptionInterface (for partial reindex on data change). This class contains the logic for reindexing data, typically involving reading data from relevant sources and writing it to a dedicated index table. You also configure a di.xml file to inject dependencies into your indexer class. To trigger reindexing, you can use the command line (php bin/magento indexer:reindex <indexer_id>) or schedule it via cron.
Key considerations for performance and scalability include optimizing data retrieval queries to minimize database load. Use efficient data structures and algorithms in your indexing logic. For large datasets, consider using batch processing to avoid memory issues. Incremental indexing (using mview.xml and subscriptions) is crucial for keeping indexes up-to-date without full reindexes. Also, ensure your database schema is optimized for the index queries and that your server has sufficient resources (CPU, memory, disk I/O) to handle the indexing process. Avoid complex calculations during indexing and pre-calculate where possible. Use caching strategies to store intermediate results. Consider using Magento\Framework\Indexer\SelectFactory when building queries for the indexer.
5. Describe how you would implement a custom cache type in Magento 2. What configuration is required, and how would you invalidate the cache?
To implement a custom cache type in Magento 2, you'll need to: 1. Define a new cache type in etc/cache.xml. This involves specifying an id, label, group, and instance. The instance points to a class that extends \Magento\Framework\Cache\Frontend\Decorator\TagScope. The cache.xml file requires configuration similar to this:
<type name="custom_cache_type" instance="Vendor\Module\Cache\Type\Custom" id="custom_cache_type" label="Custom Cache Label" group="custom_cache_group"/>
- Create the cache type class (e.g.,
Vendor\Module\Cache\Type\Custom) implementing theload,save, andremovemethods inherited from the parent. You'll interact with the underlying cache storage here. 3. Define a cache group inetc/cache.xml, associating it with the custom cache type. Cache invalidation can be achieved in several ways. You can use cache tags when saving data (e.g.,$cache->save($data, $cacheKey, ['tag1', 'tag2'])). To invalidate, you can use the cache registry to clean the cache by tags or cache IDs. For example,$this->cacheManager->clean(['cache_tag'])will invalidate all caches with the tag 'cache_tag'. You can also flush the entire custom cache type using$this->cacheManager->flush($cacheTypeId).
6. What are the different types of virtual types in Magento 2, and how do they impact performance and maintainability?
Magento 2 virtual types are used to modify existing classes without directly altering their original code. They are defined in di.xml files. Common types include:
- Preference: Overrides a class or interface with another class.
- Type: Modifies the behavior of an existing class. Allows setting arguments for constructors, calling methods, or setting properties.
- Virtual Type: Creates an alias for an existing class, allowing for customization without affecting the original class.
Impact on performance and maintainability:
- Performance: Virtual types can improve performance by allowing for customized classes with only the necessary functionality, reducing overhead. Improper use, such as excessive layering, can negatively impact performance.
- Maintainability: They enhance maintainability by enabling modifications without changing core files, making upgrades easier. Overuse or complex configurations can make the codebase harder to understand and debug. Virtual types are preferable when configuring arguments, while preferences are appropriate for concrete implementations/overriding. Use plugins for behaviors, not modifications of arguments.
7. Explain the role of message queues (e.g., RabbitMQ) in Magento 2, and describe a use case where they would be beneficial.
Message queues like RabbitMQ in Magento 2 enable asynchronous communication between different parts of the system. This is crucial for handling tasks that don't need immediate processing, improving performance and resilience. Instead of directly executing a task, Magento 2 can publish a message to the queue, and a consumer process will pick it up and process it later.
A beneficial use case is order processing. When a customer places an order, instead of directly processing the order (which might involve multiple steps like inventory updates, payment processing, and email sending), Magento can publish an 'order placed' message to a queue. Separate consumers can then handle inventory updates, payment processing, and email sending asynchronously. This ensures the customer experiences a faster checkout process, even if the backend tasks take some time. If any of the consumer processes fail, the message stays in the queue until it is successfully processed, ensuring no data is lost.
8. How does Magento 2 handle versioning of database schema? Explain the process of creating and applying upgrade scripts.
Magento 2 uses declarative schema and upgrade scripts to manage database schema versioning. The db_schema.xml file defines the desired database structure. When changes are needed, upgrade scripts (PHP files in Setup/Patch/Data or Setup/Patch/Schema) are created.
Applying upgrade scripts involves Magento comparing the current database schema version with the module's version. If an upgrade is needed, Magento executes the scripts in alphanumeric order. Schema patches use the SchemaSetupInterface and Data Patches use the ModuleDataSetupInterface to execute database modifications. These patches are registered in the module.xml file within the <module><sequence> tag.
9. Describe the process of creating a custom admin grid with mass actions and filters in Magento 2. What are the key components involved?
Creating a custom admin grid in Magento 2 involves several steps. First, you define a UI component XML file (ui_component) which specifies the grid's structure, columns, filters, and data source. This XML file declares the grid's name and defines its configuration. The data source uses a dataProvider class to fetch data, often from a custom collection. Columns are defined, specifying their labels and data types, with options for searchability and filtering.
Mass actions are implemented by adding a mass action column. This column uses a UI component to define the actions. Each action specifies a URL to a controller that will handle the mass operation. Filters are added through the UI component XML, defining the fields to be filtered on and their data types. The listingToolbar section of the UI component includes the filter configuration. Key components include: UI component XML, data provider, collection, columns, mass actions, and filters. Code examples can be found in Magento's documentation. app/code/<Vendor>/<Module>/Ui/Component/Listing/Column/Actions.php
10. Explain how you would implement a multi-tenant architecture in Magento 2, where multiple stores share the same codebase and database.
Implementing multi-tenancy in Magento 2 with a shared codebase and database typically involves leveraging Magento's website and store view functionalities. You'd configure multiple websites within the same Magento installation, each representing a different tenant. Each website can have multiple stores/store views to handle localization or specific branding needs. Tenant-specific configuration, such as themes, payment methods, and shipping options, would be applied at the website or store view level.
To differentiate data between tenants in the shared database, you'd primarily rely on the website_id column present in most Magento entities. This column allows you to scope data to a specific website. Custom modules or extensions could utilize plugins or observers to ensure data is always filtered based on the current website or store. For example, when querying products, the website_id should be considered in the collection filter. This ensures each tenant only sees and interacts with its own data.
11. What are the different types of collectors in Magento 2's sales rules, and how do they impact the cart price rules application process?
Magento 2's sales rules (cart price rules) use collectors to gather and process data during the rule application. The main collectors are:
AddressCollector: Gathers and processes address-related data (shipping and billing addresses) to evaluate conditions related to customer location or address attributes.ItemsCollector: Collects and processes data about cart items (products), including their attributes, quantities, and prices. It's central to evaluating conditions based on product categories, SKUs, or custom attributes.PaymentCollector: Gathers payment method information for condition evaluation.ShippingCollector: Collects shipping method data, which can be used in conditions based on the shipping method selected.CouponCollector: Handles coupon code processing and condition evaluation based on coupon validity.
The collectors impact the cart price rule application process by efficiently gathering and making relevant data available. Each collector is called to add conditions to the rules and then data is processed, which contributes to the final result of determining if a specific sales rule applies and what actions need to be taken (e.g., applying a discount). Collectors help optimize the rules processing, improving performance by breaking data gathering into specific steps instead of processing all data simultaneously.
12. Describe the implications of using different session storage options (e.g., file, database, Redis) in Magento 2. What are the performance and security considerations?
Magento 2 offers several session storage options, each with its own implications. File-based sessions are the simplest, storing session data in temporary files on the server. This is suitable for small sites with low traffic but can become a performance bottleneck with increased load due to disk I/O. Database sessions store session data in a database table. This provides better scalability than file-based sessions but can still impact database performance if not properly configured and optimized. Redis sessions leverage the speed and efficiency of Redis, an in-memory data store. This is the preferred option for high-traffic Magento 2 stores as it significantly reduces the load on the database server. Redis also supports session clustering and replication for high availability.
From a security perspective, consider that session data often contains sensitive user information. File-based sessions require careful management of file permissions to prevent unauthorized access. Database sessions are subject to standard database security measures. Redis sessions benefit from Redis's built-in security features, but it's crucial to configure Redis properly with authentication and access control. Always ensure data is encrypted in transit using HTTPS to prevent session hijacking. session.cookie_secure should be set to true to ensure that cookies are only sent over HTTPS.
13. How does Magento 2's code generation framework work? Explain the role of interceptors and factories in the process.
Magento 2's code generation framework automates the creation of classes and interfaces, primarily improving performance and enabling plugin functionality. It creates missing classes like factories, interceptors, and proxies during the compilation process. Factories instantiate classes, enabling dependency injection. Interceptors are generated for classes that are targeted by plugins, allowing modification of public methods without directly altering the original class.
Interceptors work by creating a class that extends the original and uses plugin methods before, around, and after to modify the input and output of the original methods. Code generation creates these interceptors based on plugin configurations in di.xml. Factories are automatically generated for classes that are injected as dependencies. The code generation system looks at the constructor of a class and creates a factory which takes care of injecting these dependencies.
14. Explain the difference between using before, after, and around plugins in Magento 2. Provide a specific example for each plugin type.
In Magento 2, plugins (or interceptors) allow you to modify the behavior of public methods in classes. before plugins execute before the target method, allowing you to modify input arguments. For example, a before plugin for Magento\Catalog\Model\Product::setName could convert the product name to uppercase:
public function beforeSetName(Magento\Catalog\Model\Product $subject, $name)
{
  return [strtoupper($name)];
}
after plugins execute after the target method, allowing you to modify the result. If we had an after plugin for Magento\Catalog\Model\Product::getName, it could append a suffix to the product name:
public function afterGetName(Magento\Catalog\Model\Product $subject, $result)
{
  return $result . ' - Special Offer!';
}
around plugins completely wrap the target method. They receive the callable $proceed as an argument, which allows them to execute code before, after, or even instead of the original method. An around plugin for Magento\Catalog\Model\Product::getPrice could implement a discount:
public function aroundGetPrice(Magento\Catalog\Model\Product $subject, callable $proceed)
{
  $price = $proceed();
  return $price * 0.9; // 10% discount
}
15. Describe how you would implement a custom payment gateway in Magento 2, including the steps involved in processing payments and handling callbacks.
To implement a custom payment gateway in Magento 2, I would start by creating a new module with the necessary files, including etc/module.xml, etc/di.xml, etc/payment.xml, and the PHP classes for the payment method. In payment.xml, I'd define the payment method code and title, and specify the model class that will handle the payment processing logic. The model class would implement methods for authorize, capture, void, and refund, as needed. The di.xml file is used to configure dependencies, such as injecting the necessary Magento objects into my custom payment method class.
Payment processing involves redirecting the user to the payment gateway's website (if it's an offsite gateway), or collecting payment information on the Magento checkout page using custom templates. Upon successful payment, the payment gateway would send a callback to a specific URL on the Magento store. This callback is handled by a controller that updates the order status, creates an invoice, and notifies the customer. Error handling and logging are critical throughout this process, ensuring that all transactions are properly recorded and any issues are addressed promptly. Data security, compliance with PCI DSS standards, and proper error handling are paramount.
16. What are the different types of events in Magento 2 (e.g., global, area-specific), and how do they differ in terms of scope and availability?
Magento 2 events can be categorized primarily by their scope of availability. Global events are available throughout the entire application, regardless of the area (frontend, backend, or API). Area-specific events, on the other hand, are only dispatched and listened to within a particular area. This is managed through the area parameter in the events.xml file. For example, an event defined in frontend/events.xml will only be triggered during frontend requests, while an event in adminhtml/events.xml will only be triggered during backend requests.
In terms of scope, global events are generally used for tasks that need to affect the entire system or perform actions across different areas, like logging or system-wide configuration changes. Area-specific events are employed when the logic being implemented is only relevant to that specific area (e.g., frontend-specific product rendering modifications). Using area-specific events helps to reduce unnecessary code execution and improve performance by limiting the scope of event observers to only the relevant parts of the application. Example of a global event: customer_login; and example of an area-specific event: checkout_cart_product_add_after (frontend).
17. Explain how you would optimize Magento 2's performance for a high-traffic e-commerce website, including caching strategies, database optimization, and code profiling.
To optimize Magento 2 for high traffic, I'd focus on several key areas. Caching is critical: utilize Varnish for full-page caching, configure Redis for session and default caching, and leverage Magento's built-in block caching. Database optimization involves profiling queries with the Magento Profiler and tools like New Relic, optimizing slow queries (e.g., adding indexes), and ensuring proper database server configuration. Consider using a database clustering solution if the load demands it.
Further optimization includes code profiling using Xdebug or Blackfire.io to identify performance bottlenecks in custom modules or core Magento code. Reduce the number of HTTP requests by merging CSS/JS files (though this should be done carefully due to potential conflicts). Optimize images using tools like TinyPNG or ImageOptim. Enable production mode, which disables unnecessary debugging features, and keep Magento and its modules up-to-date to benefit from performance improvements.
18. Describe the process of creating a custom widget in Magento 2, including the configuration options and template rendering.
Creating a custom widget in Magento 2 involves several steps. First, you'll need to create a module. Within your module, you'll define the widget in widget.xml. This file specifies the widget's name, description, and, most importantly, the class that handles its logic. Configuration options are defined in widget.xml using <parameters>. Each parameter has a name, label, field type (like text, select), and source model (if applicable). These parameters allow admins to customize the widget in the Magento admin panel. The getBlock() method of the widget handles the configurations passed by the administrator in the backend.
Template rendering is handled by the widget's block class. This class extends Magento\Widget\Block\BlockInterface and implements the toHtml() method. The toHtml() method fetches the data required and assigns it to the template. The template file (a .phtml file) is specified in the block class using $this->setTemplate('Vendor_Module::path/to/template.phtml');. The template then uses standard PHP to display the data passed from the block. When the widget is inserted on a page (via the admin panel or layout XML), Magento renders the block class and its associated template, resulting in the widget's output.
19. How does Magento 2 handle customer segments? Explain the different types of conditions and actions that can be used to define segments.
Magento 2 customer segments allow you to target specific groups of customers based on their characteristics and behavior. These segments are dynamically updated, ensuring that customers are always in the correct segment based on their actions. Segments are defined through conditions that customers must meet. These conditions can include:
- Customer Attributes: Such as name, email, date of birth, gender, or customer group.
- Address Attributes: Billing and shipping address details.
- Order History: Based on order totals, number of orders, items ordered, and specific product categories purchased.
- Cart Attributes: Products in the cart, cart total, etc.
- Newsletter Subscriptions: Whether or not a customer is subscribed to the newsletter.
Actions associated with customer segments primarily involve applying rules, discounts, or displaying targeted content to customers who belong to a specific segment. For example, you can offer a discount to customers in a high-value segment, display promotional banners to new customers, or personalize content based on a customer's purchase history.
20. Explain the role of the service contracts in Magento 2. How can you ensure that your custom modules adhere to best practices for service contracts?
Service contracts in Magento 2 are sets of interfaces (PHP interfaces) that define the public API of a module. They decouple modules by defining how other modules can interact with a module's functionality without needing to know the implementation details. This promotes modularity, maintainability, and upgradeability.
To ensure adherence to best practices, you should always define interfaces in the Api directory of your module. Implement these interfaces in classes that handle the business logic. Use data interfaces (also in Api/Data) to define the structure of data being passed between modules. You should validate input data thoroughly using data validation techniques and exception handling. Finally, write unit and integration tests to confirm that your module's service contracts function as expected and conform to the defined interfaces.
21. Describe how you would implement a custom shipping method in Magento 2, including the steps involved in calculating shipping rates and displaying options to the customer.
To implement a custom shipping method in Magento 2, you'd start by creating a custom module with the necessary files in etc/. The etc/module.xml file registers the module, and etc/config.xml defines the default configuration values. Crucially, etc/di.xml will define your shipping method's class and its dependencies. The core logic resides in a PHP class that implements Magento\Shipping\Model\Carrier\CarrierInterface. This class must define a collectRates method. Inside collectRates, you'll calculate shipping rates based on factors like destination, weight, and cart value, creating a Magento\Quote\Model\Quote\Address\RateResult\Method object for each available option. You then add these rate results to a Magento\Shipping\Model\Rate\Result object, which is returned by collectRates.
For displaying the options to the customer, Magento automatically handles the rendering in the checkout process once your shipping method is enabled and rates are returned by the collectRates method. Configuration settings (like enabling/disabling the module, setting a handling fee, or specifying allowed countries) are defined in etc/adminhtml/system.xml, which generates the settings panel in the Magento admin. UI components might be required for enhanced checkout experiences.
22. What are the key considerations for securing a Magento 2 website against common vulnerabilities such as SQL injection and cross-site scripting (XSS)?
Securing a Magento 2 website involves several key considerations to protect against vulnerabilities like SQL injection and XSS. Input validation and sanitization are crucial, ensuring that all user-supplied data is properly validated and cleaned before being used in database queries or displayed on the website. Prepared statements (using parameterized queries) should be used in database interactions to prevent SQL injection. For XSS, output encoding/escaping user-supplied data before rendering it in HTML prevents malicious scripts from being executed. Regularly update Magento 2 and all extensions to patch known security vulnerabilities.
Furthermore, implement a robust Content Security Policy (CSP) to control the resources that the browser is allowed to load, mitigating the impact of XSS attacks. Consider using a Web Application Firewall (WAF) to filter malicious traffic. Regularly scan the website for vulnerabilities using automated security tools. Finally, always follow Magento's security best practices, and enable two-factor authentication (2FA) for all admin accounts.
Expert Magento 2 interview questions
1. Explain the nuances between interceptors and plugins in Magento 2.
Interceptors (also known as plugins) modify the behavior of public methods of classes in Magento 2. They achieve this by intercepting the method call and executing code before, after, or around the original method. They're useful for adding functionality without directly modifying the core code. Plugins are declared in di.xml and are configured to target specific methods.
In contrast, Plugins operate at a more granular level targeting individual methods. Interceptors can execute code before, after, or around a method call, providing precise control over the intercepted method's behavior.Plugins are simpler to implement and understand, especially for basic modifications.Plugins are preferred for scenarios where you need to add functionality to a module without modifying the original code or to modify a specific module of third party or any module.
2. Describe advanced techniques for optimizing Magento 2 performance in high-traffic scenarios.
To optimize Magento 2 for high-traffic, consider these advanced techniques: Varnish Cache with proper configuration for complex caching rules beyond default settings; implement a robust Redis setup for session and page caching, potentially using multiple Redis instances for different cache types; leverage a CDN (Content Delivery Network) to offload static assets (images, CSS, JavaScript); optimize the database with MySQL performance tuning, including query optimization and proper indexing, consider using tools like Percona Toolkit; and use PHP 7.4+ or PHP 8+ for improved performance. Furthermore, use tools like Blackfire.io to profile the Magento application and identify bottlenecks for code-level optimization.
Database sharding can distribute the load across multiple database servers. Asynchronous tasks using message queues (RabbitMQ) for tasks like indexing and sending emails avoid blocking the user's request. Optimize images using tools like jpegoptim and pngquant, and reduce the number of HTTP requests by merging CSS/JS files (although HTTP/2 mitigates this somewhat, it's still relevant). Finally, regularly review and optimize custom code and third-party extensions, as poorly written code can significantly impact performance. Use tools like New Relic APM for real-time monitoring and proactive performance issue detection.
3. Discuss your experience with implementing complex data import/export processes in Magento 2.
I've worked on several complex data import/export processes in Magento 2, primarily focusing on product catalogs, customer data, and order information. My approach generally involves leveraging Magento's built-in import/export functionality when feasible, extending it with custom scripts or modules when the requirements become more intricate. For instance, I've used Magento's CSV import for basic product updates, but for more complex scenarios like importing configurable products with numerous variations or handling custom attributes, I've developed custom import scripts using PHP and Magento's object manager. These scripts often involve data validation, transformation, and error handling to ensure data integrity. I've also used the data patch mechanism to programmatically import settings or configuration changes.
For exports, I've created custom reports that can be downloaded in various formats (CSV, XML, JSON) to meet specific client needs. When dealing with large datasets, I've implemented techniques like batch processing and memory management to prevent timeouts and ensure efficient processing. I have also integrated external APIs to import data from third party sources and used message queues to handle asynchronous import/export processes. Additionally, I've used Magento's API (REST and GraphQL) to programmatically import and export data, which allows for easier integration with other systems. I ensured secure data transfer and access control in these implementations.
4. How would you approach debugging a complex performance bottleneck in a Magento 2 application?
Debugging a complex performance bottleneck in Magento 2 involves a systematic approach. First, identify the slow areas using profiling tools like Magento's built-in profiler, New Relic, or Blackfire.io. These tools pinpoint slow database queries, code execution, and rendering times.
Next, analyze the identified bottlenecks. For slow database queries, use the MySQL slow query log or tools like EXPLAIN to optimize queries, add indexes, or refactor data structures. For slow code execution, analyze the profiling data to understand which functions or classes are taking the most time. Look for inefficient algorithms, excessive loops, or unnecessary object instantiations. Consider utilizing caching mechanisms like Redis or Varnish, and ensure that Magento's caching is properly configured (full page cache, block cache). Finally, review third-party modules for potential conflicts or inefficiencies; disable modules temporarily to see if performance improves. Leverage tools like Xdebug for deep code inspection when needed and static analysis tools to identify potential issues.
5. Describe your experience with different caching strategies in Magento 2 and when to use them.
Magento 2 leverages several caching strategies to improve performance. Full Page Cache (FPC) is crucial for anonymous users, caching entire pages for fast delivery. It's ideal for content that doesn't change frequently, such as category and product pages. Block caching allows you to cache specific blocks of content, useful for elements like navigation or promotional banners that are relatively static. Configuration caching stores Magento's configuration, and Layout caching stores page layouts, both significantly speeding up page rendering. Additionally, Magento utilizes Database query caching to reduce database load. For dynamic content like customer-specific data, private content caching can be used, using local storage to avoid hitting the server for every request.
The appropriate caching strategy depends on the content's volatility and user context. FPC is the go-to for static pages. Block caching is great for semi-dynamic content. Private content caching addresses dynamic customer data without sacrificing overall performance. It is also important to clear cache after making any code/configuration changes:
php bin/magento cache:clean
php bin/magento cache:flush
6. Explain the architectural differences between Magento 1 and Magento 2 and the reasons for the changes.
Magento 1 and Magento 2 have significant architectural differences driven by the need for improved performance, scalability, and maintainability. Magento 1 was built on a monolithic architecture, meaning all components were tightly coupled. This led to performance bottlenecks and difficulties in upgrading and customizing the platform. Magento 2 adopted a more modular architecture utilizing technologies such as:
- Service Contracts: Defining interfaces for modules, promoting loose coupling.
- Dependency Injection: Reducing dependencies between components.
- Composer: Managing dependencies and simplifying module installation/updates.
- Full Page Caching: Improved caching mechanisms for faster page load times.
- Improved Indexing: Faster indexing processes for better performance.
- PHP 7 Compatibility: Taking advantage of PHP 7's performance improvements (and later PHP 7.x and PHP 8.x).
These changes allowed for a more scalable, flexible, and maintainable platform. The shift towards modularity enables developers to create and integrate custom modules without significantly impacting the core system, leading to quicker development cycles and reduced upgrade complexities. The improved architecture also allowed Magento 2 to take advantage of newer PHP features for enhanced performance.
7. Describe how you would implement a complex custom shipping module with advanced rate calculation logic in Magento 2.
To implement a complex custom shipping module in Magento 2, I'd start by creating a new module with the necessary registration.php and module.xml files. The core logic resides in a custom shipping carrier class, extending Magento\Shipping\Model\Carrier\AbstractCarrier. This class would implement the collectRates method, which is the heart of the rate calculation.
Inside collectRates, I'd inject necessary dependencies like custom data models, database connections (if needed), or external API clients. The advanced rate calculation logic would involve fetching relevant data (customer address, cart contents, shipping destination, etc.), applying business rules, and possibly calling external APIs for real-time rates. The resulting Magento\Quote\Model\Quote\Address\RateResult\Method objects, containing shipping method name, cost, and method code, are then added to a Magento\Shipping\Model\RateResult\Result object, which is returned by the collectRates method. Configuration options for the module would be handled via the system.xml file, allowing admin users to configure settings like API keys, weight ranges, or custom rules. I would ensure the module is testable using PHPUnit with proper mocking to isolate unit level functionality, and integration tests to ensure data flows correctly between the various classes of the module.
8. Discuss your experience with using message queues for asynchronous processing in Magento 2.
I have experience using message queues in Magento 2 to handle asynchronous tasks, improving application performance and user experience. Specifically, I've worked with the queue and cron_queue modules to defer tasks such as sending emails, processing orders, and updating product indexes. This prevents these operations from blocking the main request flow, ensuring faster page load times for customers.
My approach typically involves defining message queues in queue.xml, creating corresponding consumers to process the messages, and using producers to enqueue messages when specific events occur. For example, upon order placement, a message is added to the sales.order.place queue, which is then consumed by a process that sends order confirmation emails and updates inventory. I've also implemented error handling and retry mechanisms to ensure reliable processing of messages, even in the event of temporary system failures. The Magento CLI commands are useful for queue management, specifically queue:consumers:start.
9. Explain how you would implement a custom payment gateway integration with complex transaction processing requirements in Magento 2.
To implement a custom payment gateway with complex transaction processing in Magento 2, I would start by creating a custom module. This module would include a model that extends \Magento\Payment\Model\Method\AbstractMethod. This class handles the core payment logic. The _code property in this class needs to be set to a unique identifier for the payment method.
Next, I'd implement methods for authorizing, capturing, and refunding payments, potentially leveraging Magento's transaction management system (e.g., \Magento\Sales\Model\Order\Payment\Transaction). Configuration options, such as API keys and URLs, would be managed through the system configuration using system.xml. Complex requirements like tokenization or recurring payments would necessitate building additional services or components within the module, carefully adhering to Magento 2's plugin and dependency injection architecture for extensibility and maintainability. Finally, thorough testing is critical. Use Magento's testing framework to create unit and integration tests. Also, test the payment gateway in a staging environment with real-world scenarios before deploying it to production.
10. Describe your approach to securing a Magento 2 application against common web vulnerabilities.
To secure a Magento 2 application, I would focus on several key areas. Firstly, keeping the Magento core, extensions, and PHP up-to-date is crucial to patch known vulnerabilities. Regularly applying security patches provided by Magento is a priority. Secondly, I'd implement a strong password policy and enforce two-factor authentication (2FA) for all admin users. Limiting admin access based on the principle of least privilege is also important.
Furthermore, I'd configure a Web Application Firewall (WAF) to protect against common attacks like SQL injection and Cross-Site Scripting (XSS). Implementing proper input validation and output encoding would also help mitigate these risks. Enabling HTTPS and using strong encryption protocols is essential for securing data in transit. Regularly scanning the application for vulnerabilities using automated tools and performing penetration testing are vital for continuous security assessment. Following Magento's security best practices is also an ongoing process.
11. How do you handle complex dependency injection scenarios involving circular dependencies in Magento 2?
Circular dependencies in Magento 2 can be tricky. Constructor injection, if not handled correctly, will lead to errors. The most common approach to address this is to use interface segregation and lazy loading. Split large classes into smaller, more focused classes with well-defined interfaces. Inject these interfaces rather than concrete classes. Lazy loading, achieved using the ObjectManager or by injecting factories, allows delaying the instantiation of the dependent class until it's actually needed. This breaks the immediate circular dependency.
Another method involves refactoring. Rethink the class design to eliminate the direct dependency. Sometimes a collaborator class can be introduced to handle the interaction, effectively breaking the cycle. If possible, use plugin/interceptors as they provide a way to modify the behavior of a class without directly depending on it. Properly configured areas in di.xml is also important in managing dependency injection across different parts of the Magento application. Remember, careful design is often key to preventing these issues in the first place.
12. Explain the role and implementation of Elasticsearch in a Magento 2 environment.
Elasticsearch in Magento 2 serves as the primary catalog search engine, replacing the default MySQL search for improved performance and scalability. It handles indexing and searching product data, categories, and other relevant information.
Implementation involves configuring Magento to connect to an Elasticsearch server. This includes setting up the Elasticsearch host, port, and index prefix within Magento's admin panel. Magento then pushes product data to Elasticsearch for indexing. Modules like Smile_Elasticsuite enhance this integration, offering advanced features like faceted navigation and improved search relevance. You can configure connection settings at Stores > Configuration > Catalog > Catalog > Catalog Search. Then the indexer will populate the data with a command such as bin/magento indexer:reindex catalogsearch_fulltext
13. Describe your experience with contributing to open-source Magento 2 projects or developing custom modules.
I've contributed to several open-source Magento 2 projects and developed custom modules. For example, I submitted a pull request to improve the performance of the catalog_product_index_price indexer by optimizing the SQL queries used to calculate product prices. This involved analyzing the existing code, identifying bottlenecks, and implementing more efficient queries using JOIN clauses and subqueries.
Furthermore, I've developed custom modules to extend Magento 2's functionality. One such module integrated a third-party payment gateway using Magento's payment processing API. This included creating custom controllers, models, and templates to handle payment requests, responses, and error handling. I also created a CLI command to import products from a CSV file, using the Magento's object manager and product repository.
14. How would you approach load testing a Magento 2 application to identify performance bottlenecks?
To load test a Magento 2 application, I'd use a tool like Apache JMeter or Gatling to simulate concurrent users performing various actions, like browsing categories, adding products to cart, and completing checkout. The key is to create realistic scenarios that mimic actual user behavior. During the test, I'd monitor server resources (CPU, memory, disk I/O) and Magento-specific metrics (database query times, page load times, Redis cache hit rate) to pinpoint bottlenecks.
Specifically, I'd focus on these areas:
- Database: Slow queries are a common issue. Tools like MySQL slow query log can help identify them.
- Caching: Verify that Magento's caching mechanisms (Varnish, Redis) are properly configured and effectively caching content.
- PHP: Profile PHP execution to identify slow code or inefficient algorithms. Xdebug and Blackfire.io are useful for this.
- Frontend: Optimize images, CSS, and JavaScript to reduce page load times.
15. Explain the concepts of Domain-Driven Design (DDD) and how they can be applied in a Magento 2 project.
Domain-Driven Design (DDD) focuses on creating software that closely models a specific business domain. In Magento 2, this means structuring the application around core business concepts like customers, products, orders, and inventory, rather than technical considerations. Key concepts include: Ubiquitous Language (a common terminology shared by developers and domain experts), Entities (objects with a unique identity, like a specific product), Value Objects (objects defined by their attributes, like a monetary amount), Aggregates (clusters of entities and value objects treated as a single unit), Repositories (interfaces for accessing and persisting aggregates), and Services (operations that don't naturally belong to an entity or value object).
Applying DDD in Magento 2 involves identifying the core domain concepts and defining clear boundaries between them. This might mean creating custom modules that represent specific domain areas, each with its own entities, value objects, and repositories. For example, a "Loyalty Program" module could be built with entities like LoyaltyAccount and RewardPoint, along with repositories to manage them. Using interfaces and dependency injection promotes loose coupling, making the system more maintainable and testable. Custom modules can then expose API endpoints, so other parts of magento or 3rd party application can access the business logic. The goal is to build software where business logic is well-defined and separated from infrastructural concerns, aligning the codebase with the business requirements.
16. Describe the process of creating and managing API integrations (REST or GraphQL) in Magento 2.
Creating and managing API integrations in Magento 2 involves several steps. First, you create a new integration in the Magento Admin under System > Integrations. This generates consumer key, secret, access token, and secret used for authentication. You configure the integration, specifying the resources (APIs) that the integration needs access to. This involves granting permissions to specific Magento modules and functionalities.
Once the integration is active, you can use the generated credentials (consumer key, consumer secret, access token, access token secret) to authenticate your API requests. For REST APIs, you'd typically use OAuth 1.0a. For GraphQL, you'd use an access token obtained via the OAuth flow or by exchanging username/password for a token. Magento provides comprehensive documentation for its REST and GraphQL APIs, including details on request formats, authentication methods, and available endpoints. You can use tools like Postman or Insomnia to test and debug API calls before incorporating them into your application.
17. How do you stay up-to-date with the latest Magento 2 releases, security patches, and best practices?
I stay up-to-date with Magento 2 through a combination of official and community resources. I regularly check the official Magento website, including the Magento Security Center for security patches and release notes. I also subscribe to the Magento Commerce blog and follow Magento's official social media channels (Twitter, LinkedIn).
Additionally, I participate in the Magento community through forums like Stack Exchange (Magento), Magento Community Slack channels, and attend Magento conferences and webinars when possible. I also follow key Magento influencers and developers on social media and subscribe to relevant newsletters to get insights into best practices and emerging trends. Reviewing the release notes and changelogs for each new version and patch is a crucial step. I also subscribe to the Github repository to monitor pull requests and updates to the core code.
18. Explain how you would implement a multi-website or multi-store setup with complex shared catalog and customer management rules.
To implement a multi-website/store setup with shared catalogs and customer management, I would leverage a multi-tenant architecture. Each website/store would represent a tenant, sharing the core application code and database schema, but with tenant-specific data and configurations. The shared catalog would reside in a central location, with options to configure visibility and pricing at the tenant (website/store) level. Customer management would also be centralized, allowing customers to potentially use a single account across multiple websites, with tenant-specific permissions and roles.
Technically, I'd use a framework that supports multi-tenancy well. The data model would include tenant identifiers on key entities like products, categories, and customer profiles. Authentication and authorization would be configured to respect tenant boundaries. For example, in a PHP context, I'd consider using a package like Tenancy for Laravel and leverage features like database separation or shared database with tenant identifier columns. Catalog sharing could be implemented using a shared database table and tenant-specific product overrides. The decision of shared database or separate databases often depends on the scale of data and the desired level of isolation.
19. Describe your experience with using tools for automated testing (unit, integration, functional) in Magento 2 projects.
I have experience using various automated testing tools in Magento 2 projects. For unit testing, I primarily use PHPUnit, often in conjunction with Magento's testing framework, to verify the behavior of individual classes and methods. I've written tests to cover different scenarios, including positive and negative cases, and I'm familiar with mocking dependencies to isolate units under test.
For integration and functional testing, I've used tools like PHPUnit with Selenium and Codeception. I've created tests to simulate user interactions and verify that different modules work together correctly. I’ve also utilized Magento's Integration Testing Framework (MITF) to ensure system stability after code changes. While creating tests, I focused on aspects like performance, security, and data integrity, writing testable and maintainable code using best practices and design patterns.
20. Explain the process of customizing the Magento 2 checkout flow with complex validation and data manipulation requirements.
Customizing the Magento 2 checkout flow for complex validation and data manipulation usually involves creating custom modules that intercept and modify the checkout process. This can be achieved using plugins (interceptors) on classes like Magento\Checkout\Model\ShippingInformationManagement or Magento\Quote\Model\QuoteRepository. For example, a plugin before the saveAddressInformation method can allow modifying address data before it's saved to the quote. Similarly, plugins after can be used to manipulate the quote after data persistence.
For validation, custom validation rules can be added to form elements via UI components. Alternatively, plugins can be used to add server-side validation. Data manipulation often involves extending the quote model with custom attributes. Observers can also be used, especially for actions like checkout_submit_before or sales_order_place_before, enabling manipulation of the order object before it's created. Consider using preference when overriding existing classes to maintain code maintainability.
21. Describe the differences between a ViewModel and a Block in Magento 2 and when you would use each.
In Magento 2, both ViewModels and Blocks contribute to the presentation layer, but they have distinct responsibilities. A Block is a PHP class responsible for preparing data to be displayed in a template (.phtml file). Blocks interact directly with Magento's layout system and often contain logic related to data retrieval, formatting, and interacting with models. Blocks are tightly coupled with the view layer and are typically used when the data preparation requires interacting with Magento's core functionality.
A ViewModel, introduced later, serves as a simpler data provider for templates. It encapsulates view-specific logic, making templates cleaner and more maintainable. ViewModels are not part of the layout system directly; instead, they are instantiated and passed to blocks or templates. They promote separation of concerns by isolating complex view logic from blocks and templates, leading to more testable and reusable code. Use a ViewModel when you need to pass data to a template without involving the full complexity or overhead of a Block, particularly for simple data formatting or calculations. Think of ViewModels as lightweight data containers that enhance template rendering.
22. Explain the nuances between different types of events in Magento 2 (e.g., global, area-specific).
In Magento 2, events allow custom code to execute in response to specific system actions. Global events are dispatched regardless of the area (frontend, adminhtml, etc.) and are defined in the events.xml file in a module's etc directory. Area-specific events, on the other hand, are only dispatched within a particular area. For example, events defined in etc/frontend/events.xml are only triggered in the frontend area, while those in etc/adminhtml/events.xml are only triggered in the admin area. This area-specific scoping helps to prevent conflicts and improve performance by ensuring that event observers only execute when they're relevant to the current context.
The area attribute in events.xml controls event scoping. If the area attribute is omitted or set to global, the event is a global event. Otherwise, it's an area-specific event. Using area-specific events improves the codebase modularity because observer logic intended only for the frontend, for example, won't run during a cron job or in the admin backend. An example is:
<event name="checkout_cart_product_add_after">
    <observer name="example_observer" instance="Vendor\Module\Observer\ExampleObserver" />
</event>
If this event is inside etc/frontend/events.xml it applies only in the frontend.
23. Describe your approach to handling complex data migrations from older versions of Magento or other platforms to Magento 2.
My approach to complex data migrations to Magento 2 involves careful planning, analysis, and iterative execution. I begin with a thorough assessment of the existing data structure in the older Magento version or other platform. This includes identifying custom attributes, extensions, and any data inconsistencies. I then map the source data to the Magento 2 data schema, creating detailed transformation rules. This mapping is crucial for ensuring data integrity.
Next, I use a combination of Magento's built-in data migration tool and custom scripts for more complex data transformations. I prioritize migrating critical data like customers, products, and orders first, followed by less essential data. Data validation is performed after each migration stage, and any errors or discrepancies are immediately addressed. This iterative approach allows for early detection of issues and minimizes the risk of data loss or corruption. I also pay close attention to performance optimization, especially when dealing with large datasets. For example, I would use the following CLI command bin/magento migrate:data --reset --auto-resolve vendor/magento/data-migration-tool/etc/opensource-to-opensource/1.9.4.5/config.xml after configuration and mapping.
24. How would you approach integrating Magento 2 with a third-party ERP or CRM system with complex data synchronization requirements?
Integrating Magento 2 with a third-party ERP/CRM with complex data sync often requires a multi-faceted approach. Initially, a thorough analysis of data mapping and transformation needs between the systems is crucial. Custom APIs or message queues (like RabbitMQ) are usually necessary to handle the volume and complexity of data. We'd establish dedicated data models and synchronization processes for each entity (customers, products, orders, etc.) considering data direction, conflict resolution, and error handling.
Furthermore, robust logging and monitoring are essential to track synchronization status and identify issues promptly. A well-defined data validation process before and after synchronization can help prevent data inconsistencies. Consider utilizing Magento's service contracts and extension attributes to add any necessary custom data to Magento entities. Finally, incrementally building and testing the integration is vital, starting with a subset of data and gradually expanding to the full scope.
25. Explain the role of service contracts and data interfaces in Magento 2 module development.
In Magento 2, service contracts are sets of PHP interfaces that define the public API of a module. They promote loose coupling and enable other modules (or external systems) to interact with a module's functionality without knowing its internal implementation. This enhances maintainability and upgradability. Service contracts consist primarily of data interfaces and service interfaces.
Data interfaces (or data entities) define the structure of the data being passed between modules. They are PHP interfaces that define getter and setter methods for object properties. This ensures that data is consistently represented and prevents direct access to a module's internal data structures. Example:
interface MyDataInterface {
 public function getId();
 public function setId($id);
 public function getName();
 public function setName($name);
}
26. Describe the steps involved in creating a custom indexer in Magento 2 for optimizing search performance.
Creating a custom indexer in Magento 2 involves several key steps to improve search performance. First, you need to define the indexer in indexer.xml, specifying the indexer ID, view ID, and data source model. The data source model is crucial as it defines how data is retrieved for indexing. This model should implement the Magento\Framework\Indexer\ActionInterface. Second, you'll create a view model responsible for transforming the data retrieved by the source model into a format suitable for indexing. This view model should implement the Magento\Framework\Mview\View\SubscriptionInterface. Finally, implement the logic for reindexing either through the command line (bin/magento indexer:reindex) or programmatically. Consider using dependency injection and plugins for maintainability. Remember to clear the cache after creating and enabling your indexer.
27. Explain the differences between UI components, layouts, and templates in Magento 2 and how they work together.
In Magento 2, UI components are reusable building blocks representing individual elements like buttons, forms, or grids. Layouts define the structure and arrangement of these components on a page using XML files (e.g., default.xml, catalog_product_view.xml). Layout XML declares containers and blocks. Containers are structural elements, while blocks are PHP classes associated with PHTML templates, responsible for data and logic. Templates (PHTML files) are responsible for the presentation layer. They contain the HTML markup and PHP code to render the actual UI.
They work together in a hierarchical manner: Layouts define the page structure, placing UI components within containers and blocks. Blocks prepare data and call templates. Templates then use this data to render the final HTML. Components are reusable so they can be included in different layouts. uiComponent type nodes (declared in layout XML) directly instantiate JavaScript UI components, making them highly dynamic and interactive.
Magento 2 MCQ
Question 1.
Which Magento CLI command is used to trigger a reindex process from the command line?
Options:
Question 2.
Which of the following is the correct way to create a new block in Magento 2?
Options:
Options:
Question 3.
Which method is the most appropriate way to override a core Magento 2 block?
Options:
Question 4.
Which of the following files is primarily responsible for defining cron jobs in a Magento 2 module?
Options:
Question 5.
What is the correct directory structure required for creating a basic custom module in Magento 2?
Options:
Question 6.
In Magento 2, which of the following XML file is used to define a plugin/interceptor?
Options:
Question 7.
What is the correct directory structure to create a custom theme in Magento 2 inheriting from the Luma theme?
Options:
Question 8.
In Magento 2, which file is primarily responsible for defining the structure and configuration of a widget?
Options:
Question 9.
In Magento 2, what XML file is used to declare a preference to override a class?
Options:
Question 10.
Which of the following is the correct way to create a new product attribute programmatically in Magento 2 using the Magento\Catalog\Setup\EavSetup class?
options:
Options:
Question 11.
Which of the following methods is the most appropriate way to create a new customer attribute programmatically in Magento 2?
Options:
Question 12.
How do you define an observer in Magento 2?
Options:
Question 13.
What is the correct way to define a new API endpoint (web API) in Magento 2? Choose the option that accurately describes the required files and their purpose.
Options:
Options:
Question 14.
Which of the following files is required to define a new system configuration field in Magento 2?
Options:
Question 15.
In Magento 2, how do you define a new router to handle custom URLs?
options:
Options:
Question 16.
Which of the following XML files is used to define a new event in Magento 2?
Options:
Question 17.
Which of the following is the correct way to override a model in Magento 2?
options:
Options:
Question 18.
Which of the following class types is primarily used to perform database schema changes during module installation or upgrades in Magento 2?
options:
Options:
Question 19.
In Magento 2, what is the primary purpose of a source model used in a system configuration field?
Options:
Question 20.
Which of the following is the primary configuration file used to define a UI component in Magento 2?
Options:
Question 21.
What is the primary interface that a custom payment method model must implement in Magento 2?
Options:
Options:
Question 22.
Which of the following steps correctly outlines how to create a virtual product in Magento 2?
options:
Options:
Question 23.
Which of the following is the correct way to create a new order programmatically in Magento 2?
Options:
Question 24.
Which of the following is the correct way to programmatically create a newsletter subscriber in Magento 2?
options:
Options:
Question 25.
What is the preferred method for injecting a dependency (e.g., a model or helper) into a block in Magento 2?
Options:
- A: Using the
getObjectManager()directly within the block's constructor. - B: Declaring the dependency in the block's constructor as a parameter, which Magento's dependency injection system will automatically resolve.
- C: Creating a global variable to hold the dependency instance.
- D: Using a static method to retrieve the dependency instance.
Options:
Which Magento 2 skills should you evaluate during the interview phase?
While a single interview can't reveal everything about a candidate, focusing on key skills is essential. For Magento 2 developers, evaluating specific skills ensures you're hiring someone ready to tackle the challenges of e-commerce development. This targeted approach will help you gauge their expertise effectively.
Magento Architecture
Screening for architectural understanding can be easier with a dedicated test. A Magento test helps filter candidates with the right knowledge base.
To further assess their knowledge of Magento architecture, you can ask a targeted question.
Explain the role of the di.xml file in Magento 2.
Look for an explanation that includes dependency injection, module configuration, and preference settings. A good answer will demonstrate an understanding of how Magento components are configured and interact.
Custom Module Development
Evaluating module development skills is easier with assessment tests. You can use the Magento test to filter suitable candidates.
Gauge their module development skills with a practical interview question.
Describe the steps involved in creating a simple 'Hello World' module in Magento 2.
The candidate should mention creating the module folder, module.xml, registration.php, and a basic controller. Look for an understanding of the module structure and file placement.
Theme Customization
You can gauge the level of theme customization skills using skill tests. Use the HTML/CSS online test to assess if they have the right skillset.
Try asking a question targeted specifically on theme customisation.
How would you override a Magento 2 core template in your custom theme?
The answer should include creating the necessary directory structure in their theme and copying the template file. The explanation should also show how Magento's fallback system works.
Hire Top Magento 2 Developers with Skills Tests and Targeted Interview Questions
Looking to hire a talented Magento 2 developer? It's important to accurately gauge their Magento 2 skills to ensure they're the right fit for your team and project needs.
Skills tests are the best way to accurately assess a candidate's abilities. Consider using Adaface's Magento Online Test to quickly evaluate their expertise.
Once you've identified top candidates through skills testing, you can focus your interview time on in-depth discussions. This allows you to explore their experience and problem-solving skills.
Ready to find your next Magento 2 expert? Start your journey with a free trial on our online assessment platform today.
Magento Online Test
40 mins | 10 MCQs and 1 Coding Question
The Magento Online Test uses scenario-based multiple choice questions to evaluate candidates on their technical knowledge and practical skills related to Magento, a popular e-commerce platform. The test assesses candidates' proficiency in various aspects of Magento development, including topics such as Magento architecture, Magento installation and configuration, theme development, module development, customization of core functionalities, performance optimization, security, and debugging.
Try Magento Online Test
Download Magento 2 interview questions template in multiple formats
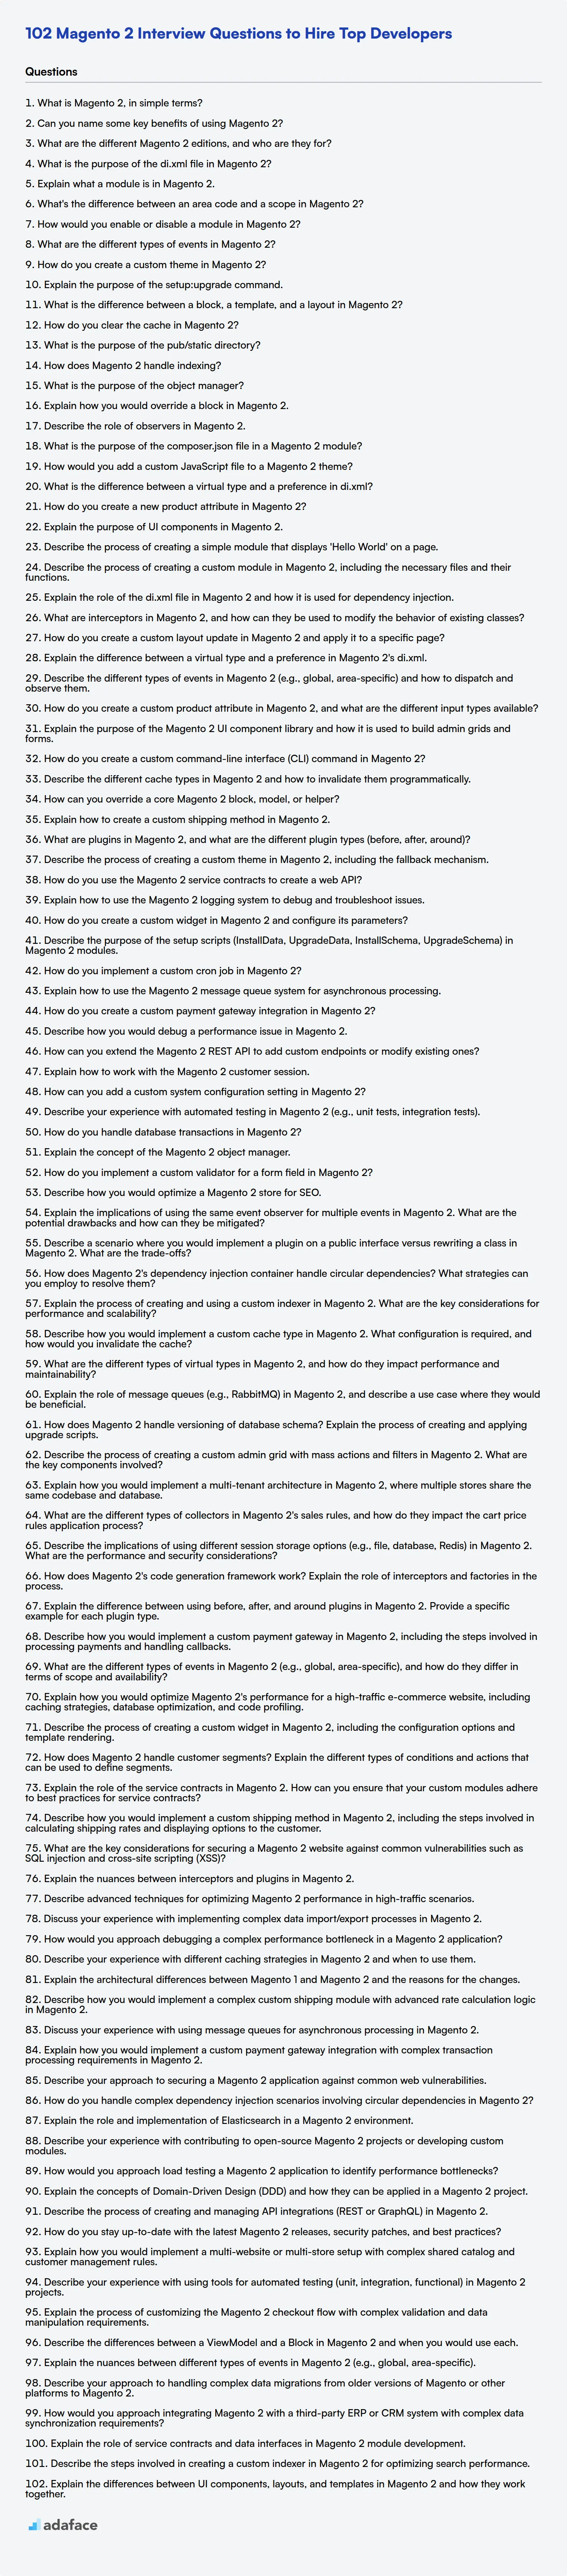
Magento 2 Interview Questions FAQs
What are basic Magento 2 interview questions for?
Basic questions help assess a candidate's fundamental knowledge of Magento 2 concepts and terminology.
When should I use intermediate Magento 2 interview questions?
Use intermediate questions to evaluate a candidate's ability to apply Magento 2 knowledge to practical scenarios and problem-solving.
What is the purpose of advanced Magento 2 interview questions?
Advanced questions are designed to test a candidate's in-depth understanding of complex Magento 2 features, architecture, and customization techniques.
How can expert Magento 2 interview questions help me?
Expert questions help identify candidates with mastery of Magento 2, including performance optimization, security best practices, and contribution to the Magento community.
Why use skills tests in addition to interview questions?
Skills tests provide a standardized assessment of a candidate's practical Magento 2 abilities, complementing the insights gained from interview questions.
40 min skill tests.
No trick questions.
Accurate shortlisting.
We make it easy for you to find the best candidates in your pipeline with a 40 min skills test.
Try for freeRelated posts
Free resources

Join 1200+ companies in 80+ countries.
Try the most candidate friendly skills assessment tool today.

40 min tests.
No trick questions.
Accurate shortlisting.
No trick questions.
Accurate shortlisting.