
Spring Boot interview questions for freshers
1. What is Spring Boot, and why do developers use it?
2. Can you explain the concept of 'auto-configuration' in Spring Boot?
3. What are Spring Boot Starters, and how do they simplify dependency management?
4. How would you create a simple 'Hello, World!' application using Spring Boot?
5. What is the purpose of the `@SpringBootApplication` annotation?
6. Explain what an embedded server is in the context of Spring Boot.
7. How do you configure different environments (e.g., development, production) in a Spring Boot application?
8. What are some common Spring Boot annotations you've used or heard of?
9. How does Spring Boot handle exception handling?
10. Can you describe how to access properties defined in `application.properties` or `application.yml`?
11. What is the difference between `@RestController` and `@Controller` in Spring Boot?
12. How can you perform database operations using Spring Boot and Spring Data JPA?
13. What is a Spring Bean, and how are beans managed in a Spring Boot application?
14. Explain how Spring Boot simplifies the process of creating RESTful APIs.
15. What are some advantages of using Spring Boot over traditional Spring development?
16. How would you deploy a Spring Boot application to a cloud platform like AWS or Azure?
17. What is Spring Data REST, and how does it help in building RESTful services?
18. Explain how Spring Boot handles security.
19. How do you add logging to a Spring Boot application?
20. What are Spring Boot Actuators, and what kind of information do they provide?
21. How can you test a Spring Boot application?
22. If you have a Spring Boot application that needs to interact with external APIs, how would you approach that?
Spring Boot interview questions for juniors
1. What is Spring Boot and why do developers use it?
2. Can you explain the concept of 'auto-configuration' in Spring Boot?
3. What are Spring Boot starters and how do they simplify project setup?
4. How would you create a simple REST API endpoint using Spring Boot?
5. What is the purpose of the `@SpringBootApplication` annotation?
6. Explain what a dependency injection is and how Spring Boot helps in achieving that?
7. What is an embedded server in Spring Boot? Why is it useful?
8. How can you configure different environments (dev, prod) in Spring Boot?
9. What are some common Spring Boot annotations you've used?
10. How do you handle exceptions in a Spring Boot application?
11. What is the purpose of `application.properties` or `application.yml` file?
12. Explain how to connect to a database using Spring Boot.
13. What is Spring Data JPA? How does it simplify database operations?
14. How do you test a Spring Boot application? What types of tests can you write?
15. What are some advantages of using Spring Boot over traditional Spring?
16. How can you add custom dependencies to your Spring Boot project?
17. What is the role of a `pom.xml` file in a Spring Boot project?
18. Explain the concept of Spring Beans and how they are managed in Spring Boot.
19. How would you secure a Spring Boot API endpoint?
20. What are Spring Boot Actuators? What kind of information do they expose?
21. How do you handle logging in a Spring Boot application?
22. What is a message queue, and how could you use one in a Spring Boot application?
23. If you had a slow-running API endpoint, how would you troubleshoot it using Spring Boot's tools?
24. How would you deploy a Spring Boot application to a cloud environment?
25. What is the difference between `@RestController` and `@Controller` in Spring Boot?
26. Explain how Spring Boot simplifies the creation of microservices.
27. How does Spring Boot simplify the process of creating scheduled tasks?
Spring Boot intermediate interview questions
1. How does Spring Boot handle auto-configuration, and what are some ways to customize or disable it?
2. Explain Spring Boot's actuator module and its benefits for monitoring and managing applications.
3. Describe how you would implement exception handling in a Spring Boot REST API, including global exception handling.
4. What are Spring Boot starters, and how do they simplify dependency management in a Spring Boot project?
5. How would you configure different environments (e.g., development, testing, production) in a Spring Boot application?
6. Explain how Spring Boot integrates with databases using Spring Data JPA. Include details on repository interfaces.
7. Describe the process of securing a Spring Boot application with Spring Security, including authentication and authorization.
8. How would you implement caching in a Spring Boot application, and what are some of the caching providers you can use?
9. Explain how to use Spring Boot's testing support to write unit and integration tests for your application.
10. Describe how you would configure logging in a Spring Boot application, including setting log levels and output formats.
11. How can you use Spring Boot to create and consume RESTful web services?
12. Explain how Spring Boot handles transaction management, and how you can use annotations to control transactions.
13. What are some best practices for deploying a Spring Boot application to a cloud environment like AWS or Azure?
14. How does Spring Boot support asynchronous processing, and how can you use annotations like `@Async`?
15. Describe the process of creating a custom Spring Boot starter.
16. Explain how Spring Boot simplifies the process of working with message queues like RabbitMQ or Kafka.
17. How would you monitor your Spring Boot application in production, including metrics and health checks?
18. Describe how you would configure and use Spring Boot's support for internationalization (i18n) and localization (l10n).
19. Explain how to use Spring Boot with different types of databases (e.g., relational, NoSQL).
20. How would you handle file uploads and downloads in a Spring Boot application?
21. Describe how Spring Boot supports building reactive applications with Spring WebFlux.
Spring Boot interview questions for experienced
1. How does Spring Boot's auto-configuration work internally, and how can you customize or disable specific auto-configurations?
2. Explain your experience with Spring Boot Actuator. What custom metrics have you implemented, and how did you secure the Actuator endpoints?
3. Describe a scenario where you used Spring Boot's embedded database support (e.g., H2). What were the advantages and disadvantages compared to using an external database?
4. How have you implemented caching in a Spring Boot application? What caching providers have you used (e.g., Redis, Caffeine), and what are the trade-offs?
5. Explain how you have handled asynchronous tasks in Spring Boot. What are the pros and cons of using `@Async` vs. a message queue like RabbitMQ or Kafka?
6. Describe your experience with Spring Boot's testing framework. What types of tests have you written (e.g., unit, integration, end-to-end), and how did you handle testing external dependencies?
7. How does Spring Boot simplify the process of creating RESTful APIs? What are some best practices for designing and implementing REST APIs with Spring Boot?
8. Explain how you've handled security in a Spring Boot application. What authentication and authorization mechanisms have you used (e.g., OAuth2, JWT), and how did you protect against common web vulnerabilities?
9. How have you used Spring Boot's dependency injection features in complex applications? Can you provide an example of using constructor injection, setter injection, and field injection?
10. Describe your experience with Spring Boot's data access features. What ORM frameworks have you used (e.g., JPA, Hibernate), and how did you optimize database queries?
11. How have you monitored and managed Spring Boot applications in production? What tools have you used for logging, metrics, and alerting?
12. Explain how you have used Spring Boot's configuration management features. How did you handle different environments (e.g., development, testing, production), and how did you externalize configuration?
13. How would you implement a custom health indicator in Spring Boot Actuator to monitor a specific aspect of your application?
14. Describe a situation where you needed to create a custom Spring Boot starter. What were the components you included in the starter, and how did you make it configurable?
15. How do you handle transactions in Spring Boot, especially when dealing with multiple data sources or microservices?
16. Explain how you would implement rate limiting in a Spring Boot application to protect against abuse.
17. Describe a scenario where you used Spring Boot's `CommandLineRunner` or `ApplicationRunner` interfaces. What kind of tasks did you perform during application startup?
18. How have you used Spring Boot's profiles feature to manage different application configurations for various environments?
19. Explain how you would implement a background job scheduler in a Spring Boot application. What are the pros and cons of using `@Scheduled` vs. a more robust scheduler like Quartz?
20. How have you handled versioning of REST APIs in a Spring Boot application? What strategies did you use (e.g., URI versioning, header versioning), and what are the trade-offs?
21. Describe a situation where you used Spring Boot's event publishing and listening mechanism. What types of events did you publish, and how did you handle them asynchronously?
22. How do you approach troubleshooting performance issues in Spring Boot applications? What tools and techniques do you use to identify bottlenecks?
23. Explain how you have implemented distributed tracing in a Spring Boot microservices architecture using tools like Zipkin or Jaeger.
24. Describe your experience with using Spring Boot with Reactive programming. How did you use project reactor and what were the benefits?

Hiring Spring Boot developers can be tricky because the framework is so versatile, touching many parts of backend development. Recruiters need a well-structured set of questions to identify candidates who truly grasp the technology and can apply it effectively, especially given the rise of microservices which our skills required for spring boot developer post touches upon.
This blog post provides a carefully curated list of Spring Boot interview questions, categorized by experience level from freshers to experienced professionals, including a section on MCQs. It will equip you with the right questions to assess candidates' knowledge and practical skills.
By using these questions, you'll be able to streamline your interview process and identify top Spring Boot talent; for a more standardized and data-driven approach, consider using Adaface's Java Spring Test to screen candidates before interviews.
Table of contents
Spring Boot interview questions for freshers
Spring Boot interview questions for juniors
Spring Boot intermediate interview questions
Spring Boot interview questions for experienced
Spring Boot MCQ
Which Spring Boot skills should you evaluate during the interview phase?
3 Tips for Using Spring Boot Interview Questions
Evaluate Spring Boot Talent with Targeted Assessments
Download Spring Boot interview questions template in multiple formats
Spring Boot interview questions for freshers
1. What is Spring Boot, and why do developers use it?
Spring Boot is a framework that simplifies the development of Spring-based applications. It auto-configures the application based on dependencies, meaning you can create stand-alone, production-grade Spring applications with minimal configuration. It embeds servers like Tomcat, Jetty, or Undertow directly, so you don't need to deploy to an external server.
Developers use Spring Boot because it drastically reduces boilerplate code and setup time. Features like auto-configuration, starter dependencies (e.g., spring-boot-starter-web), and the Spring Initializr allow for rapid application development. It streamlines the development process, letting developers focus on writing business logic rather than configuring infrastructure.
Some key benefits are:
- Reduced development time
- Simplified configuration
- Easy deployment
- Increased productivity
2. Can you explain the concept of 'auto-configuration' in Spring Boot?
Auto-configuration in Spring Boot automatically configures your application based on the dependencies present in your classpath. It examines the JARs you've added and attempts to configure beans that it thinks you'll need. For example, if you have spring-boot-starter-web on your classpath, Spring Boot will automatically configure a DispatcherServlet, Tomcat, and other web-related components.
Essentially, Spring Boot provides pre-defined configuration classes (using @Configuration annotation) that are conditionally applied based on the presence of specific classes or properties. This reduces the amount of boilerplate configuration you need to write manually. It aims to minimize the configuration burden, allowing developers to focus on writing business logic instead of configuring infrastructure.
3. What are Spring Boot Starters, and how do they simplify dependency management?
Spring Boot Starters are a set of convenient dependency descriptors that you can include in your application. They provide a streamlined way to add all the necessary dependencies for a specific technology or feature. Instead of manually adding individual dependencies, you can add a single starter dependency.
They simplify dependency management by grouping related dependencies into a single, logical unit. For example, the spring-boot-starter-web starter includes all the dependencies needed to build a web application, such as Spring MVC, Tomcat, and Jackson. This reduces the risk of dependency conflicts and ensures that you have all the necessary components for your desired functionality. They also manage versions of dependencies, ensuring compatibility.
4. How would you create a simple 'Hello, World!' application using Spring Boot?
To create a simple 'Hello, World!' application using Spring Boot, you can follow these steps:
- Create a new Spring Boot project: You can use Spring Initializr (https://start.spring.io/) to generate a basic project structure. Add the 'Spring Web' dependency.
- Create a Controller: Create a simple controller class with a method to handle the request. Annotate the class with
@RestControllerand the method with@GetMapping. The method should return "Hello, World!".
@RestController
public class HelloController {

    @GetMapping("/")
    public String hello() {
        return "Hello, World!";
    }
}
- Run the application: The
@SpringBootApplicationannotation in your main application class takes care of automatically configuring Spring and bootstrapping the application. Build and run the application (e.g., usingmvn spring-boot:runorgradle bootRun). - Access the application: Open your web browser and navigate to
http://localhost:8080/(or the port your application is running on) to see the 'Hello, World!' message.
5. What is the purpose of the `@SpringBootApplication` annotation?
The @SpringBootApplication annotation is a convenience annotation that bundles together three other commonly used Spring Boot annotations:
@Configuration: Indicates that the class declares one or more@Beanmethods or contains import of other configurations.@EnableAutoConfiguration: Enables Spring Boot's auto-configuration mechanism, which automatically configures your Spring application based on the dependencies you have added. It attempts to deduce and configure beans that you are likely to need.@ComponentScan: Enables component scanning to find and register beans within the specified packages (by default, the package of the annotated class and its subpackages). It scans for components like@Component,@Service,@Repository, and@Controller.
Effectively, using @SpringBootApplication marks a class as a source of bean definitions, turns on auto-configuration, and enables component scanning. This simplifies the setup and bootstrap process for Spring Boot applications. It is typically placed on the main application class.
6. Explain what an embedded server is in the context of Spring Boot.
In Spring Boot, an embedded server is a web server that is bundled directly within the application's deployable artifact (e.g., a JAR file). This eliminates the need to deploy the application to a separate, pre-installed web server like Tomcat or Jetty.
Spring Boot supports several embedded servers, with Tomcat being the default. Others include Jetty and Undertow. The choice of embedded server can be configured in the pom.xml or build.gradle file. Using an embedded server simplifies deployment and reduces the overall footprint of the application. The server starts when the Spring Boot application starts and stops when the application shuts down. Example dependency for Tomcat:
<dependency>
 <groupId>org.springframework.boot</groupId>
 <artifactId>spring-boot-starter-web</artifactId>
</dependency>
7. How do you configure different environments (e.g., development, production) in a Spring Boot application?
Spring Boot offers several ways to configure different environments. A common approach is using application-{profile}.properties or application-{profile}.yml files. For example, application-dev.properties would hold development-specific configurations. You activate a specific profile using the spring.profiles.active property in your application.properties or by setting an environment variable.
Another way is by using environment variables or system properties directly. You can access them using @Value("${YOUR_PROPERTY}") or System.getenv("YOUR_ENVIRONMENT_VARIABLE"). Profiles can also be programmatically activated within your application's configuration if needed. For example, a @Configuration class annotated with @Profile("dev") would only be loaded when the "dev" profile is active.
8. What are some common Spring Boot annotations you've used or heard of?
Some common Spring Boot annotations I've used or heard of include:
@SpringBootApplication: This is a convenience annotation that combines@Configuration,@EnableAutoConfiguration, and@ComponentScan. It's typically used on the main application class.@RestController: Marks a class as a controller where every method returns a domain object instead of a view. It combines@Controllerand@ResponseBody.@RequestMapping: Used to map web requests onto specific handler methods.@GetMapping,@PostMapping,@PutMapping,@DeleteMapping,@PatchMapping: Specialized versions of@RequestMappingfor specific HTTP methods.@Autowired: Injects dependencies into a class. Spring manages the dependency injection.@Component,@Service,@Repository,@Controller: These are specializations of@Componentfor different layers of an application. They mark a class as a Spring bean.@Configuration: Indicates that a class declares one or more@Beanmethods and may be processed by the Spring container to generate bean definitions and service requests for those beans at runtime.@Bean: Used on a method to define a new bean managed by the Spring container.@Value: Injects values from properties files or environment variables.@Transactional: Enables transactional behavior for a method or class. Useful for database operations.@EnableAutoConfiguration: Enables Spring Boot's auto-configuration mechanism. It attempts to automatically configure your Spring application based on the dependencies you have added.
@PathVariable: Extracts values from the URI path. @RequestBody: Binds the HTTP request body to a method parameter. @RequestParam: Extracts values from query parameters.
9. How does Spring Boot handle exception handling?
Spring Boot offers several ways to handle exceptions, providing flexibility and customization. The primary mechanisms are:
- @ControllerAdvice: This annotation allows you to define global exception handlers that apply to all controllers. You can create methods annotated with
@ExceptionHandlerto handle specific exceptions or groups of exceptions. - @ExceptionHandler: This annotation is used within a
@ControllerAdviceclass or a specific@Controllerto handle exceptions thrown by request handling methods. It allows you to define custom logic for handling different exception types and return appropriate responses. - ResponseEntityExceptionHandler: This is a convenient base class for
@ControllerAdviceclasses that provides pre-defined exception handling for common Spring exceptions. You can extend this class and override its methods to customize the handling of these exceptions.
By default, Spring Boot also provides a default error page for unhandled exceptions. This can be customized by providing your own error page or by configuring the server.error.path property.
10. Can you describe how to access properties defined in `application.properties` or `application.yml`?
Properties defined in application.properties or application.yml files can be accessed in several ways in Spring Boot.
- Using
@Valueannotation: This is the simplest way for injecting individual property values directly into fields. For example:@Value("${my.property.name}") private String myPropertyValue; - Using
@ConfigurationPropertiesannotation: This is used for binding a group of properties with a common prefix to a Java class. This approach provides type safety and validation. You would define a class annotated with@ConfigurationProperties(prefix = "my.prefix")and Spring Boot will automatically bind the properties with keys starting withmy.prefixto the fields of this class. These classes need to be registered as a bean for the spring container.
11. What is the difference between `@RestController` and `@Controller` in Spring Boot?
@Controller and @RestController are both Spring annotations used for handling web requests, but they differ in their default behavior regarding how the response is handled.
@Controller is used for traditional MVC applications where the primary goal is to return a view (e.g., HTML). Methods in a @Controller typically use @RequestMapping annotations and return a String representing the view name. The ViewResolver then resolves this name to an actual view template. To return data directly (e.g., JSON or XML) from a @Controller, you'd need to use the @ResponseBody annotation on the method.
@RestController is a convenience annotation that combines @Controller and @ResponseBody. It's designed for building RESTful APIs where the method's return value is directly serialized into the response body (e.g., as JSON or XML). You do not need to add @ResponseBody to every method in a @RestController. It implies that the controller's methods will directly return data, not view names.
12. How can you perform database operations using Spring Boot and Spring Data JPA?
Spring Boot and Spring Data JPA simplify database operations significantly. We start by defining JPA entities which map to database tables. Spring Data JPA then allows us to create repositories (interfaces) that extend JpaRepository, CrudRepository, or PagingAndSortingRepository. These interfaces provide basic CRUD operations (Create, Read, Update, Delete) out of the box.
For more complex queries beyond the basic CRUD, you can define methods in your repository interface following naming conventions (e.g., findByLastName) which Spring Data JPA will implement automatically. Alternatively, you can use @Query annotation to define custom queries using JPQL or native SQL. Dependency Injection is used to inject these repositories into your service layer, where you can perform database operations using the provided methods. Transactions are typically managed using the @Transactional annotation.
13. What is a Spring Bean, and how are beans managed in a Spring Boot application?
A Spring Bean is simply an object that is managed by the Spring IoC (Inversion of Control) container. Spring manages the bean's lifecycle, dependencies, and configuration.
In a Spring Boot application, beans are typically managed using annotations like @Component, @Service, @Repository, and @Controller. Spring's component scanning automatically detects these annotated classes and registers them as beans in the application context. You can also define beans explicitly using @Bean annotated methods within @Configuration classes. The Spring container handles creating, configuring, and wiring these beans together based on declared dependencies (often using @Autowired for dependency injection).
14. Explain how Spring Boot simplifies the process of creating RESTful APIs.
Spring Boot simplifies REST API creation primarily through its auto-configuration capabilities and starter dependencies. spring-boot-starter-web is a key dependency that includes all necessary libraries like Spring MVC, Jackson for JSON processing, and an embedded servlet container (e.g., Tomcat, Jetty) to get started quickly.
Furthermore, annotations like @RestController, @RequestMapping, @GetMapping, @PostMapping, etc., provide a concise way to define request mappings and handle HTTP methods. Spring Boot automatically configures message converters to handle request and response payloads in formats like JSON and XML, reducing boilerplate code. Example of a simple controller:
@RestController
@RequestMapping("/api")
public class MyController {
    @GetMapping("/hello")
    public String hello() {
        return "Hello, World!";
    }
}
15. What are some advantages of using Spring Boot over traditional Spring development?
Spring Boot simplifies Spring development significantly. It offers auto-configuration, reducing boilerplate code and configuration files. Dependencies are managed through starter POMs, streamlining the build process. Embedded servers (like Tomcat, Jetty, or Undertow) remove the need for external server deployment, simplifying application deployment and management. This leads to faster development cycles and easier application maintenance.
Compared to traditional Spring, Spring Boot promotes an 'opinionated' view, guiding developers towards best practices and reducing decision fatigue. Features like Actuator provide built-in monitoring and management capabilities, further simplifying operational tasks. Developers can focus on the business logic rather than spending time on complex configurations.
16. How would you deploy a Spring Boot application to a cloud platform like AWS or Azure?
To deploy a Spring Boot application to AWS or Azure, you'd typically package it as a JAR or WAR file and then choose a suitable deployment service. For AWS, options include EC2 (virtual machines), Elastic Beanstalk (PaaS), ECS/EKS (container orchestration), and Lambda (serverless). Elastic Beanstalk simplifies deployment and management, while ECS/EKS offer more control and scalability for containerized applications using Docker. For Azure, similar options exist such as Azure VMs, Azure App Service (PaaS), Azure Container Instances/Azure Kubernetes Service (AKS), and Azure Functions (serverless).
The deployment process generally involves:
- Building: Creating an executable JAR or WAR file.
- Configuring: Setting up the chosen cloud service (e.g., creating an Elastic Beanstalk environment or an Azure App Service plan).
- Deploying: Uploading the artifact to the cloud service. Consider using CI/CD pipelines (e.g., AWS CodePipeline, Azure DevOps) for automated deployments. Configure environment variables, database connections, and any other necessary settings specific to the target environment. Also, ensure proper logging and monitoring are in place.
17. What is Spring Data REST, and how does it help in building RESTful services?
Spring Data REST builds RESTful APIs on top of Spring Data repositories. It simplifies REST API development by automatically exposing your data through HATEOAS-compliant endpoints, reducing boilerplate code.
Specifically, it does the following:
- Automatic Endpoint Generation: Exposes repositories as REST endpoints.
- HATEOAS Support: Generates links in responses for discoverability.
- Customization: Allows customization of endpoints, request/response handling, and validation.
- Uses Spring Data: Leverages Spring Data's repository abstraction for data access.
18. Explain how Spring Boot handles security.
Spring Boot security is primarily handled through Spring Security. It provides authentication and authorization features, allowing you to control who can access your application's resources. You configure security rules using annotations like @EnableWebSecurity along with configuration classes that extend WebSecurityConfigurerAdapter (deprecated, now components implementing SecurityFilterChain are preferred).
Common security measures include: authentication to verify user identity, authorization to control access based on roles/permissions, protection against common web vulnerabilities (CSRF, XSS), and session management. Spring Security integrates seamlessly with various authentication providers (e.g., LDAP, OAuth, database authentication) and authorization mechanisms (e.g., role-based access control, expression-based access control). For instance, you can define security rules in your configuration like:
@Bean
public SecurityFilterChain filterChain(HttpSecurity http) throws Exception {
    http
        .authorizeHttpRequests((authz) -> authz
            .requestMatchers("/admin/**").hasRole("ADMIN")
            .requestMatchers("/user/**").hasRole("USER")
            .anyRequest().permitAll()
        )
        .formLogin(withDefaults());
    return http.build();
}
19. How do you add logging to a Spring Boot application?
To add logging to a Spring Boot application, you can leverage Spring Boot's default logging configuration which uses Logback. You can add dependencies like spring-boot-starter-logging, but typically it's already included.
To utilize logging, you simply inject a Logger instance into your class:
import org.slf4j.Logger;
import org.slf4j.LoggerFactory;

public class MyClass {
    private static final Logger logger = LoggerFactory.getLogger(MyClass.class);

    public void myMethod() {
        logger.info("This is an info message");
        logger.warn("This is a warning message");
        logger.error("This is an error message");
    }
}
You can configure logging levels (e.g., DEBUG, INFO, WARN, ERROR) in application.properties or application.yml. For example, to set the root logging level to DEBUG:
logging.level.root=DEBUG
You can also configure logging to specific packages:
logging.level.com.example.myapp=DEBUG
20. What are Spring Boot Actuators, and what kind of information do they provide?
Spring Boot Actuators are sub-projects within Spring Boot that provide production-ready features for monitoring and managing your application. They expose operational information about the running application through HTTP endpoints or JMX.
Actuators provide a variety of information, including:
- Application health: Shows the application's overall health status.
- Metrics: Provides detailed metrics about application performance (e.g., memory usage, CPU usage, request counts).
- Info: Displays application information, such as build details, git commit ID, etc.
- Auditing: Records events such as authentication attempts, and access to secured resources.
- Configuration: Shows the application's configuration properties.
- Beans: Provides a list of all the Spring beans in the application context.
- Environment: Displays the application's environment properties.
- Thread dump: Shows a snapshot of all the threads in the JVM.
- HTTP traces: Displays recent HTTP request-response exchanges.
21. How can you test a Spring Boot application?
Testing a Spring Boot application involves several approaches, focusing on different layers of the application. Unit tests verify individual components (e.g., services, repositories) in isolation, using mocking frameworks like Mockito to simulate dependencies. Integration tests, often using @SpringBootTest, test the interaction between multiple components or layers within the application context. They might involve a real database or an embedded database like H2.
End-to-end tests validate the entire application flow, simulating real user interactions, commonly via REST APIs. Tools like RestTemplate or WebTestClient (for reactive applications) are used for making HTTP requests. Testing slices with annotations like @WebMvcTest or @DataJpaTest also provide focused testing of specific application parts. MockMvc can be used in WebMvcTest to test controllers.
22. If you have a Spring Boot application that needs to interact with external APIs, how would you approach that?
To interact with external APIs in a Spring Boot application, I would typically use the RestTemplate or the WebClient (from Spring WebFlux) for making HTTP requests. RestTemplate is simpler for synchronous, blocking operations, while WebClient offers a reactive, non-blocking approach which can be beneficial for performance, especially under high load. I'd create a service layer class to encapsulate the API interaction logic, handle request/response mapping (using Jackson or similar), error handling (e.g., using try-catch blocks and custom exception handling), and potentially implement retry mechanisms or circuit breakers (using libraries like Resilience4j or Spring Retry) for resilience. Security considerations, such as handling API keys or authentication tokens, would also be addressed at this layer, potentially storing sensitive data securely using Spring Cloud Config or a similar solution.
For example, using RestTemplate:
@Service
public class ApiService {
    @Autowired
    private RestTemplate restTemplate;

    public String getDataFromApi(String apiUrl) {
        try {
            return restTemplate.getForObject(apiUrl, String.class);
        } catch (RestClientException e) {
            // Handle exception
            return null;
        }
    }
}
Spring Boot interview questions for juniors
1. What is Spring Boot and why do developers use it?
Spring Boot is a framework that simplifies the development of Spring-based applications. It removes much of the boilerplate configuration traditionally associated with Spring, making it faster and easier to get started.
Developers use Spring Boot for several reasons:
- Reduced Configuration: Auto-configuration automatically configures your application based on dependencies, eliminating the need for verbose XML configurations.
- Embedded Servers: Spring Boot includes embedded servers like Tomcat, Jetty, or Undertow, so you don't need to configure them separately.
- Simplified Dependency Management: It provides opinionated dependency management, streamlining dependency declarations and reducing version conflicts. The
spring-boot-starter-webfor instance adds all dependencies needed to create a web application. - Actuator: Provides production-ready features like health checks, metrics, and auditing out-of-the-box.
- Rapid Development: It significantly speeds up development cycles, allowing developers to focus on business logic rather than infrastructure concerns.
2. Can you explain the concept of 'auto-configuration' in Spring Boot?
Auto-configuration in Spring Boot is a mechanism that automatically configures your Spring application based on the dependencies present in your classpath. Spring Boot examines the dependencies you've added to your project (e.g., database drivers, web server libraries) and, based on these, automatically configures the necessary beans and settings to get your application up and running quickly. Essentially, it removes the boilerplate configuration that you'd typically have to write manually.
For instance, if you include the spring-boot-starter-web dependency, Spring Boot auto-configures a DispatcherServlet, an embedded Tomcat server (by default), and other web-related components. Similarly, if you add a database driver like mysql-connector-java, Spring Boot will attempt to configure a DataSource and a JdbcTemplate, provided you've also configured database connection properties (like spring.datasource.url, spring.datasource.username, and spring.datasource.password) in your application.properties or application.yml file. You can exclude specific auto-configurations if needed by using the @EnableAutoConfiguration annotation and its exclude attribute or by setting spring.autoconfigure.exclude in your application properties.
3. What are Spring Boot starters and how do they simplify project setup?
Spring Boot starters are a set of convenient dependency descriptors that you can include in your application. They provide a streamlined way to add all the necessary dependencies required for a specific functionality, without having to manually search for and add each individual dependency.
They simplify project setup by:
- Reducing dependency management: Starters bundle related dependencies, minimizing the risk of version conflicts and ensuring compatibility.
- Auto-configuration: Starters trigger Spring Boot's auto-configuration feature, automatically configuring beans based on the dependencies present. For example, adding
spring-boot-starter-webautomatically sets up Spring MVC, embedded Tomcat, etc. No need to explicitly declare them. - Improved developer productivity: Developers can quickly add functionalities without spending time on dependency management, accelerating the development process. A common starter is
spring-boot-starter-data-jpawhich simplifies database access. With this starter, all the necessary dependencies are added. You can simply add the starter as dependency to the pom.xml/build.gradle:<dependency> <groupId>org.springframework.boot</groupId> <artifactId>spring-boot-starter-data-jpa</artifactId> </dependency>
4. How would you create a simple REST API endpoint using Spring Boot?
To create a simple REST API endpoint using Spring Boot, you'd typically start by creating a Spring Boot project, and then define a controller class. Within the controller, you'd use annotations like @RestController to indicate it's a REST controller, and @RequestMapping to map incoming HTTP requests to specific methods.
For example:
@RestController
@RequestMapping("/api")
public class MyController {

    @GetMapping("/hello")
    public String hello() {
        return "Hello, world!";
    }
}
In this example, a GET request to /api/hello would return the string "Hello, world!". Other annotations such as @PostMapping, @PutMapping, and @DeleteMapping can be used for different HTTP methods. Spring Boot simplifies dependency management and server configuration, making the process straightforward.
5. What is the purpose of the `@SpringBootApplication` annotation?
The @SpringBootApplication annotation is a convenience annotation that bundles together three other annotations:
@Configuration: Marks the class as a source of bean definitions for the application context.@EnableAutoConfiguration: Enables Spring Boot's auto-configuration mechanism. This attempts to automatically configure your Spring application based on the dependencies you have added via Maven or Gradle.@ComponentScan: Tells Spring to look for other components, configurations, and services in the same package (and subpackages) as the annotated class. This is where the components annotated with@Component,@Service,@Repository, and@Controllerare discovered.
6. Explain what a dependency injection is and how Spring Boot helps in achieving that?
Dependency Injection (DI) is a design pattern where a class receives its dependencies from external sources rather than creating them itself. This promotes loose coupling and makes testing easier. Instead of a class creating its dependencies with new, they are "injected" into the class, usually through its constructor, setter methods, or fields.
Spring Boot simplifies DI through its Inversion of Control (IoC) container, also known as the Spring Application Context. Spring manages the creation and wiring of beans (objects managed by Spring). You use annotations like @Autowired to declare dependencies, and Spring automatically resolves and injects them. This reduces boilerplate code and configuration compared to traditional approaches. For example:
@Service
public class MyService {

    @Autowired
    private MyRepository myRepository;

    // ...
}
In this case, Spring will automatically inject an instance of MyRepository into MyService.
7. What is an embedded server in Spring Boot? Why is it useful?
An embedded server in Spring Boot is a web server that's bundled directly into your application's deployable artifact (typically a JAR file). Common examples include Tomcat, Jetty, and Undertow. Instead of deploying your application to an external, pre-existing web server, the server runs within your application itself.
Embedded servers are useful because they simplify deployment and reduce configuration overhead. You don't need to install and configure a separate web server. Spring Boot handles the server setup, making your application self-contained and easily portable. This approach is particularly beneficial for microservices and cloud-native applications.
8. How can you configure different environments (dev, prod) in Spring Boot?
Spring Boot offers several ways to configure different environments (dev, prod):
- Using
application-{profile}.propertiesorapplication-{profile}.yml: You create environment-specific configuration files (e.g.,application-dev.properties,application-prod.yml). Spring Boot automatically loads the configuration based on the active profile. - Setting the
spring.profiles.activeproperty: This property specifies which profile(s) to activate. You can set it inapplication.properties, as a system property, or as an environment variable. For example, settingspring.profiles.active=devactivates theapplication-dev.propertiesconfiguration. - Using environment variables: Define environment-specific configurations as OS environment variables and access them in your Spring Boot application. This is particularly useful for production environments.
- Command-line arguments: You can pass profile information via command-line arguments when starting the application, like
--spring.profiles.active=prod. - Using
@Profileannotation: Annotate@Component,@Service,@Repository, and@Configurationclasses with@Profile("dev")or@Profile("prod")to include or exclude them based on the active profile.
9. What are some common Spring Boot annotations you've used?
Some common Spring Boot annotations I've used include:
@SpringBootApplication: This is the main annotation that combines@Configuration,@EnableAutoConfiguration, and@ComponentScan. It's used to bootstrap the application.@RestController: Marks a class as a controller where every method returns a domain object instead of a view. It combines@Controllerand@ResponseBody.@RequestMapping: Used to map web requests onto specific handler methods. It can be used at the class level to map a base URL and at the method level to map specific endpoints.@Autowired: Used for dependency injection. It allows Spring to automatically resolve and inject the dependencies.@Service: Marks a class as a service provider (business logic layer).@Repository: Indicates that a class is a data repository (data access layer).@Component: A generic stereotype annotation indicating that a class is a component. It serves as a base for@Service,@Repository, and@Controller.@Configuration: Indicates that a class declares one or more@Beanmethods.@Bean: Annotates a method that produces a bean to be managed by the Spring container.@Value: Used to inject values from properties files or environment variables into fields.@PathVariable: Extracts values from the URI path.@RequestParam: Extracts values from the query string parameters.
I often use these in conjunction with each other. For example, a @RestController might use @Autowired to inject a @Service, which in turn uses @Autowired to inject a @Repository.
10. How do you handle exceptions in a Spring Boot application?
In Spring Boot, exceptions can be handled using several mechanisms. @ControllerAdvice along with @ExceptionHandler annotations are commonly used to create global exception handlers. This allows you to centralize exception handling logic for specific exceptions or exception types across your application. You can define methods within a @ControllerAdvice class to handle different exceptions and return appropriate HTTP status codes and error messages to the client.
Alternatively, you can handle exceptions locally within a specific controller using @ExceptionHandler within that controller. Also, for REST APIs, you might use ResponseEntity to return custom error responses with specific HTTP status codes and error details. Finally, Spring Boot provides a default error handling mechanism that displays a generic error page or JSON response if an unhandled exception occurs. You can customize this default behavior by providing your own error view or error controller.
11. What is the purpose of `application.properties` or `application.yml` file?
The application.properties or application.yml file in a Spring Boot application is used to configure the application's behavior. It defines various properties related to the application's environment, data sources, logging, server configurations, and third-party library integrations.
These files allow developers to externalize configuration, making it easier to manage different settings for different environments (e.g., development, testing, production) without modifying the application's code. application.yml uses YAML, a human-readable data serialization format, while application.properties uses key-value pairs. Spring Boot automatically loads properties from these files at startup.
12. Explain how to connect to a database using Spring Boot.
Spring Boot simplifies database connections using spring-boot-starter-data-jpa (for JPA) or spring-boot-starter-jdbc (for JDBC). Include the appropriate dependency in your pom.xml or build.gradle.
Next, configure database connection properties in application.properties or application.yml. This typically includes spring.datasource.url, spring.datasource.username, and spring.datasource.password. Spring Boot auto-configures a DataSource based on these properties. For example:
spring.datasource.url=jdbc:mysql://localhost:3306/mydb
spring.datasource.username=user
spring.datasource.password=password
For JPA, define entities with @Entity and use Spring Data JPA repositories (interfaces extending JpaRepository) to interact with the database. For JDBC, you can use JdbcTemplate to execute SQL queries.
13. What is Spring Data JPA? How does it simplify database operations?
Spring Data JPA is a Spring module that simplifies working with databases using the Java Persistence API (JPA). It provides a repository abstraction, automatically generating common data access methods (CRUD operations) based on interface definitions. This significantly reduces boilerplate code typically required for database interactions.
It simplifies database operations by:
- Reducing boilerplate: Eliminates the need to write repetitive code for common database operations.
- Repository abstraction: Provides a consistent and easy-to-use interface for data access.
- Query derivation: Automatically generates queries based on method names.
- Integration with Spring: Seamlessly integrates with other Spring modules.
@Repositoryannotation: Marks an interface as a repository for data access. Spring provides the implementation.- Provides pre-built interfaces like
JpaRepository, offering standard methods likesave(),findById(),findAll(),deleteById(), etc.
14. How do you test a Spring Boot application? What types of tests can you write?
Testing a Spring Boot application involves several approaches. Primarily, we focus on unit, integration, and end-to-end tests.
- Unit Tests: These verify individual components (e.g., a service or controller method) in isolation. Mocking dependencies is common using frameworks like Mockito. Example:
@Test public void myServiceTest() { ... } - Integration Tests: These confirm that different parts of the application work together correctly. They might involve testing the interaction between a service and a database. Spring provides support for integration tests with
@SpringBootTestand testing slices using annotations like@DataJpaTest,@WebMvcTest. - End-to-End (E2E) Tests: These validate the entire application flow, simulating user interactions. Tools like Selenium, Cypress, or Playwright are often used. These typically involve testing through the user interface and potentially hitting external services. These tests are more comprehensive and generally slower to execute than unit or integration tests.
15. What are some advantages of using Spring Boot over traditional Spring?
Spring Boot simplifies development compared to traditional Spring by providing auto-configuration, which automatically configures your application based on the dependencies you have added. This reduces the amount of boilerplate code and XML configuration required. It also offers embedded servers (like Tomcat, Jetty, or Undertow) making deployment easier as you can create standalone, executable JAR files.
Key advantages include:
- Reduced Configuration: Auto-configuration minimizes manual configuration.
- Embedded Servers: Simplifies deployment.
- Starters: Dependency management is streamlined using starter POMs, for example:
spring-boot-starter-webprovides all the dependencies needed for web development. - Actuator: Provides monitoring and management endpoints.
16. How can you add custom dependencies to your Spring Boot project?
You can add custom dependencies to your Spring Boot project primarily using Maven or Gradle. For Maven, you would add a <dependency> block within the <dependencies> section of your pom.xml file. This block specifies the groupId, artifactId, and version of the dependency. For example:
<dependency>
    <groupId>com.example</groupId>
    <artifactId>my-custom-library</artifactId>
    <version>1.0.0</version>
</dependency>
For Gradle, you would add the dependency to the dependencies block in your build.gradle file using the implementation or api keyword. For example:
dependencies {
    implementation 'com.example:my-custom-library:1.0.0'
}
Spring Boot's dependency management will then handle the resolution and inclusion of these dependencies in your project. After adding the dependencies, make sure to rebuild your project to download and include them.
17. What is the role of a `pom.xml` file in a Spring Boot project?
The pom.xml file is the Project Object Model file, the core of Maven projects, including Spring Boot projects. It contains information about the project, its dependencies, and how to build it. Crucially, it manages dependencies, plugins, build configurations, and project metadata.
Specifically, it:
- Defines dependencies: Lists all external libraries (like Spring Boot starters) required by the project.
- Manages versions: Specifies the exact version of each dependency, avoiding conflicts.
- Configures build process: Defines plugins for compiling code, running tests, packaging the application (e.g., into a JAR or WAR file).
- Provides project metadata: Includes the project's name, version, group ID, and other descriptive information. The
parenttag is often used to inherit configuration from Spring Boot's parent POM, simplifying dependency management.
Example:
<dependency>
    <groupId>org.springframework.boot</groupId>
    <artifactId>spring-boot-starter-web</artifactId>
</dependency>
18. Explain the concept of Spring Beans and how they are managed in Spring Boot.
Spring Beans are the core components of a Spring application. Essentially, a Spring Bean is any Java object that is managed by the Spring IoC (Inversion of Control) container. The container is responsible for instantiating, configuring, and assembling these beans. Think of them as building blocks Spring uses.
In Spring Boot, bean management is largely automated through features like component scanning and auto-configuration. Spring Boot automatically detects classes annotated with @Component, @Service, @Repository, and @Controller (which are specializations of @Component) and registers them as beans. Furthermore, you can use @Bean annotation within @Configuration classes to explicitly define and configure beans. The Spring container manages the lifecycle of these beans, handling dependency injection (DI) to wire them together, ensuring loose coupling and modularity.
19. How would you secure a Spring Boot API endpoint?
Securing a Spring Boot API endpoint typically involves using Spring Security. The primary approach is to add the spring-boot-starter-security dependency to your project. Configuration can then be done in a class annotated with @Configuration and @EnableWebSecurity. This allows you to define authentication and authorization rules. For instance, you can configure which endpoints require authentication using HttpSecurity's authorizeHttpRequests() method to specify URL patterns and access rules, such as permitAll(), authenticated(), hasRole('ADMIN'), etc. For example:
@Configuration
@EnableWebSecurity
public class SecurityConfig extends WebSecurityConfigurerAdapter {
    @Override
    protected void configure(HttpSecurity http) throws Exception {
        http.authorizeHttpRequests()
            .antMatchers("/public/**").permitAll()
            .antMatchers("/admin/**").hasRole("ADMIN")
            .anyRequest().authenticated()
            .and()
            .formLogin(); // Or other authentication mechanisms like OAuth2, JWT, etc.
    }
}
This example demonstrates a basic setup. More sophisticated methods involve integrating with OAuth 2.0, JWT (JSON Web Tokens), LDAP or defining custom authentication mechanisms by implementing UserDetailsService and PasswordEncoder. Proper validation and sanitization of request parameters are also crucial.
20. What are Spring Boot Actuators? What kind of information do they expose?
Spring Boot Actuators are sub-modules that provide monitoring and management capabilities to Spring Boot applications. They expose operational information about the application, such as its health, metrics, info, dump, env, beans etc. Essentially, actuators provide endpoints that allow you to monitor and interact with your application at runtime.
Actuators expose several endpoints which provide specific information. Common endpoints include:
/health: Shows the application's health status (up, down, etc.)./metrics: Exposes various application metrics, such as memory usage, CPU usage, and request latency./info: Displays general information about the application./env: Exposes the application's environment properties./beans: Displays a list of all Spring beans in the application context./loggers: Shows and modifies the configuration of loggers in the application.
21. How do you handle logging in a Spring Boot application?
In Spring Boot, logging is typically handled using a logging framework like Logback (default) or Log4j2. Spring Boot provides sensible defaults, so basic logging works out of the box. To log, you inject a Logger instance into your class using @Slf4j (from Lombok) or manually via LoggerFactory.getLogger(YourClass.class). Then, you use methods like logger.info(), logger.warn(), logger.error(), logger.debug(), and logger.trace() to record information at different severity levels.
Configuration is usually done in application.properties or application.yml. For example, you can set the logging level for a specific package like this: logging.level.com.example=DEBUG. You can also customize the logging output format and appenders (e.g., to write logs to a file) by creating a logback-spring.xml or log4j2-spring.xml file in your src/main/resources directory. These files allow you to define appenders for writing to files, consoles, or other destinations. You can also specify encoders for formatting the log messages. For example, here's how you might log to a file:
<appender name="FILE" class="ch.qos.logback.core.FileAppender">
 <file>application.log</file>
 <encoder>
 <pattern>%d{yyyy-MM-dd HH:mm:ss.SSS} [%thread] %-5level %logger{36} - %msg%n</pattern>
 </encoder>
</appender>

<root level="info">
 <appender-ref ref="FILE" />
</root>
22. What is a message queue, and how could you use one in a Spring Boot application?
A message queue is a form of asynchronous communication that enables services to communicate with each other without needing to know about each other. Messages are stored in the queue until they are processed, improving reliability and scalability.
In a Spring Boot application, you could use a message queue like RabbitMQ or Apache Kafka to decouple services. For example, an e-commerce application might use a message queue to handle order processing. When a user places an order, the order details are sent to the message queue. A separate order processing service then consumes these messages from the queue and processes the orders asynchronously. Spring provides excellent support for message queues through Spring AMQP and Spring Kafka. The @RabbitListener annotation can be used to easily define message listeners in Spring Boot applications using RabbitMQ.
For example:
@RabbitListener(queues = "orderQueue")
public void processOrder(Order order) {
    // Process the order
}
23. If you had a slow-running API endpoint, how would you troubleshoot it using Spring Boot's tools?
To troubleshoot a slow-running API endpoint in Spring Boot, I'd start by enabling Spring Boot Actuator and its metrics endpoint. This provides insights into various performance indicators like request counts, average response times, and JVM memory usage. Specifically, I'd look at metrics like http.server.requests to identify slow endpoints and their response times. I'd also enable Micrometer tracing to trace requests end-to-end, looking for slow database queries or external service calls.
Next, I'd utilize Spring's built-in logging capabilities. By setting the logging level to DEBUG or TRACE for relevant components (e.g., controllers, services, repositories), I can get detailed information about method execution times and parameter values. I'd use a profiler (like VisualVM or JProfiler) to identify hotspots in the code. This allows me to pinpoint the methods or code sections consuming the most resources. Also, check external dependencies to rule out the external reasons of slowness.
24. How would you deploy a Spring Boot application to a cloud environment?
To deploy a Spring Boot application to a cloud environment, I would typically follow these steps. First, I'd package the application as a JAR or WAR file using Maven or Gradle. Then, depending on the cloud provider, I would choose a suitable deployment option. For example:
- AWS: Deploy to Elastic Beanstalk, EC2, ECS, or EKS. Use Docker images and deploy via container orchestration services like ECS/EKS for more control.
- Azure: Deploy to Azure App Service, Azure VMs, or Azure Kubernetes Service (AKS). Similar to AWS, Docker images and container orchestration are options.
- Google Cloud Platform (GCP): Deploy to Google App Engine, Compute Engine, or Google Kubernetes Engine (GKE). Utilize Docker and GKE for scalable deployments.
I would also configure CI/CD pipelines (e.g., Jenkins, GitLab CI, GitHub Actions) to automate the build, test, and deployment process. Important considerations include setting up proper logging, monitoring, and scaling strategies based on the application's requirements. Infrastructure-as-code tools (Terraform, CloudFormation) would be used to manage cloud resources in a repeatable and automated way.
25. What is the difference between `@RestController` and `@Controller` in Spring Boot?
In Spring Boot, both @Controller and @RestController are used for handling web requests, but they differ in their default behavior regarding how responses are handled.
@Controller is a general-purpose annotation. When a method in a @Controller handles a request, it typically returns the name of a view to be rendered (e.g., an HTML page). You'd often use @ResponseBody in conjunction with @Controller methods if you want to serialize the returned object into the response body (like JSON or XML). @RestController is a convenience annotation that combines @Controller and @ResponseBody. Essentially, a @RestController indicates that every method in the controller will serialize the return value directly into the response body, often as JSON or XML. It's suitable for building RESTful APIs. So, using @RestController avoids the need to add @ResponseBody to each handler method.
26. Explain how Spring Boot simplifies the creation of microservices.
Spring Boot simplifies microservice creation by providing several key features that streamline development and deployment. It offers auto-configuration, which automatically configures your application based on dependencies present in your project. This reduces boilerplate code and configuration overhead. Embedded servers (like Tomcat, Jetty, or Undertow) eliminate the need for external application server deployment, making microservices easier to package and deploy as standalone executables (JARs).
Furthermore, Spring Boot integrates well with Spring Cloud, offering tools for service discovery (e.g., Eureka), configuration management (e.g., Spring Cloud Config), and API gateways (e.g., Zuul or Spring Cloud Gateway). These components are crucial for building resilient and scalable microservice architectures. Its' starter dependencies provide pre-configured sets of libraries for common tasks like web development, data access, and security, greatly accelerating the development process. For instance: spring-boot-starter-web will add dependencies for building web applications with Spring MVC. Finally, actuator provides monitoring and management endpoints for your microservices.
27. How does Spring Boot simplify the process of creating scheduled tasks?
Spring Boot simplifies creating scheduled tasks primarily through its @EnableScheduling annotation and @Scheduled annotation. @EnableScheduling enables Spring's scheduled task execution capability. Then, you can annotate methods with @Scheduled to define their execution schedule.
For example:
@Configuration
@EnableScheduling
public class SchedulingConfig {

    @Scheduled(fixedRate = 5000) // Runs every 5 seconds
    public void doSomething() {
        // Task logic here
        System.out.println("Task executed");
    }
}
Spring Boot abstracts away the complexities of setting up task executors and schedulers, making it easy to define and manage scheduled tasks with minimal configuration. You can control the execution using fixedRate, fixedDelay, or cron expressions.
Spring Boot intermediate interview questions
1. How does Spring Boot handle auto-configuration, and what are some ways to customize or disable it?
Spring Boot's auto-configuration automatically configures your application based on the dependencies present in your classpath. It examines the classpath for specific libraries and beans, and then configures beans that it anticipates your application will need. This is primarily achieved using @EnableAutoConfiguration, @Configuration, @ConditionalOnClass, @ConditionalOnMissingBean, and spring.factories.
To customize or disable auto-configuration, you can use several approaches:
- Exclude specific auto-configurations: Use the
excludeattribute of@EnableAutoConfigurationor@SpringBootApplication. For example:@SpringBootApplication(exclude = {DataSourceAutoConfiguration.class}) - Exclude by name: Use the
excludeNameattribute, specifying the fully qualified name of the auto-configuration class. - Conditional exclusion: Use
@ConditionalOnMissingBeanto prevent an auto-configuration from taking effect if a bean of a specific type already exists. This allows you to provide your own configuration that takes precedence. spring.autoconfigure.excludeproperty: Inapplication.propertiesorapplication.yml, list the auto-configurations to exclude:spring.autoconfigure.exclude=org.springframework.boot.autoconfigure.jdbc.DataSourceAutoConfiguration- Create your own auto-configurations: You can create your own auto-configurations to override or supplement the default ones. Ensure that your custom configurations have a higher precedence. Ensure that they are placed inside a package to be scanned by Spring.
2. Explain Spring Boot's actuator module and its benefits for monitoring and managing applications.
Spring Boot Actuator provides production-ready features to monitor and manage your application. It exposes endpoints that offer insights into application health, metrics, configuration, and more. These endpoints can be accessed over HTTP or JMX.
Benefits include:
- Monitoring: Provides health status, metrics (memory usage, HTTP request counts, etc.), and application info.
- Management: Allows remote management and configuration of the application.
- Auditing: Enables tracking of application events and user activity.
- Security: Secure endpoints with authentication and authorization.
- Customization: Extensible to add custom metrics and health indicators. For example,
/healthendpoint provides application health information and/metricsendpoint displays various metrics. You can usemanagement.endpoints.web.exposure.include=*to expose all endpoints (not recommended for production) ormanagement.endpoints.web.exposure.include=health,infoto expose only health and info endpoints.
3. Describe how you would implement exception handling in a Spring Boot REST API, including global exception handling.
In a Spring Boot REST API, I'd implement exception handling using a combination of @ExceptionHandler annotations and @ControllerAdvice for global handling. For specific exceptions within a controller, I'd use @ExceptionHandler methods within that controller. These methods are annotated to handle specific exception types and return a custom ResponseEntity with an appropriate error message and status code.
For global exception handling, I'd create a @ControllerAdvice annotated class. Within this class, I'd define @ExceptionHandler methods to handle exceptions that can occur across the entire application. This allows me to centralize error handling logic, ensuring consistent error responses. For example, a common use case would be handling MethodArgumentNotValidException for request body validation failures. The @ControllerAdvice would return a JSON payload detailing the validation errors. Here's an example of the code for the global handler:
@ControllerAdvice
public class GlobalExceptionHandler {

    @ExceptionHandler(MethodArgumentNotValidException.class)
    public ResponseEntity<Object> handleValidationExceptions(
      MethodArgumentNotValidException ex) {
        //logic here
    }
}
4. What are Spring Boot starters, and how do they simplify dependency management in a Spring Boot project?
Spring Boot Starters are a set of convenient dependency descriptors that you can include in your application. Each starter is a set of dependencies related to a specific functionality, like web development, data access, or security. They eliminate the need to search the web for dependencies and copy-paste configurations.
They simplify dependency management by:
- Reducing boilerplate: Starters automatically pull in all the necessary dependencies for a specific feature, reducing the amount of manual dependency declaration in your
pom.xml(Maven) orbuild.gradle(Gradle) file. - Providing sensible defaults: Each starter provides a pre-configured set of dependencies that are known to work well together, eliminating version conflicts.
- Easing project setup: Adding a starter is typically as simple as adding a single dependency to your build file. For example, the
spring-boot-starter-webadds all the dependencies for building web applications, including Spring MVC, Tomcat, and Jackson.
5. How would you configure different environments (e.g., development, testing, production) in a Spring Boot application?
Spring Boot provides several ways to configure different environments. A common approach is using application-{profile}.properties or application-{profile}.yml files. For example, application-dev.properties for the development environment. You specify the active profile using the spring.profiles.active property, either in application.properties (common settings) or as a command-line argument (--spring.profiles.active=dev).
Another method involves using environment variables or system properties. You can access these within your Spring configuration using @Value annotation or the Environment interface. Configuration classes annotated with @Configuration and @Profile("dev") will only be loaded when the 'dev' profile is active. You can also leverage Spring Cloud Config Server for centralized configuration management, especially in microservices architectures. Using separate configuration files for different environments ensures settings like database URLs, API keys, and logging levels are tailored to each environment.
6. Explain how Spring Boot integrates with databases using Spring Data JPA. Include details on repository interfaces.
Spring Boot simplifies database integration with Spring Data JPA by providing auto-configuration and convention-over-configuration. It automatically configures a DataSource, EntityManagerFactory, and JpaTransactionManager based on dependencies (like spring-boot-starter-data-jpa) and configuration properties (e.g., database URL, username, password). Spring Data JPA focuses on abstracting away boilerplate code needed for data access, letting developers work with repositories.
Repository interfaces define data access methods. Spring Data JPA automatically provides implementations for these interfaces at runtime, eliminating the need to write boilerplate DAO code. Common methods like save(), findById(), findAll(), delete() are automatically implemented. Custom queries can be defined using method name conventions (e.g., findByLastName) or using the @Query annotation. For example:
public interface UserRepository extends JpaRepository<User, Long> {
 List<User> findByLastName(String lastName);
 @Query("SELECT u FROM User u WHERE u.email = ?1")
 User findByEmailAddress(String emailAddress);
}
7. Describe the process of securing a Spring Boot application with Spring Security, including authentication and authorization.
Securing a Spring Boot application with Spring Security involves authentication (verifying who the user is) and authorization (determining what the user can access). First, include the spring-boot-starter-security dependency. Next, configure authentication by creating a @Configuration class that extends WebSecurityConfigurerAdapter and override the configure(AuthenticationManagerBuilder auth) method to define user details. This can use in-memory storage, JDBC, or integrate with an external authentication provider. Authorization is then configured by overriding the configure(HttpSecurity http) method. Here, you define URL patterns and the roles required to access them using .authorizeRequests(). For example:
@Override
protected void configure(HttpSecurity http) throws Exception {
    http
        .authorizeRequests()
            .antMatchers("/admin/**").hasRole("ADMIN")
            .antMatchers("/user/**").hasRole("USER")
            .antMatchers("/").permitAll()
            .anyRequest().authenticated()
        .and()
        .formLogin();
}
This example requires the ADMIN role for /admin/**, USER role for /user/**, allows unauthenticated access to /, and requires authentication for all other requests. Finally, consider using password encoding (e.g., BCryptPasswordEncoder) to securely store user passwords.
8. How would you implement caching in a Spring Boot application, and what are some of the caching providers you can use?
To implement caching in a Spring Boot application, I would use Spring's caching abstraction. First, I'd enable caching using the @EnableCaching annotation in my configuration class. Then, I'd annotate methods whose results need to be cached with @Cacheable, @CachePut, or @CacheEvict annotations, specifying the cache name. For example:
@Cacheable("myCache")
public String getData(String key) {
  // ... expensive operation
  return result;
}
Some caching providers I could use include:
- In-memory: Caffeine, EhCache, ConcurrentHashMap (Spring's SimpleCache)
- Distributed: Redis, Memcached
9. Explain how to use Spring Boot's testing support to write unit and integration tests for your application.
Spring Boot provides excellent testing support via the spring-boot-starter-test dependency, which includes JUnit, Mockito, Spring Test, and other useful libraries. For unit tests, focus on testing individual components in isolation. Use @MockBean to mock dependencies of the class under test. For example:
@ExtendWith(SpringExtension.class)
class MyServiceTest {
  @MockBean
  private MyRepository myRepository;

  @Autowired
  private MyService myService;

  @Test
  void testMyMethod() {
    when(myRepository.findById(1L)).thenReturn(Optional.of(new MyEntity()));
    // ... assertions
  }
}
Integration tests, on the other hand, verify the interaction of multiple components or the entire application context. Use @SpringBootTest to load the complete application context. You can use TestRestTemplate or WebTestClient to make HTTP requests to your application's endpoints. For database integration testing, consider using an embedded database like H2 or Testcontainers to avoid modifying the production database. @DataJpaTest is useful for testing the JPA repositories.
10. Describe how you would configure logging in a Spring Boot application, including setting log levels and output formats.
To configure logging in a Spring Boot application, I typically use application.properties or application.yml. I can set the log level for the entire application or specific packages using properties like logging.level.root=INFO or logging.level.com.example=DEBUG. Spring Boot uses Logback as the default logging framework but supports others as well.
For customizing output formats, I create a logback-spring.xml file in the src/main/resources directory. Within this file, I define appenders (e.g., console, file) and encoders to control the log format. For example, using <pattern>%d{yyyy-MM-dd HH:mm:ss.SSS} [%thread] %-5level %logger{36} - %msg%n</pattern> in the encoder allows me to specify the date format, thread name, log level, logger name, and message. You can also use specific appenders for file rotation or other functionalities.
11. How can you use Spring Boot to create and consume RESTful web services?
Spring Boot simplifies creating and consuming RESTful web services. To create a RESTful service, you can define a controller class with @RestController annotation. Use annotations like @GetMapping, @PostMapping, @PutMapping, and @DeleteMapping to map HTTP requests to specific handler methods. These methods can return objects that Spring Boot automatically serializes into JSON or XML using Jackson or other configured message converters. For example:
@RestController
public class MyController {

    @GetMapping("/resource/{id}")
    public MyResource getResource(@PathVariable Long id) {
        // Logic to retrieve resource
        return new MyResource(id, "example");
    }
}
To consume a RESTful service, you can use Spring's RestTemplate or WebClient. RestTemplate provides methods like getForObject(), postForObject(), put(), and delete() to send HTTP requests and retrieve responses. WebClient is a non-blocking, reactive alternative, particularly useful for microservices. For example:
RestTemplate restTemplate = new RestTemplate();
MyResource resource = restTemplate.getForObject("https://example.com/resource/1", MyResource.class);
12. Explain how Spring Boot handles transaction management, and how you can use annotations to control transactions.
Spring Boot simplifies transaction management by providing auto-configuration and integration with various transaction managers like DataSourceTransactionManager for JDBC or JpaTransactionManager for JPA. It leverages Spring's powerful transaction abstraction. We can control transactions declaratively using annotations. The most common annotation is @Transactional.
We can apply @Transactional at the class or method level. For example, marking a method with @Transactional will automatically start a transaction before the method execution and commit it upon successful completion or rollback in case of an exception. Key attributes include propagation (defines how a transaction should propagate), isolation (specifies the isolation level), timeout (sets a timeout), readOnly (optimizes read-only transactions), and rollbackFor / noRollbackFor (defines which exceptions should trigger a rollback or prevent it, respectively). For instance:
@Transactional(propagation = Propagation.REQUIRED, isolation = Isolation.READ_COMMITTED, rollbackFor = Exception.class)
public void myTransactionalMethod() {
    // Database operations here
}
13. What are some best practices for deploying a Spring Boot application to a cloud environment like AWS or Azure?
When deploying a Spring Boot application to AWS or Azure, several best practices can ensure a smooth and reliable deployment. First, containerize your application using Docker. This provides consistency across different environments. Use a CI/CD pipeline (e.g., Jenkins, GitLab CI, GitHub Actions) to automate the build, test, and deployment processes. Store your application's configuration in environment variables rather than hardcoding them in the application, to allow for easy changes without redeployment and better secret management. Utilize cloud-native services like AWS ECS/EKS or Azure Kubernetes Service (AKS) for container orchestration.
Furthermore, implement robust logging and monitoring using tools like Prometheus and Grafana, or cloud-specific services like AWS CloudWatch or Azure Monitor, to track application health and performance. Employ infrastructure as code (IaC) tools such as Terraform or AWS CloudFormation/Azure Resource Manager to manage your infrastructure in a repeatable and version-controlled manner. Secure your application by following cloud security best practices, including using IAM roles and network security groups, and regularly patching vulnerabilities. Properly configure health checks and readiness probes so that your deployment platform knows when your application is ready to receive traffic. Consider using a load balancer for distributing traffic and ensuring high availability.
14. How does Spring Boot support asynchronous processing, and how can you use annotations like `@Async`?
Spring Boot simplifies asynchronous processing using the @EnableAsync annotation and the @Async annotation. First, you need to enable asynchronous method execution by adding @EnableAsync to your Spring Boot application's configuration class. Then, you can annotate methods with @Async to make them execute in a separate thread. The return type of an @Async method should be void or Future<?>. If you need to handle exceptions thrown by @Async methods, you can implement AsyncUncaughtExceptionHandler and configure it.
For example:
@Configuration
@EnableAsync
public class AsyncConfig {
}

@Service
public class MyService {
  @Async
  public void doSomethingAsync() {
    // Asynchronous task
  }
}
15. Describe the process of creating a custom Spring Boot starter.
Creating a custom Spring Boot starter involves several steps. First, you create a new Maven or Gradle project. Define the core functionality you want to encapsulate in your starter. Then, create an auto-configuration class (@Configuration) that configures beans based on properties defined in application.properties or application.yml. Use @ConditionalOnClass, @ConditionalOnProperty, and other conditional annotations to control when these beans are created.
Next, create a spring.factories file in the META-INF directory of your project. This file lists your auto-configuration class, enabling Spring Boot to automatically configure your starter. Package the project as a JAR file and deploy it to a Maven repository (local or remote). Finally, any Spring Boot project can then include your starter by adding a dependency to the starter's groupId and artifactId. Spring Boot will automatically detect and apply the configurations defined in your starter. For example:
<dependency>
 <groupId>com.example</groupId>
 <artifactId>my-custom-starter</artifactId>
 <version>1.0.0</version>
</dependency>
16. Explain how Spring Boot simplifies the process of working with message queues like RabbitMQ or Kafka.
Spring Boot significantly simplifies working with message queues like RabbitMQ or Kafka by providing auto-configuration and abstractions that reduce boilerplate code. It offers modules like spring-rabbit and spring-kafka that provide high-level APIs for sending and receiving messages. These APIs handle the complexities of connecting to the brokers, serializing/deserializing messages, and managing message acknowledgments.
Specifically, Spring Boot simplifies the process through features such as:
- Auto-configuration: Based on dependencies in your
pom.xml(Maven) orbuild.gradle(Gradle), Spring Boot automatically configures the necessary beans (e.g.,RabbitTemplate,KafkaTemplate,MessageListenerContainer) to interact with the message queue. - Simplified Configuration: Properties in
application.propertiesorapplication.ymlare used to configure connection details, queue/topic names, and other settings, reducing the amount of code required. - Template Classes: Spring provides template classes like
RabbitTemplateandKafkaTemplateto easily send messages to the queue. These classes handle the underlying low-level details. @RabbitListener/@KafkaListenerannotations: These annotations simplify the process of consuming messages from queues. You can annotate methods with these annotations to automatically receive and process messages from a specific queue or topic. The framework handles the creation of message listeners and thread management.- Error Handling: Spring integrates with message queues' error handling mechanisms, such as dead-letter exchanges (DLX) in RabbitMQ, to handle failed messages gracefully.
17. How would you monitor your Spring Boot application in production, including metrics and health checks?
I would monitor my Spring Boot application in production using a combination of metrics, health checks, and logging. Specifically, I'd use Spring Boot Actuator to expose endpoints for metrics (like memory usage, CPU utilization, request latency) and health checks (database connectivity, disk space). These metrics could then be collected and visualized using tools like Prometheus and Grafana.
For health checks, Actuator provides /health endpoint which reports the application health status. To implement custom health checks, I'd implement the HealthIndicator interface. For logging, I'd leverage a centralized logging system (e.g., ELK stack or Splunk) to aggregate and analyze logs from different application instances. To ensure performance and stability, it's crucial to set up alerts based on key metrics and error rates.
18. Describe how you would configure and use Spring Boot's support for internationalization (i18n) and localization (l10n).
To configure i18n/l10n in Spring Boot, I would start by creating message resource bundles, typically named messages.properties (default), messages_fr.properties (French), messages_de.properties (German), etc., placing them in the src/main/resources directory. These files contain key-value pairs where the keys are message codes and the values are the localized messages. Next, I'd configure a MessageSource bean in my Spring configuration. Spring Boot auto-configures a MessageSource if it finds message resource bundles on the classpath. To customize it further, I would define a LocaleResolver bean (e.g., AcceptHeaderLocaleResolver or CookieLocaleResolver) to determine the user's locale based on the Accept-Language header or a cookie.
To use i18n/l10n in the application, I'd inject the MessageSource into my components and use the getMessage() method to retrieve localized messages by their codes, passing in any necessary arguments and the current locale. In Thymeleaf templates, I would use the #messages utility object to access localized messages. For example, <span th:text="#{welcome.message}"></span> retrieves the value associated with the welcome.message key from the appropriate message bundle based on the current locale. I may also configure interceptors to automatically switch locale.
19. Explain how to use Spring Boot with different types of databases (e.g., relational, NoSQL).
Spring Boot simplifies database interactions through its auto-configuration and data access modules like Spring Data JPA (for relational databases) and Spring Data MongoDB (for NoSQL). For relational databases like MySQL or PostgreSQL, you'd include the appropriate Spring Data JPA starter (e.g., spring-boot-starter-data-jpa), the database driver dependency (e.g., mysql-connector-java), and configure the spring.datasource.url, spring.datasource.username, and spring.datasource.password properties in application.properties or application.yml. You can then use JPA repositories to interact with the database using simple method naming conventions. Example: List<User> findByLastName(String lastName);
For NoSQL databases like MongoDB, you'd include the spring-boot-starter-data-mongodb dependency and configure the MongoDB connection details using spring.data.mongodb.uri or spring.data.mongodb.host and spring.data.mongodb.port properties. Similar to JPA, Spring Data MongoDB provides repository support. You can define entities and repositories, and Spring Data handles the underlying database interactions. For other NoSQL databases, you'd typically look for specific Spring Data modules or use the database's native driver with Spring's JdbcTemplate or RestTemplate for more control.
20. How would you handle file uploads and downloads in a Spring Boot application?
For file uploads in Spring Boot, I'd use MultipartFile in a controller method. The user would upload a file through a form, and the controller would receive it as a MultipartFile object. I'd then write the file to the server's file system or a cloud storage service like AWS S3, handling potential exceptions like IOException. For downloads, a controller method would read the file from the file system or cloud storage and return it as a Resource (e.g., InputStreamResource), setting the appropriate Content-Disposition header so the browser prompts the user to save the file. Error handling and proper MIME type settings are crucial for both.
Here's a basic example of file upload:
@PostMapping("/upload")
public String uploadFile(@RequestParam("file") MultipartFile file) {
  try {
   // Save the file to a directory or cloud storage
   file.transferTo(new File("/upload-dir/" + file.getOriginalFilename()));
   return "File uploaded successfully";
  } catch (IOException e) {
   return "File upload failed: " + e.getMessage();
  }
}
21. Describe how Spring Boot supports building reactive applications with Spring WebFlux.
Spring Boot simplifies building reactive applications with Spring WebFlux through autoconfiguration and a familiar programming model. It automatically configures the necessary components for WebFlux, such as the WebClient for making reactive HTTP requests and a reactive web server (Netty is the default), reducing boilerplate code. You can use annotations like @RestController, @GetMapping, @PostMapping similar to Spring MVC, but instead of returning simple values, you return reactive types like Mono and Flux.
Specifically, Spring Boot provides:
- Auto-configured WebFlux infrastructure: A
ReactiveWebServerFactoryis automatically configured, typically using Netty. Other implementations like Tomcat, Jetty and Undertow are also possible. WebClientintegration: For making reactive HTTP calls.- Functional Routing: Support for functional bean registration (e.g., through the
RouterFunctionandHandlerFunctionAPIs). - Reactive Data Repositories: Spring Data provides reactive repositories for various databases allowing for completely non-blocking data access.
Spring Boot interview questions for experienced
1. How does Spring Boot's auto-configuration work internally, and how can you customize or disable specific auto-configurations?
Spring Boot's auto-configuration magic happens through a few key components. It starts with the @EnableAutoConfiguration annotation (often implicitly included via @SpringBootApplication). This annotation leverages Spring's SpringFactoriesLoader to find classes listed in META-INF/spring.factories files across your classpath. These classes are typically configuration classes annotated with @Configuration and conditionally enabled using @Conditional annotations. These @Conditional annotations check for the presence of specific classes, beans, or properties to determine whether a particular auto-configuration should be applied.
To customize or disable auto-configurations, you have several options. You can exclude specific auto-configurations using the exclude or excludeName attributes of the @EnableAutoConfiguration annotation. For example: @EnableAutoConfiguration(exclude={DataSourceAutoConfiguration.class}). You can also control auto-configuration behavior using properties in application.properties or application.yml. Many auto-configurations provide properties that allow you to customize their behavior or disable them entirely. For example, spring.datasource.url can be set to disable the default data source auto-configuration if you prefer to configure it yourself.
2. Explain your experience with Spring Boot Actuator. What custom metrics have you implemented, and how did you secure the Actuator endpoints?
I've used Spring Boot Actuator extensively for monitoring and managing Spring Boot applications. I'm familiar with the built-in endpoints like /health, /metrics, /info, /loggers, and /env. My experience includes configuring these to expose relevant application data.
Regarding custom metrics, I've implemented several using Micrometer. For instance, tracking the number of successful and failed login attempts using Counter. I've also created custom gauges to monitor the size of a specific cache or the number of active threads. Securing Actuator endpoints is crucial. I've primarily used Spring Security to restrict access based on roles. For example, only users with the ACTUATOR_ADMIN role can access sensitive endpoints like /shutdown or /env. I've also configured management.endpoints.web.exposure.include and management.endpoints.web.exposure.exclude in application.properties to control which endpoints are exposed.
3. Describe a scenario where you used Spring Boot's embedded database support (e.g., H2). What were the advantages and disadvantages compared to using an external database?
I used Spring Boot's embedded H2 database for a personal project involving a simple REST API for managing a to-do list. The primary advantage was the ease of setup and configuration. Since it was a small, self-contained application, not having to configure and manage an external database server significantly simplified the development process and made it easy to share with others as no external database setup was required. I just included spring-boot-starter-data-jpa and com.h2database:h2 dependencies, and Spring Boot automatically configured an in-memory H2 instance for me. This allowed me to quickly iterate on the API and test different functionalities.
However, the main disadvantage was data persistence. Once the application shut down, the H2 database's contents were lost (unless configured to persist to a file which adds complexity). This made it unsuitable for production deployment, where persistent data storage is crucial. Also, H2's performance and scalability are not comparable to more robust external databases like PostgreSQL or MySQL, which would be required for handling a larger number of users or more complex data structures. Switching to an external database required only minor changes to the configuration file during the project's lifecycle which proved quite useful for rapid development.
4. How have you implemented caching in a Spring Boot application? What caching providers have you used (e.g., Redis, Caffeine), and what are the trade-offs?
I've implemented caching in Spring Boot using Spring's @Cacheable, @CacheEvict, and @CachePut annotations. These annotations simplify adding caching logic to methods. I've used different caching providers based on the application's needs.
- Caffeine: It is an in-memory caching library. It provides high performance and is suitable for scenarios where data doesn't change frequently and memory usage is a concern. A trade-off is that the cache is local to the application instance, so it's not suitable for distributed environments without additional configuration (like using a JCache bridge).
- Redis: A more robust, distributed caching solution. It's suitable for applications where data needs to be shared across multiple instances or services. The trade-off is that it adds complexity to the infrastructure and has higher latency compared to in-memory caches like Caffeine. Configuration involves defining a
RedisCacheConfigurationand usingRedisCacheManager.
Code example:
@Cacheable("myCache")
public String getData(String key) {
 // Expensive operation to retrieve data
 return "data for " + key;
}
5. Explain how you have handled asynchronous tasks in Spring Boot. What are the pros and cons of using `@Async` vs. a message queue like RabbitMQ or Kafka?
In Spring Boot, I've handled asynchronous tasks primarily using @Async and message queues. @Async simplifies asynchronous execution by allowing a method to run in a separate thread. You just need to annotate a method with @Async and enable asynchronous processing with @EnableAsync in a configuration class.
Comparing @Async with message queues (like RabbitMQ or Kafka): @Async is straightforward for fire-and-forget tasks within the same application. However, it's limited to a single application instance and lacks reliability features like guaranteed delivery. Message queues provide a more robust solution for decoupling services, ensuring message delivery even if a service is temporarily unavailable, and scaling horizontally. The choice depends on the complexity and reliability requirements of the asynchronous task. Message queues introduce complexity and overhead, so @Async is preferable for simpler use cases.
6. Describe your experience with Spring Boot's testing framework. What types of tests have you written (e.g., unit, integration, end-to-end), and how did you handle testing external dependencies?
I have extensive experience with Spring Boot's testing framework and have written various types of tests. For unit tests, I primarily use JUnit and Mockito to isolate and test individual components, mocking any dependencies. Integration tests involve testing the interaction between different parts of the application, often using @SpringBootTest to load the application context. I've also utilized Testcontainers or embedded databases (like H2) to manage database dependencies during integration testing. For end-to-end tests, I've used tools like Selenium or RestAssured to simulate user interactions and verify the application's behavior from an external perspective.
To handle testing external dependencies, I use mocking frameworks like Mockito to create mock objects that mimic the behavior of these dependencies. This allows me to control the responses and ensure that my code handles different scenarios correctly. I also use Spring's TestRestTemplate or WebTestClient for testing REST endpoints and verifying the request/response flow without involving the actual external services. For message queues or other asynchronous communication, I use embedded brokers or mock the message sending/receiving components.
7. How does Spring Boot simplify the process of creating RESTful APIs? What are some best practices for designing and implementing REST APIs with Spring Boot?
Spring Boot simplifies REST API creation by providing auto-configuration, embedded servers (like Tomcat), and the Spring MVC framework. Auto-configuration automatically configures many components, reducing boilerplate code. Spring MVC handles request routing, serialization/deserialization of data (JSON, XML), and response generation, using annotations like @RestController, @RequestMapping, @GetMapping, @PostMapping, etc. This drastically cuts down on configuration and setup needed compared to traditional Spring applications.
Best practices include using proper HTTP methods (GET, POST, PUT, DELETE) for corresponding actions. Employ meaningful resource URIs (e.g., /users/{id} instead of /getuser?userid={id}). Implement proper status codes (200 OK, 201 Created, 400 Bad Request, 404 Not Found, 500 Internal Server Error). Use JSON for data exchange. Consider pagination for large datasets. Implement proper authentication and authorization using Spring Security. Employ versioning (e.g., /api/v1/users).
8. Explain how you've handled security in a Spring Boot application. What authentication and authorization mechanisms have you used (e.g., OAuth2, JWT), and how did you protect against common web vulnerabilities?
In Spring Boot applications, I've implemented security using Spring Security. For authentication, I've used JWT (JSON Web Tokens) and OAuth2. JWTs are particularly useful for stateless authentication, where the server doesn't need to maintain sessions. OAuth2 is implemented using Spring Authorization Server (or libraries like Spring Security OAuth2) to handle authorization flows. For authorization, I leverage Spring Security's role-based access control (RBAC) and expression-based access control using annotations like @PreAuthorize and @PostAuthorize.
To protect against common web vulnerabilities, I've taken several measures. These include input validation to prevent SQL injection and cross-site scripting (XSS) attacks. I also utilize CSRF (Cross-Site Request Forgery) protection provided by Spring Security. For example, setting proper CORS configurations to prevent cross-origin requests. Rate limiting to prevent denial-of-service (DoS) attacks, and using secure coding practices, such as avoiding hardcoded credentials and regularly updating dependencies to patch security vulnerabilities. Sensitive data is encrypted both in transit (using HTTPS) and at rest.
9. How have you used Spring Boot's dependency injection features in complex applications? Can you provide an example of using constructor injection, setter injection, and field injection?
In complex Spring Boot applications, I've heavily relied on dependency injection (DI) to promote loose coupling and testability. I primarily use constructor injection, which I consider the best practice because it ensures required dependencies are provided at object creation, making the object fully initialized and immutable.
For instance:
@Service
public class MyService {
  private final MyRepository myRepository;

  @Autowired
  public MyService(MyRepository myRepository) {
    this.myRepository = myRepository;
  }
  // ...
}
While constructor injection is preferred, I've used setter injection in scenarios where dependencies are optional or can be changed after object creation:
@Service
public class AnotherService {
  private ExternalApi externalApi;

  @Autowired(required = false)
  public void setExternalApi(ExternalApi externalApi) {
    this.externalApi = externalApi;
  }
 // ...
}
Field injection (using @Autowired directly on fields) has been used sparingly, mostly in legacy code or quick prototypes, but it is generally avoided due to challenges in testing and potential for runtime exceptions if dependencies are not properly configured. It also makes immutability difficult to enforce.
@Service
public class YetAnotherService {
  @Autowired
  private SomeHelper someHelper;

  //...
}
10. Describe your experience with Spring Boot's data access features. What ORM frameworks have you used (e.g., JPA, Hibernate), and how did you optimize database queries?
I've extensively used Spring Boot's data access features, primarily through Spring Data JPA. My experience includes defining entities, repositories, and leveraging Spring's transaction management. I've worked with Hibernate as the underlying ORM provider for JPA implementations. I've also used JdbcTemplate for more direct JDBC interactions when needed.
To optimize database queries, I've employed techniques such as:
- Using indexes: Ensuring appropriate indexes are defined on frequently queried columns.
- Eager vs. Lazy loading: Carefully choosing fetch types to avoid N+1 query problems.
- Query optimization: Analyzing and rewriting slow-running queries using tools like
EXPLAIN PLAN. - Caching: Implementing caching strategies (e.g., using Spring's caching abstraction with Redis or Caffeine) for frequently accessed data.
- Using projections and DTOs to retrieve only necessary fields. Example JPA query
@Query("SELECT new com.example.MyDto(e.field1, e.field2) FROM MyEntity e WHERE e.someCondition = :someValue") List<MyDto> findBySomeCondition(@Param("someValue") String someValue);
11. How have you monitored and managed Spring Boot applications in production? What tools have you used for logging, metrics, and alerting?
For monitoring and managing Spring Boot applications in production, I've used a combination of tools and techniques. Logging is crucial, and I typically configure Spring Boot to use Logback or Log4j2, with logs often shipped to a centralized logging system like the ELK stack (Elasticsearch, Logstash, Kibana) or Splunk. This allows for efficient searching and analysis of application behavior.
For metrics, I leverage Spring Boot Actuator, which provides built-in endpoints for exposing application health, metrics, and other operational information. These metrics can be scraped by monitoring systems like Prometheus and visualized using Grafana. We've also used APM tools such as New Relic and Dynatrace for more in-depth performance monitoring and tracing. For alerting, I've configured alerts in Prometheus or the APM tools to notify the team via PagerDuty or Slack when critical metrics exceed predefined thresholds.
12. Explain how you have used Spring Boot's configuration management features. How did you handle different environments (e.g., development, testing, production), and how did you externalize configuration?
I've utilized Spring Boot's configuration management extensively through application.properties or application.yml files. For environment-specific configurations, I leverage Spring profiles. I create separate files like application-dev.properties, application-test.properties, and application-prod.properties. The spring.profiles.active property is then used to activate the appropriate profile, either through environment variables, command-line arguments, or within the application.properties (default profile). For externalizing configuration, I prioritize environment variables and command-line arguments, often in conjunction with tools like Docker or Kubernetes. When I need hierarchical configuration and want to prevent sensitive information leaks, I use spring cloud config server which centralizes application configuration and provides client side mechanisms to retrieve it.
For sensitive information, I prefer to avoid storing them directly in configuration files. Instead, I use environment variables that are injected at runtime, or utilize a secrets management solution. In terms of externalizing, the order of precedence in Spring Boot is also very helpful: command-line arguments > environment variables > application.properties > default properties. This helps ensure that the right configuration is always being used at runtime.
13. How would you implement a custom health indicator in Spring Boot Actuator to monitor a specific aspect of your application?
To implement a custom health indicator in Spring Boot Actuator, you create a class that implements the HealthIndicator interface. This interface requires you to implement a health() method where you perform the checks for the aspect you want to monitor. Within the health() method, you build a Health object using the Health.up() or Health.down() methods, providing details about the status (e.g., using .withDetail()).
For example:
import org.springframework.boot.actuate.health.Health;
import org.springframework.boot.actuate.health.HealthIndicator;
import org.springframework.stereotype.Component;

@Component
public class MyCustomHealthIndicator implements HealthIndicator {

    @Override
    public Health health() {
        if (isMyServiceHealthy()) {
            return Health.up().withDetail("message", "Service is healthy").build();
        } else {
            return Health.down().withDetail("message", "Service is unhealthy").build();
        }
    }

    private boolean isMyServiceHealthy() {
        // Perform health check logic here
        return true; // Or false, depending on the check
    }
}
Spring Boot automatically discovers and registers beans of type HealthIndicator, making your custom indicator available in the /actuator/health endpoint.
14. Describe a situation where you needed to create a custom Spring Boot starter. What were the components you included in the starter, and how did you make it configurable?
I once built a custom Spring Boot starter for integrating with a proprietary in-house authentication service. We wanted to simplify the integration process for other teams. The starter included these components: 1. Auto-configuration class: Defined beans for the authentication client, interceptors, and utility services. 2. Configuration properties: A @ConfigurationProperties class to externalize configuration like API endpoint URLs, timeouts, and API keys. 3. Authentication client: A custom RestTemplate based client pre-configured to handle authentication headers. 4. Dependency management: Declared the required dependencies (e.g., spring-boot-starter-web, spring-boot-starter-security).
To make it configurable, the @ConfigurationProperties class allowed users to specify settings in application.properties or application.yml. For example:
my.auth.api-url: "https://auth.example.com"
my.auth.api-key: "your_api_key"
my.auth.timeout: 5000
Conditional configuration (@ConditionalOnProperty, @ConditionalOnClass) further allowed enabling/disabling certain features of the starter based on property settings or the presence of specific classes on the classpath. This setup ensured the starter was both easy to use and customizable to different environments and use cases.
15. How do you handle transactions in Spring Boot, especially when dealing with multiple data sources or microservices?
In Spring Boot, I handle transactions primarily using the @Transactional annotation. For single data source scenarios, Spring's transaction management automatically handles the transaction lifecycle, ensuring atomicity, consistency, isolation, and durability (ACID) properties. When multiple data sources are involved, I use a PlatformTransactionManager for each data source and configure a ChainedTransactionManager to manage the transaction across all of them. This involves defining transaction boundaries programmatically or declaratively.
For microservices, distributed transactions become necessary. I typically explore options like the Saga pattern or two-phase commit (2PC) if ACID properties are paramount. With the Saga pattern, a series of local transactions are coordinated, and compensating transactions are executed to undo previous operations if one fails. Frameworks like Axon or custom implementations can help manage Sagas. For 2PC, technologies like XA transactions can be employed, although they can introduce performance overhead and complexity. More modern approaches might include eventual consistency models leveraging message queues to ensure data synchronization across services.
16. Explain how you would implement rate limiting in a Spring Boot application to protect against abuse.
I would implement rate limiting in a Spring Boot application using a library like bucket4j. First, I'd add the bucket4j-spring-boot-starter dependency to my pom.xml or build.gradle. Then, I'd configure the rate limit rules. These rules can be defined globally in application.yml or application.properties, or dynamically using annotations like @RateLimit. For example, @RateLimit(value = "myLimit", bandwidths = {@Bandwidth(capacity = 10, refillRefillAmount = 10, refillPeriod = 60, refillPeriodTimeUnit = ChronoUnit.SECONDS)}) would limit a specific endpoint (or method) to 10 requests per minute.
When a request exceeds the rate limit, bucket4j automatically rejects it with a 429 Too Many Requests error. Custom error handling can also be implemented to provide a more user-friendly message. Under the hood, bucket4j can utilize various storage options like in-memory, Redis, or Hazelcast for managing the rate limit buckets. Choosing Redis or Hazelcast ensures that rate limits are enforced across multiple instances of the application. Bucket4j also provides metrics via Spring Boot Actuator, enabling monitoring of rate limiting behavior.
17. Describe a scenario where you used Spring Boot's `CommandLineRunner` or `ApplicationRunner` interfaces. What kind of tasks did you perform during application startup?
I used CommandLineRunner in a Spring Boot application to perform database initialization tasks right after the application context was initialized. Specifically, the application required a few lookup tables to be pre-populated with default values if they were empty on startup.
I implemented the CommandLineRunner interface and, within its run method, I checked if those specific tables were empty. If they were, I used Spring Data JPA repositories to insert the initial data. This ensured that the application always started with the necessary data available. For example:
@Component
public class DataInitializer implements CommandLineRunner {
    @Autowired
    private LookupTableRepository lookupTableRepository;

    @Override
    public void run(String... args) throws Exception {
        if (lookupTableRepository.count() == 0) {
            // Add initial data to lookupTableRepository
        }
    }
}
18. How have you used Spring Boot's profiles feature to manage different application configurations for various environments?
I've used Spring Boot profiles to manage environment-specific configurations. For example, I define different database connection settings, API endpoints, and logging levels for dev, test, and prod environments.
I achieve this by creating separate application-{profile}.properties or application-{profile}.yml files (e.g., application-dev.properties). These files contain the configurations specific to that environment. Then, I activate the desired profile using the spring.profiles.active property, either via environment variables, command-line arguments, or within the application.properties file (although the latter is less common for environment-specific settings to avoid accidentally committing them). I often use @Profile("dev") annotations on configuration classes or beans to conditionally enable them based on the active profile. Furthermore, I incorporate Maven profiles and build-time variable replacements, using ${} placeholders, to dynamically adjust the spring.profiles.active property in application.properties during the build process, allowing for greater control over environment settings without needing to modify code.
19. Explain how you would implement a background job scheduler in a Spring Boot application. What are the pros and cons of using `@Scheduled` vs. a more robust scheduler like Quartz?
Implementing a background job scheduler in Spring Boot can be achieved through @Scheduled annotation or a more feature-rich scheduler like Quartz. @Scheduled is simple and suitable for basic scheduling needs, like running a task at fixed intervals or cron expressions. For example:
@Scheduled(fixedRate = 5000) // Runs every 5 seconds
public void myTask() {
    // Task logic here
}
However, @Scheduled has limitations: no persistence, difficulty in managing complex dependencies, and challenges in monitoring. Quartz offers persistence, allowing jobs to survive application restarts. It provides a more robust API for job management (pausing, resuming, deleting), better error handling, and support for clustering. While Quartz requires more configuration and introduces external dependencies, its advanced features are essential for complex scheduling requirements. @Scheduled is a quick and easy option for simple tasks, while Quartz is preferred for more sophisticated and reliable scheduling needs.
20. How have you handled versioning of REST APIs in a Spring Boot application? What strategies did you use (e.g., URI versioning, header versioning), and what are the trade-offs?
I've handled REST API versioning in Spring Boot applications using several strategies. URI versioning, like /v1/resource and /v2/resource, is straightforward and discoverable but can clutter URIs. Header versioning, such as using Accept or custom headers, keeps URIs clean but requires clients to manage headers correctly. A trade-off is that header versioning is less discoverable without proper documentation. I typically prefer URI versioning for its simplicity and discoverability, but consider header versioning if URI aesthetics are a major concern.
Specifically, I might implement URI versioning using @RequestMapping annotations:
@RestController
@RequestMapping("/v1/users")
public class UserControllerV1 { ... }

@RestController
@RequestMapping("/v2/users")
public class UserControllerV2 { ... }
21. Describe a situation where you used Spring Boot's event publishing and listening mechanism. What types of events did you publish, and how did you handle them asynchronously?
I used Spring Boot's event mechanism in a microservices project dealing with user registration. Upon successful user registration, a UserRegisteredEvent was published. This event contained user details like ID and email.
To handle this asynchronously and avoid blocking the registration flow, I used @Async annotation on the event listener method. The listener then performed tasks like sending welcome emails and triggering other microservices (e.g., through Kafka) for profile creation. This ensured the user registration API responded quickly while background tasks were processed independently. For example:
@EventListener
@Async
public void handleUserRegisteredEvent(UserRegisteredEvent event) {
    // Send welcome email
    // Trigger profile creation in other microservice
}
22. How do you approach troubleshooting performance issues in Spring Boot applications? What tools and techniques do you use to identify bottlenecks?
To troubleshoot performance issues in Spring Boot applications, I typically start by monitoring key metrics like CPU usage, memory consumption, and response times. I use tools like Spring Boot Actuator to expose application metrics, and visualize them using Prometheus and Grafana. I also leverage JVM profiling tools such as VisualVM or JProfiler to identify CPU-intensive methods, memory leaks, and garbage collection bottlenecks.
I analyze thread dumps to detect deadlocks or long-running threads. For database-related issues, I enable query logging to identify slow queries and use database profiling tools like pgAdmin or MySQL Workbench to analyze query execution plans. Techniques like caching (using Redis or Memcached), optimizing database queries, and asynchronous processing can be applied to resolve identified bottlenecks. I also use tools like New Relic or Dynatrace for APM (Application Performance Monitoring).
23. Explain how you have implemented distributed tracing in a Spring Boot microservices architecture using tools like Zipkin or Jaeger.
In my Spring Boot microservices architecture, I've implemented distributed tracing using Spring Cloud Sleuth in conjunction with Zipkin. Spring Cloud Sleuth automatically instruments my applications by adding trace and span IDs to log messages and HTTP headers. This allows me to track requests as they propagate through different microservices.
Specifically, I've added the spring-cloud-starter-sleuth and spring-cloud-starter-zipkin dependencies to my pom.xml files. My services then automatically send trace data to a central Zipkin server. I can configure the sampling rate in application.properties using spring.sleuth.sampler.probability to control the amount of data being sent to Zipkin, especially in high-throughput environments. I access the Zipkin UI to visualize traces, identify performance bottlenecks, and understand dependencies between services. For example: spring.sleuth.sampler.probability=0.1 would sample 10% of requests.
24. Describe your experience with using Spring Boot with Reactive programming. How did you use project reactor and what were the benefits?
I have experience using Spring Boot with Reactive programming, primarily leveraging Project Reactor. I've used Flux and Mono to handle asynchronous data streams, enabling non-blocking operations in web applications. For example, I've implemented reactive REST APIs that retrieve data from multiple sources concurrently using flatMap and zip, significantly improving response times.
Some benefits observed include:
- Increased throughput: Handling more requests concurrently without blocking threads.
- Improved responsiveness: Reducing latency for users.
- Better resource utilization: Reducing thread context switching.
I've also used Reactor's testing support (e.g., StepVerifier) to write comprehensive unit tests for reactive components. A typical example would be fetching a stream of events and processing them in parallel using Flux.fromIterable(events).parallel().runOn(Schedulers.boundedElastic()).map(this::processEvent).sequential(). This allowed me to scale event processing effectively.
Spring Boot MCQ
Question 1.
Which of the following statements best describes how Spring Boot's auto-configuration feature works?
Options:
Options:
Question 2.
How can you customize the Spring Boot application banner?
Options:
Question 3.
How can you secure Spring Boot Actuator endpoints in a production environment?
Options:
Question 4.
In Spring Boot, what is the order of precedence for externalized configuration properties, with the highest precedence listed first?
Options:
Question 5.
Which of the following actions, by default, will NOT trigger an automatic restart of a Spring Boot application when using Spring Boot Devtools?
Options:
Question 6.
In a Spring Boot application, which of the following property sources takes precedence over the others when resolving a property with the same name?
Options:
Options:
Question 7.
How can you globally customize exception handling in a Spring Boot application using @ControllerAdvice?
Choose the correct approach:
Options:
Question 8.
Which of the following mechanisms allows you to execute code very early in the Spring Boot application startup sequence, before the ApplicationContext is fully refreshed, enabling early customization of the environment or context? Options:
Options:
Question 9.
In Spring Boot, which of the following statements is most accurate regarding the execution order of ApplicationListener beans that listen for ApplicationReadyEvent? Assume no @Order or Ordered interfaces are used.
options:
Options:
Question 10.
Which annotation is used to conditionally enable a bean based on the active Spring profiles?
Options:
Question 11.
Which of the following is the correct way to customize the embedded Tomcat server's port in a Spring Boot application programmatically?
Options:
Question 12.
In a Spring Boot application, what is the order of precedence for loading externalized configuration properties, with the HIGHEST precedence listed first? Consider the following options:
options:
Options:
Question 13.
How can you create a custom health indicator in a Spring Boot application to expose application-specific health information via the /actuator/health endpoint?
Options:
Question 14.
What is the purpose of the spring.main.web-application-type property in a Spring Boot application?
Options:
Question 15.
How can you customize the Jackson ObjectMapper used by Spring Boot's auto-configured JSON message converters?
Options:
Options:
Question 16.
What is the key difference between CommandLineRunner and ApplicationRunner interfaces in Spring Boot?
Options:
Question 17.
Which of the following approaches is LEAST suitable for customizing the port of an embedded Tomcat server in a Spring Boot application?
options:
Options:
Question 18.
You want to implement a custom Converter in a Spring Boot application to convert a specific String format to a custom object. How do you ensure that Spring automatically registers and uses your converter?
Options:
Question 19.
Which Spring Boot testing annotation is used to test only the web layer of an application, effectively disabling full auto-configuration and scanning only @Controller, @RestController, and related components?
Options:
Options:
Question 20.
Which annotation is used to enable auditing functionality in a Spring Boot application with Spring Data JPA?
Options:
Question 21.
In Spring Boot, what property controls whether beans with the same name can be overridden in the application context?
Options:
Question 22.
Which file is primarily used by Spring Boot to enable auto-configuration classes?
Options:
Question 23.
Which of the following is the most suitable approach to integrate Spring Batch with a Spring Boot application?
Options:
Question 24.
How do you configure multiple data sources in a Spring Boot application?
options:
Options:
Question 25.
How do you customize the path of the H2 Console in a Spring Boot application?
Options:
Which Spring Boot skills should you evaluate during the interview phase?
Assessing a candidate's Spring Boot skills in a single interview is challenging, but focusing on the core competencies is key. Let's focus on the most impactful skills that can quickly reveal a candidate's potential.
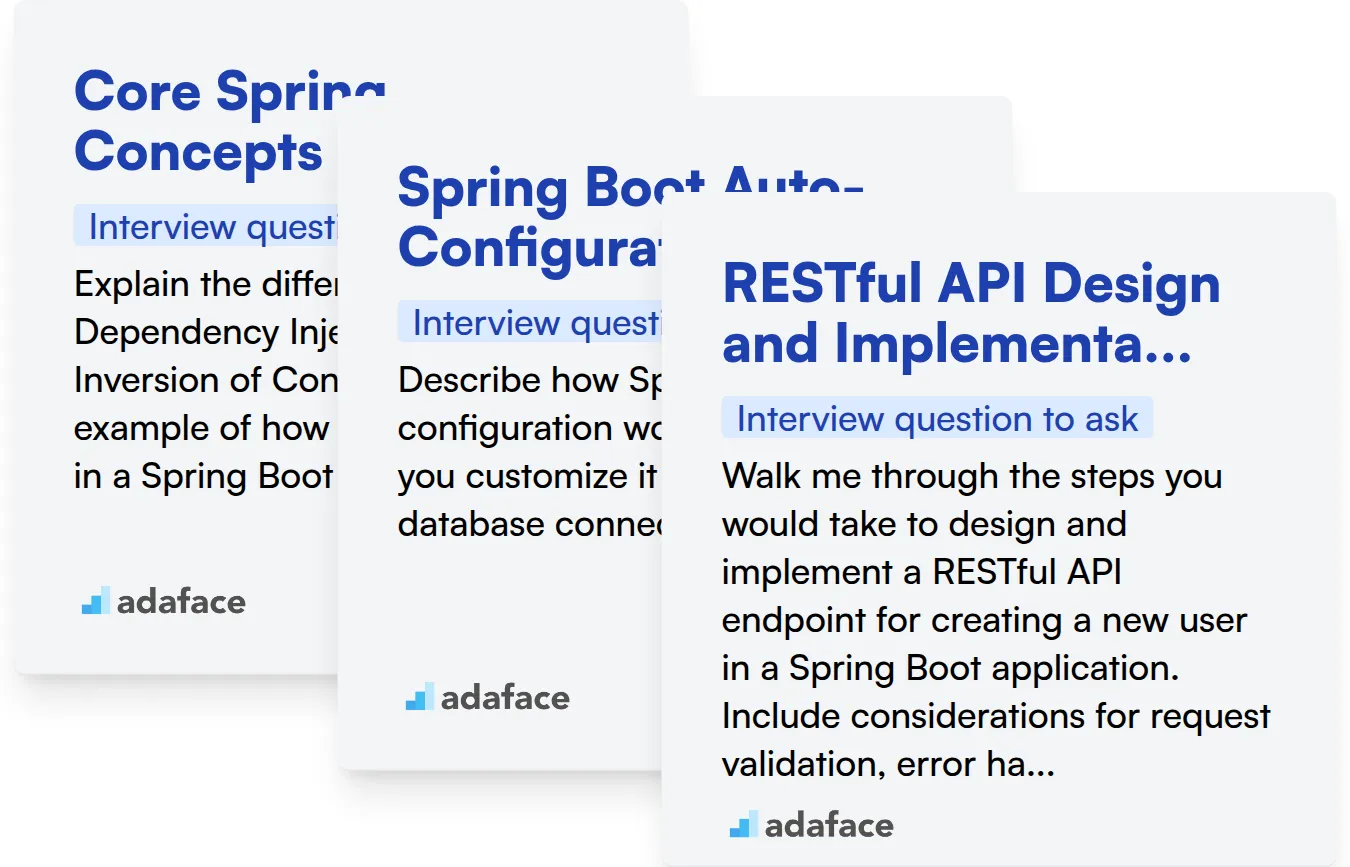
Core Spring Concepts
You can use a skills assessment test with relevant MCQs to quickly filter candidates based on their knowledge of core Spring concepts. Our Spring test includes questions on DI, IoC, and other foundational concepts.
To further evaluate a candidate's understanding, ask targeted interview questions that require them to explain these concepts in practical scenarios.
Explain the difference between Dependency Injection and Inversion of Control. Provide an example of how you've used each in a Spring Boot application.
Look for candidates who can clearly articulate the principles behind DI and IoC, and provide concrete examples from their experience. Vague answers might indicate a superficial understanding.
Spring Boot Auto-Configuration
Assess a candidate's understanding of auto-configuration with MCQs. Our Spring test covers the various auto-configuration features in Spring Boot.
Pose a question that requires them to explain the mechanics of auto-configuration and how they can customize it.
Describe how Spring Boot's auto-configuration works. How would you customize it to use a specific database connection pool?
Candidates should demonstrate an understanding of how Spring Boot identifies and configures beans based on classpath dependencies and properties. They should also know how to override defaults using configuration properties or custom auto-configuration classes.
RESTful API Design and Implementation
Evaluate a candidate's ability to design and implement RESTful APIs using MCQs. Our Spring test includes questions on designing APIs, handling requests and responses, and working with different HTTP methods.
Ask a question that requires them to describe the process of designing and implementing a RESTful API endpoint.
Walk me through the steps you would take to design and implement a RESTful API endpoint for creating a new user in a Spring Boot application. Include considerations for request validation, error handling, and security.
Look for candidates who can articulate a clear process, covering aspects like defining request/response formats, handling validation, implementing error handling, and securing the endpoint. They should demonstrate an awareness of RESTful principles and best practices.
3 Tips for Using Spring Boot Interview Questions
Before you start putting what you've learned into practice, here are a few tips to help you make the most of your Spring Boot interview questions. These suggestions will enable you to assess candidates more effectively and make informed hiring decisions.
1. Leverage Skills Assessments to Filter Candidates
Skills tests are a powerful tool to streamline your hiring process and identify candidates with the technical abilities you need. By using assessments early, you can filter out candidates who lack the required skills before investing time in interviews.
For Spring Boot roles, consider using assessments that evaluate Java, Spring, and SQL skills. Adaface offers a range of relevant tests, including the Java Spring Test, Java Spring SQL Test, and Spring Test.
Using these tests allows you to get a data-driven understanding of each candidate's skillset. This allows you to see how their qualifications align with the job requirements and prioritize interviews for the most promising individuals.
2. Outline Relevant Interview Questions
Time is limited during interviews, so it's key to choose the right number of questions and the most relevant questions. The goal is to maximize your ability to evaluate candidates effectively on important skills and aspects.
Consider focusing your questions on areas not already covered by skills assessments. For instance, if you've already assessed technical skills, you can use the interview to explore cultural fit or communication abilities. We have interview questions for communication too.
Carefully chosen interview questions can provide valuable insights into a candidate's problem-solving abilities and experience with real-world scenarios.
3. Ask Follow-Up Questions to Gauge Depth
Simply asking interview questions may not be enough to assess a candidate's true depth of knowledge. Asking the right follow-up questions is important to truly gauge a candidate's skill.
For example, if a candidate explains the concept of dependency injection in Spring Boot, follow up by asking them to describe a scenario where they used it to solve a complex problem. This type of question can help reveal their practical experience and understanding of the concept.
Evaluate Spring Boot Talent with Targeted Assessments
When hiring Spring Boot developers, accurately assessing their skills is key. The most effective way to do this is through skills testing. Explore Adaface's range of assessments, including our Java Spring Test and Spring Test, to ensure you're evaluating candidates effectively.
Once you've identified top performers through skills tests, streamline your hiring process by focusing on the most promising candidates. Sign up for the Adaface platform to get started with your assessments or learn more about our online assessment platform.
Java & Spring Online Test
40 mins | 9 MCQs and 1 Coding Question
The Java Spring Test uses scenario-based MCQs to evaluate candidates' ability to work with Spring modules, such as Core, MVC, Security, and Boot, as well as their understanding of dependency injection, AOP, RESTful web services, and database integration. Other key skills evaluated include object-oriented programming, design patterns, testing, debugging, and software architecture. The test also includes a coding question to test for hands-on Java programming skills.
Try Java & Spring Online Test
Download Spring Boot interview questions template in multiple formats

Spring Boot Interview Questions FAQs
What are some Spring Boot interview questions for freshers?
There are 22 Spring Boot interview questions tailored for freshers, focusing on the basics and core concepts.
What are some Spring Boot interview questions for experienced candidates?
There are 24 Spring Boot interview questions aimed at experienced candidates, covering advanced topics and real-world scenarios.
What kind of questions can I ask junior Spring Boot developers?
You can assess junior Spring Boot developers using 27 questions covering intermediate concepts and coding practices.
How can I use these Spring Boot interview questions effectively?
Use these questions to identify strengths and weaknesses of candidates. Tailor your questions to the job requirements.
How can I evaluate Spring Boot talent?
Use targeted assessments alongside interview questions to get a complete picture of a candidate's Spring Boot skills.
40 min skill tests.
No trick questions.
Accurate shortlisting.
We make it easy for you to find the best candidates in your pipeline with a 40 min skills test.
Try for freeRelated posts
Free resources

Join 1200+ companies in 80+ countries.
Try the most candidate friendly skills assessment tool today.

40 min tests.
No trick questions.
Accurate shortlisting.
No trick questions.
Accurate shortlisting.